
1. Version Information
1.0
1.1
2. Document Purpose & History
This document is intended to provide the reader with the required information for the initial setup of an iPECS UCP or EMG80 system.
Initial System Setup

Web Admin
The first time Web Admin is accessed, the Install Wizard is displayed – It is recommended to follow the Wizard so that critical information is not missed. The Wizard presents 9 pages in sequence with parameters that should be verified or commonly need modification prior to operation of the system including:
- System Upgrade
- Nation Code
- System Time & Date
- Station Number
- Flexible Numbering Plan
- CO Ring Assignment
- License Upload
- Maintenance ID & Password
- IP Information
- System Upgrade
If the system is not on the current latest version, please follow the steps in KB article #39095 to upgrade at this stage (software upgrades can also be done in the maintenance tab if required at a later date) – click next
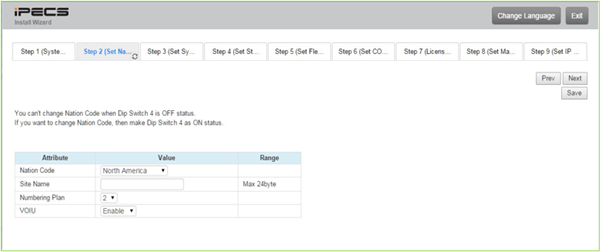
- Nation Code
During initialization, the system employs the Nation Code to establish the default gains and tones for the specific country.
Ensure pole 4 of the UCP or pole 2 of the EMG80 is ON
Change to UK, choose your numbering plan (default 1) click save, the system will reset when comes back up – Dipswitch 4 (UCP) or 2 (EMG80) – should now be set to OFF – click next
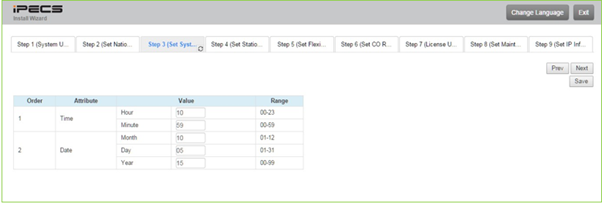
- System Time & Date
Set time & date – click next
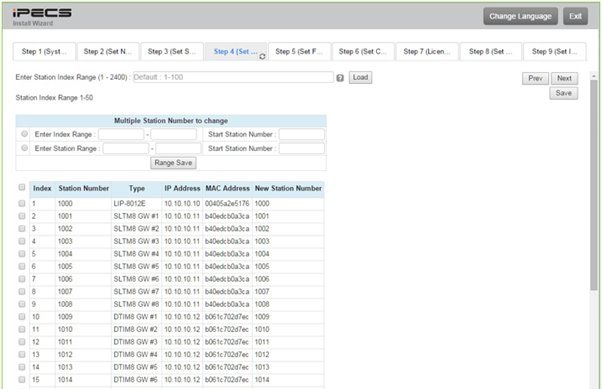
- Station Number
Enter the Station index range (for the amount of station numbers you need) and choose your required station numbers – click next
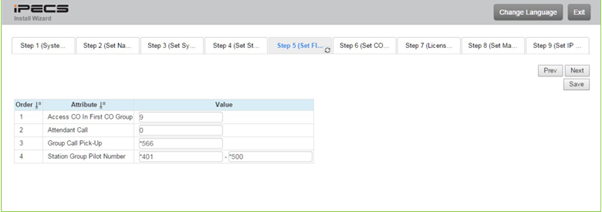
- Flexible Numbering Plan
The Flexible Numbering Plan defines the various digit strings (codes) users may dial to access system resources and features. In the wizard, codes for features that commonly may require modification are displayed. Change if required and/or – click next
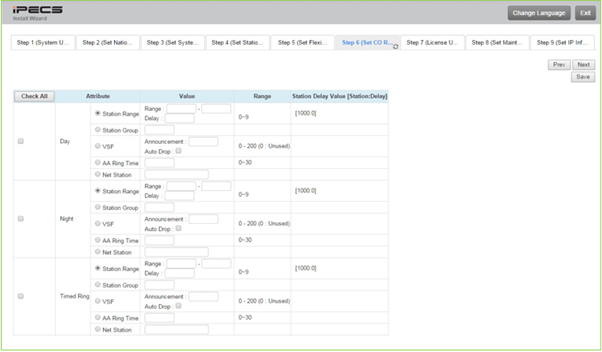
- CO Ring Assignment
This will assign the ringing for your analogue lines but, best to do once you have finished the wizard as if you need it to ring to a group, you can’t assign them here as the groups do not exist yet. If you have SIP or ISDN lines you will also need to assign these later – click next
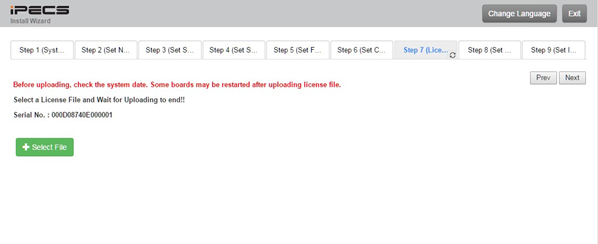
- Licence Upload
Date and time must be correct before uploading the licence file (it will have been set at point 3 but, be aware if you have skipped that step) Click [Select files] button and then open the pop-up folder. Select a valid license file to upload to the system and click the [Start] button. – click next
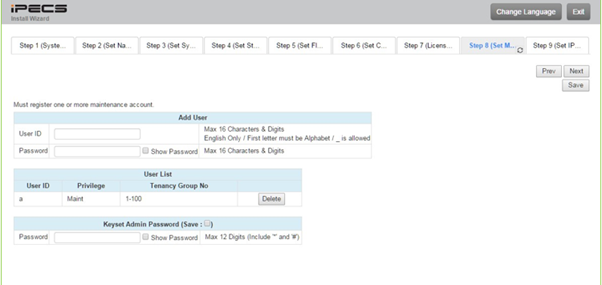
- Maintenance ID & Password
It is strongly recommended that a unique User ID and strong password be entered to minimize the risk of admin and maintenance access by unauthorised personnel.
In order to finish the final step, you will need to register a maintenance login and password. Enter the criteria, click save then – click next
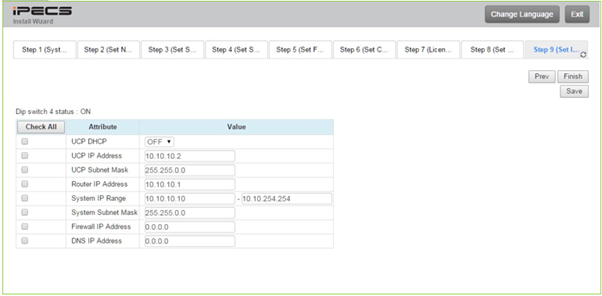
- IP Information
The IP Information page establishes the IP address scheme. DHCP can be enabled or static addressing can be configured. When the system is behind a firewall, the Firewall address must be entered allowing proper operation with remote users, devise and SIP trunks. A DNS (Directory Name Server) for Domain Name resolution should also be entered on this page. Note that changing any IP address in the system requires a system reset; the reset does not initialise data.
“

Leave A Comment