
- Version Information
- Document Purpose & History
This document is intended to provide the reader with the necessary steps to upgrade a UCP system from the setup wizard.
Please note – in order to connect to the UCP you will need your PC to be on the same subnet (10.10.10.x)
UCP – Upgrading from the Setup Wizard
- Power up the UCP system and connect it to your PC via ethernet cable. In your browser, browse to https://10.10.10.2
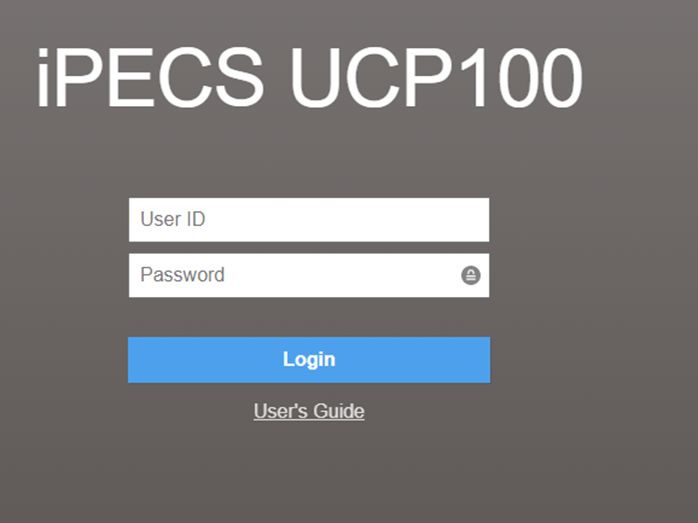
- Log in with the below credentials:
User ID : admin
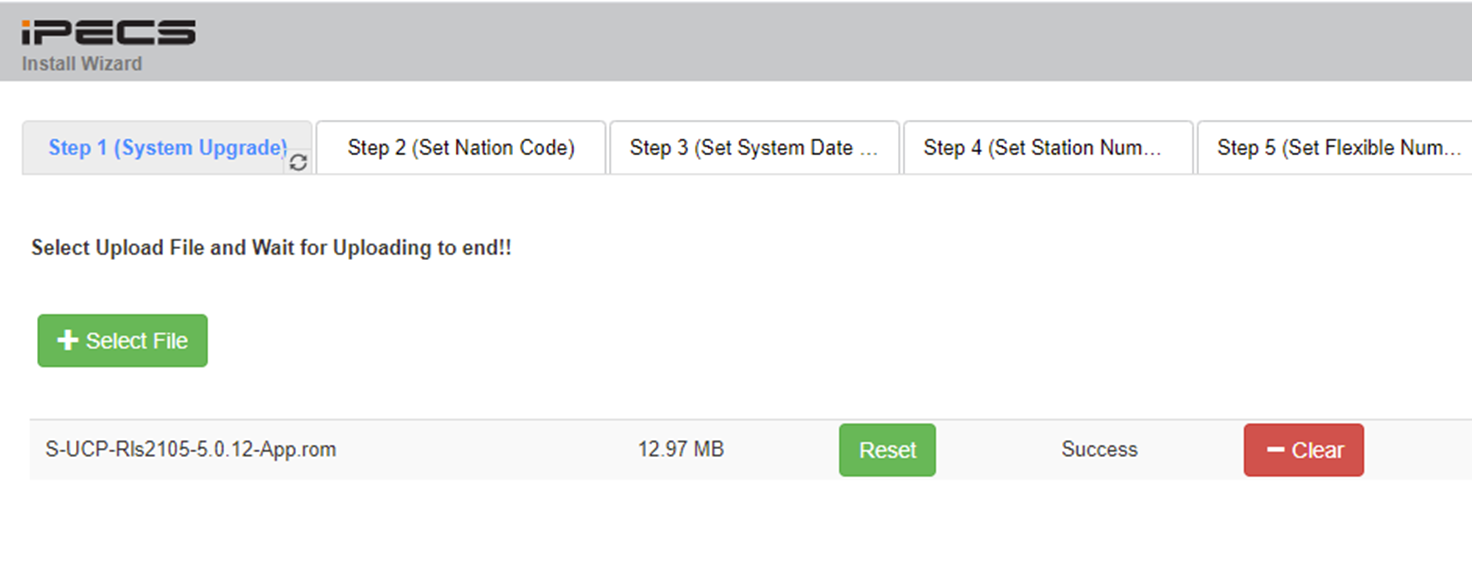
Password : 1234 - In Step 1 (System Upgrade), click the “Select File” button
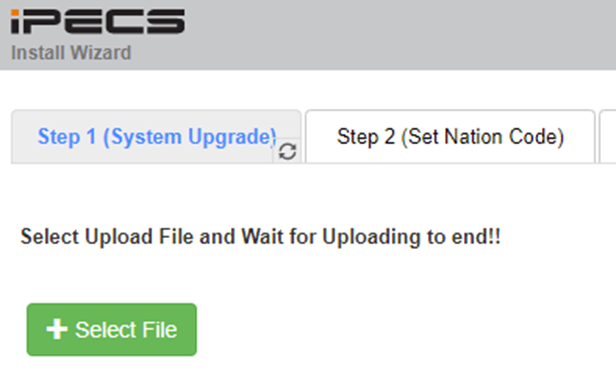
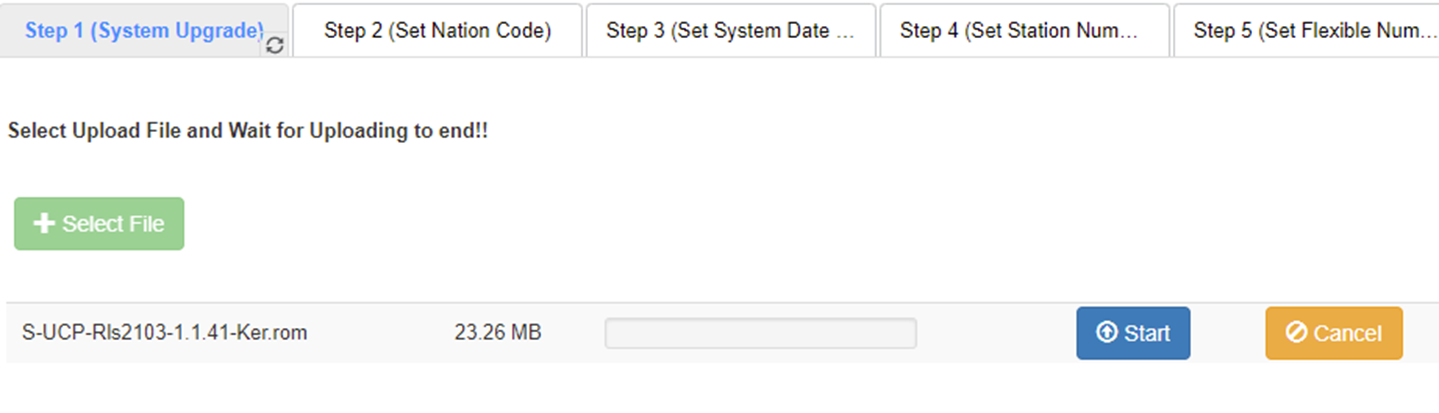
- Select the Kernel file first, and press “Start”
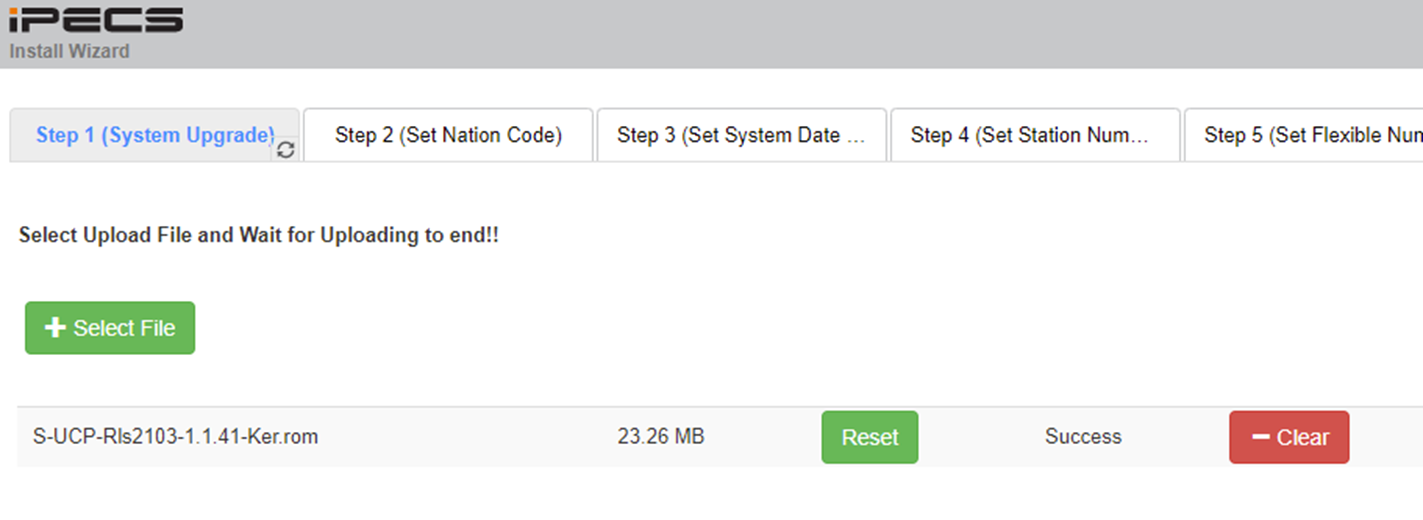
- When the system shows the “Success” message, press “Reset”
- At the below prompt, press “OK”
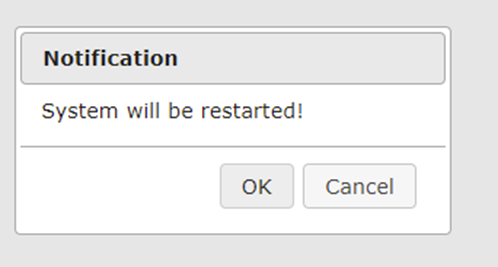
- After roughly 4 minutes, the UCP will reconnect to the browser. As before, log in with the below credentials;
User ID : admin
Password : 1234 - As before, click the “Select File” button, and choose the App file next, press “Start” and wait until the “Success” as before. Press “Reset”, then “OK”
- After roughly one minute, the UCP will reconnect to the browser. Log in one last time and confirm that the App and Kernel versions at the bottom left of the UCP web interface are up to date:

- Continue with the UCP installation as outlined in KB #4779.
“

Leave A Comment