
1. Version Information
Migrating From IPCR 2.2 to IPCR 3
2. Document Purpose & History
Pre-Requisites
Ensure you have access to the following software:
- PgAdmin 3 (the installer for this is available here).
- WinSCP or other SFTP application
Process Overview
- Backup the voicefiles from the IPCR 2.2 server.
- Backup the database from the IPCR 2.2 server.
- Install IPCR 3 server, and confirm it connects to the UCP 1.
-
Copy the Voice files to the IPCR 3 server.
- Upload the IPCR 2.2 Database backup to the IPCR 3 server.
- Post Migration Configuration
1 Ensure your IPCR server settings for the IPCR are same for the IPCR3 server, as they are on IPCR 2.2.
If the IPCR 2.2 server is not being reused as the IPCR 3 server, the IPCR 3 server can be built anytime before step (4). If selecting a new PC for IPCR 3, please compare the specification to the recommended specification below.
- 4 Core CPU
- 8GB Memory
- 500GB or higher Hard-disk 1
- Centos 6.9 32bit or Centos 7.3 64bit compatible 2
1 In addition, an external Hardrive can be used for backup.
Install ISO and VMWare image supplied, are based on CentOS 6.9 operation system.
Installation of IPCR 3 is covered in the IPCR Administrator Guide (attached here), and available in the different software and image downloads.
Backup the Database From IPCR 2.2 Server
Use an SFTP client to copy the voice files from the server to an external location. The instructions below use WinSCP.
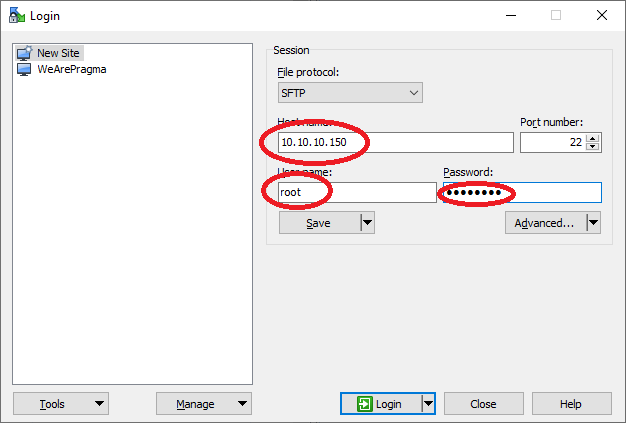
To connect to the IPCR with WinSCP:
Leave File Protocol and Port Number as default.
Username: root
Password: p@ssw0rd (this is the default password for system built by Pragma, or installed from the installation ISO).
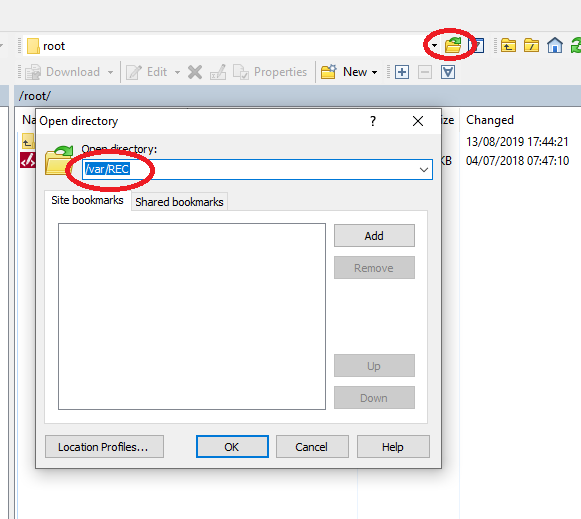
When logged on the left hand pane will show your local computer, the right hand pane will show the IPCR, the window will open showing the “/root” home directory of the root user. In the left hand pane navigate to the location you will store the voice recording files. On the right, click the “open directory” and open the “/var/REC” directory.
Right click on the RecSee_Data folder and choose Download to copy the folder and its content to the location in the left hand pane.
This may take some time depending on the number of recordings, and total length recorded. You can use PuTTY to determine the space required to backup the directory.
It is recommended you take screenshots of the User Registration for all users. You should also take screenshots or record the configuration of non-default user levels. After Migration you will need to manually reassign User Levels to restore authorisation settings from IPCR 2.2.
The screenshots aid in this task.
Login to the IPCR with PuTTY
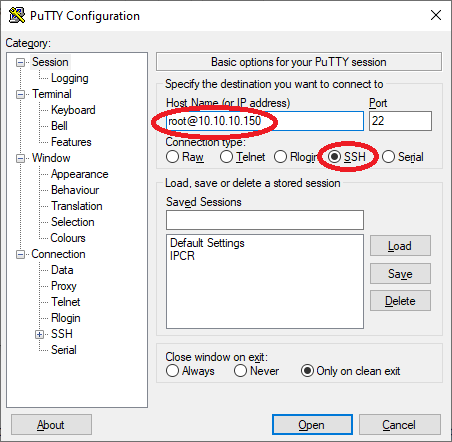
Host name or IP: root@192.168.1.14
After connection, PuTTY will challenge for a password, use the same password used in WinSCP.
Password: p@ssw0rd
At the command line issue the following command “du -sh /var/Rec/RecSee)_Data.

Backup the Database from the IPCR 2.2. Server
Install the PgAdmin3 application (link above), run the program and click the connect icon.

Complete the “New Server Registration” dialogue box.
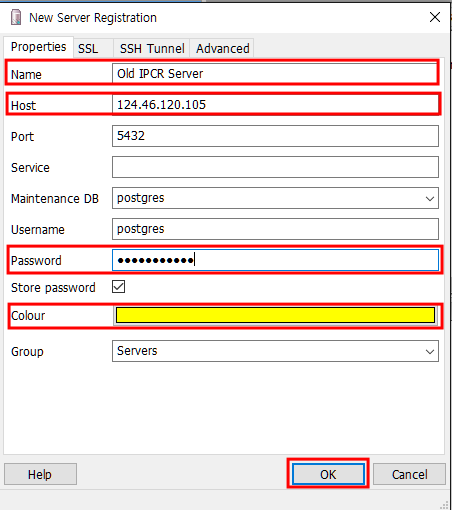
Host: IP address of IPCR server.
Username postgres
Password: postgres012 (postgres on older IPCR that have been updated)
PgAdmin will connect to the IPCR server when you press OK. We need to connect to the database calle recsee, right-click and choose backup.
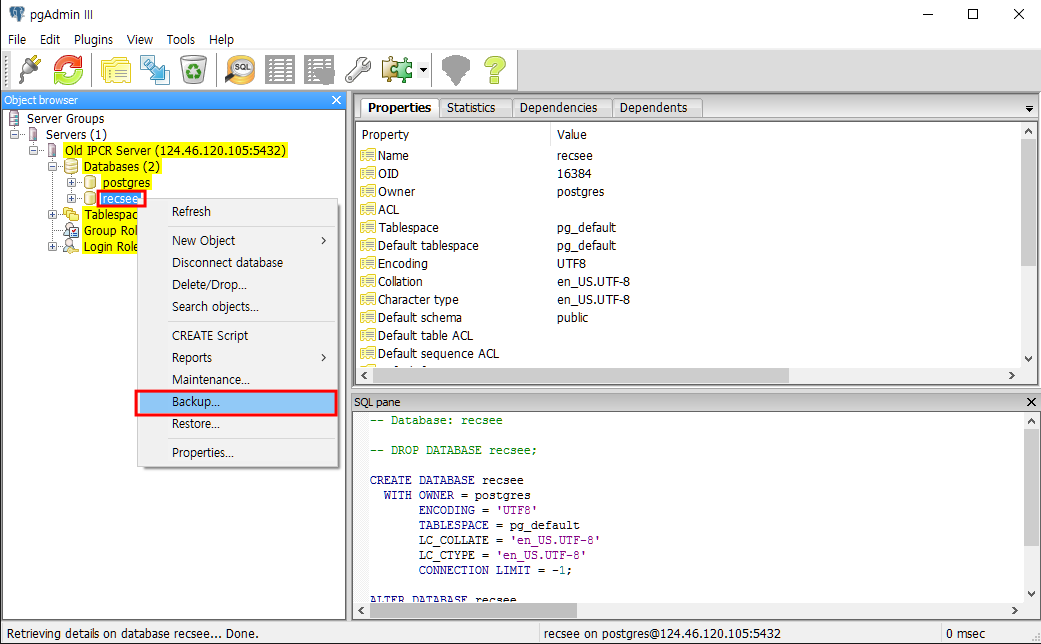
This will run the backup wizard.
Chose the directory and filename you wish to save the backup as in the Filename box (using the button to the right of the box to navigate to the directory you wish)..
Set Format to Customer, and then click the “Dump Options #1” tab.
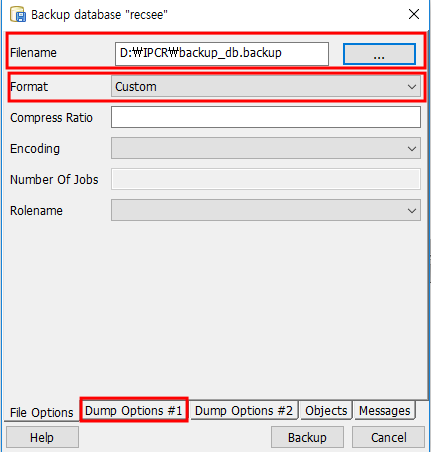
In the Dump Option #1 tab, we need to enable the “Only Data” tickbox, and then move to Dump Option #2 tab.

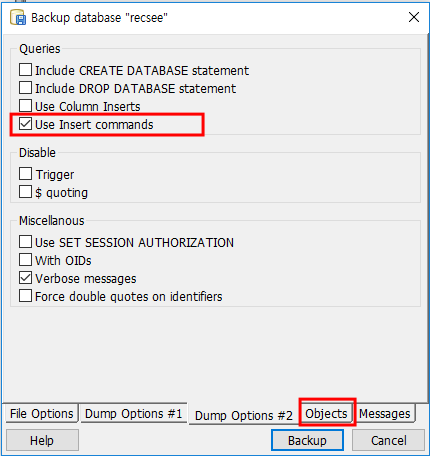
In “Dump Option #2” we need to tick “Use Insert Commands”, and then move onto the “Objects” tab.
There are many tables in an IPCR database, we only need to take a subset of the tables:
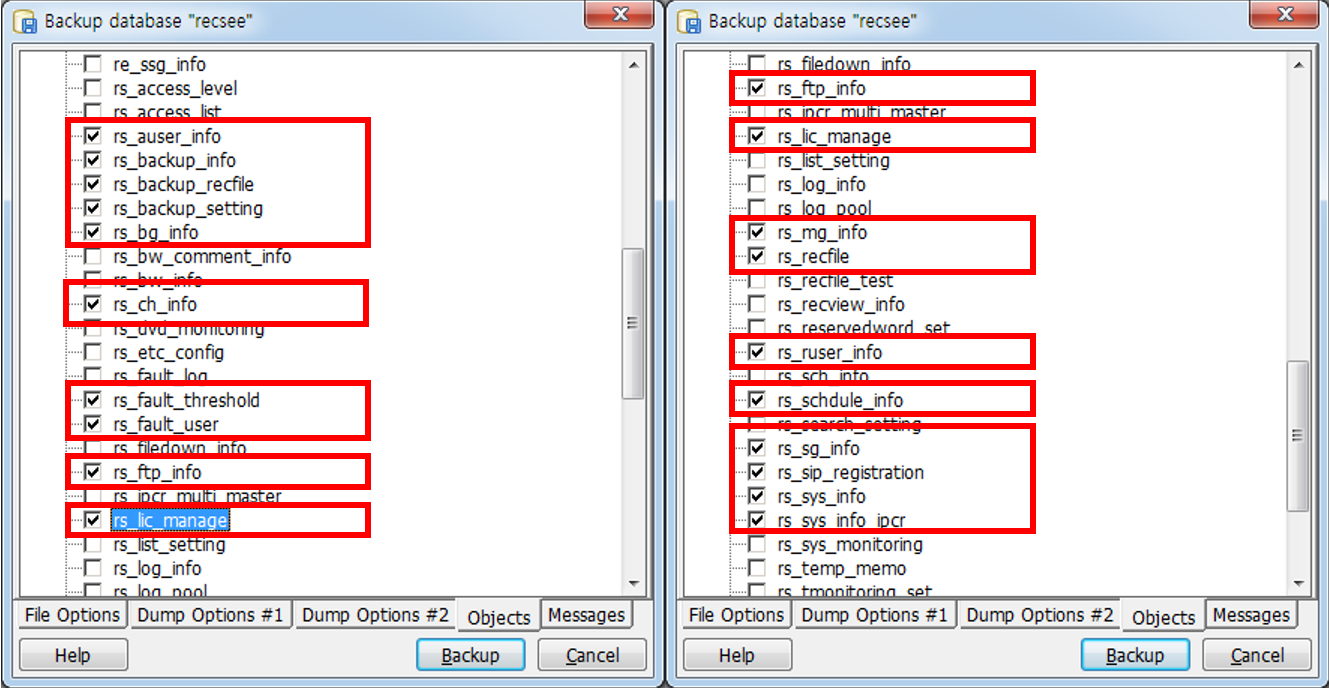
When all tables are selected, press the “Backup” button. This will run the script, and backup the data.
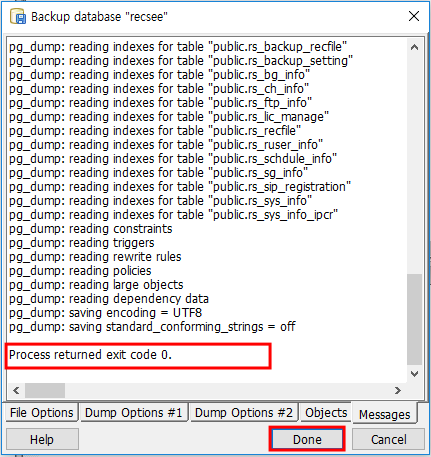
The last line should show the exit code of the backup process, which should be “0”. When complete, press the Done button.
Install IPCR 3 Server
IPCR 3 can we installed on a compatible PC, or into a VMWare image. Installation options, and instructions are covered in the “IPCR Administrator Guide”, attached.
Note: To ensure the information can be migrated, ensure your IPCR server settings for the IPCR are same for the IPCR3 server, as they are on IPCR 2.2.
Copying the Voice files to the IPCR 3 Server
Use an SFTP client to copy the voice files from the server to an external location. The instructions below use WinSCP.
To connect to the IPCR with WinSCP:
Leave File Protocol and Port Number as default.
Username: root
Password: p@ssw0rd (this is the default password for system built by Pragma, or installed from the installation ISO).
When logged on the left hand pane will show your local computer, the right hand pane will show the IPCR, the window will open showing the “/root” home directory of the root user. In the left hand pane navigate to the location where you stored the voice recording files. On the right, click the “open directory” and open the “/var/REC” directory.
Right click on the RecSee_Data folder in the left hand pane and choose “Upload” to copy the directory to the /var/REC directory of the IPCR 3 server.
Upload the IPCR 2.2 Database Backup to the IPCR 3 Server
Login to IPCR 3 using the admin account. Default admin login is:
Username: admin
Password: admin
When logged in go to the maintenance section of the Administration tab:
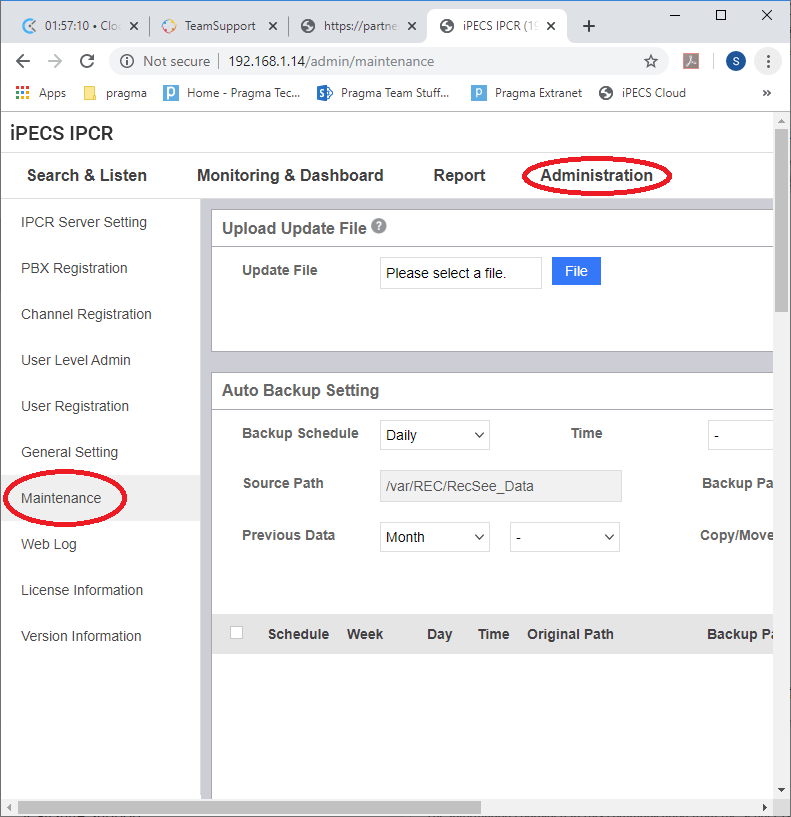
Navigate to the bottom of the page, the last section called “Migration”. Use the File button to select the file backed up by PgAdmin3 earlier, and press Start to start the migration.

The process can take some time, particularly with a large number of voice files, as each will be re-encrypted to a higher encryption level before being moved to the IPCR 3 database.
Wait until the process is completed, the message “Restoring backup DB” will indicate completion when the process has finished.

Post Migration Configuration
As noted earlier, User Levels cannot be migrated from IPCR 2.2 to IPCR 3. Recreate the user levels used in IPCR 2.2, and assign these to the correct users.
Regards,
Simon Smith
Tech support
Pragma – Unified Technology
t: +44 1903927101 e: 480900 simon.smith@wearepragma.co.uk w: www.wearepragma.co.uk
Follow us @wearepragma | LinkedIn | Check out our YouTube channel
Please use these links to access technical resources, some require login:
TeamSupport Ticket System:Click Here| Knowledge Base:Click Here
Software Library: Click Here| Documents and Manuals:Click Here
Training Courses & Webinars: Click Here| Tech Support Policy:Click Here
“

Leave A Comment