
1. Version Information
2. Document Purpose & History
This document is intended to provide the reader with the necessary steps on how to install the iPECS ONE mobile app on an Android mobile device
iPECS ONE – Installing the ONE app on an Android mobile device
Important note regarding call priority in Android OS: The iPECS ONE policy is that a mobile phone call has the highest priority on Android Phone.
When a mobile phone call comes in during an IPECS ONE call, the iPECS ONE call is automatically put on hold to receive a mobile phone call.
When IPECS ONE call comes in during a mobile phone call. iPECS ONE call is automatically transferred to VM.
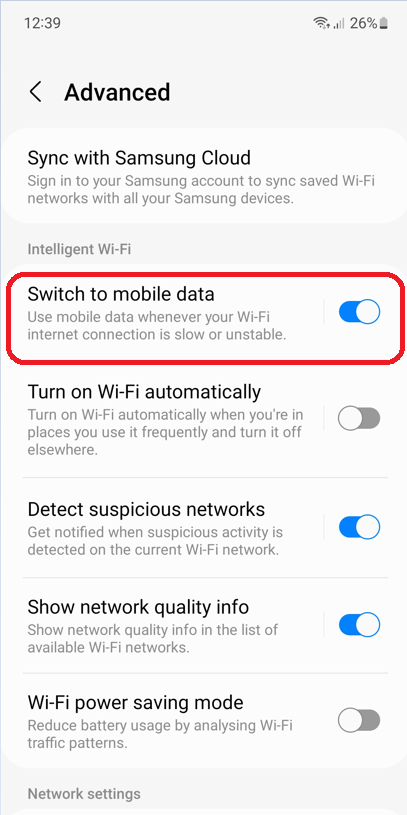
Before installing the iPECS ONE application please make sure Switch to Mobile Data is turned off as this can impact your call connectivity. Please see below image.
- Open up the Google Play store and search for iPECS ONE. Select install and wait for the application to install
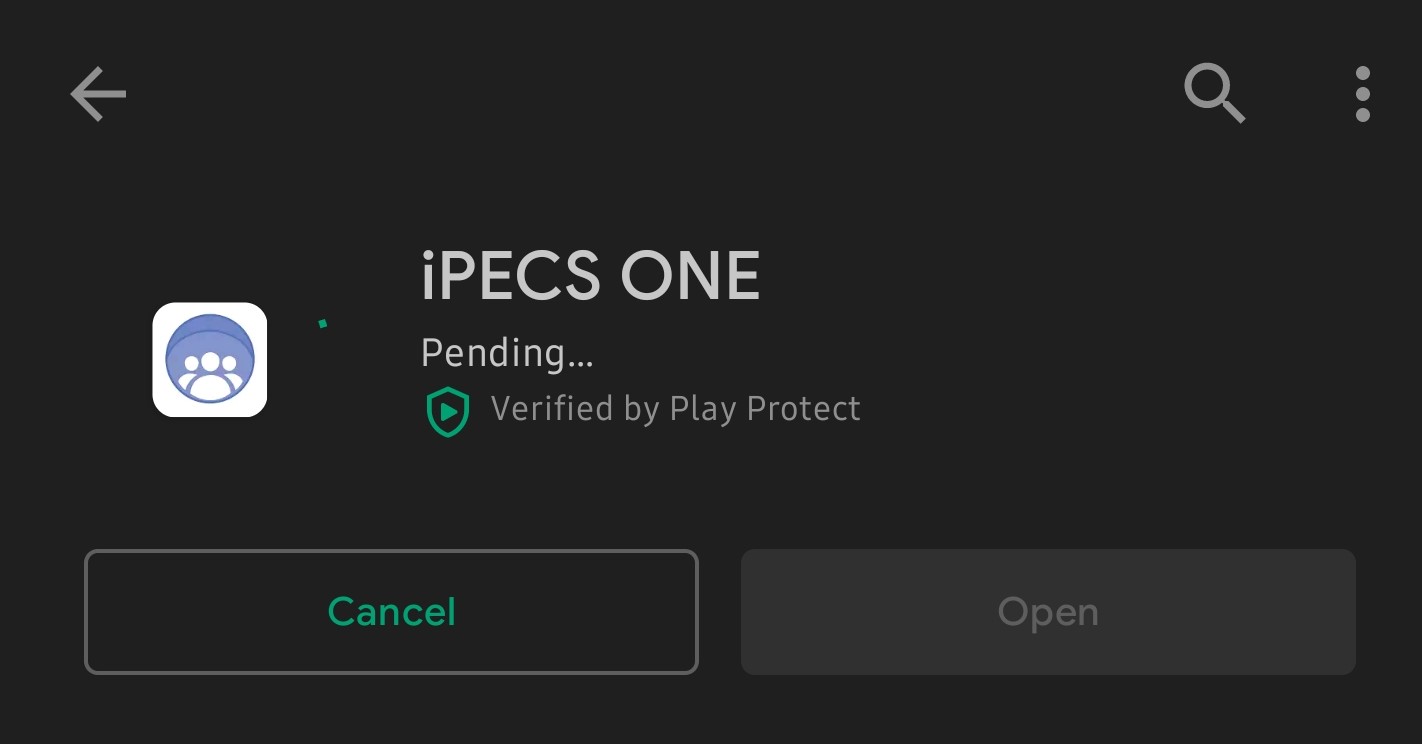
- Once the installation has completed. Select “Open”. This will now launch the iPECS ONE mobile app.
- When the application first launches you will prompted to enable a number of settings and permissions to enable iPECS ONE to work correctly. The first setting that needs to be changed is to allow “Draw Overlays”. When prompted select “OK”

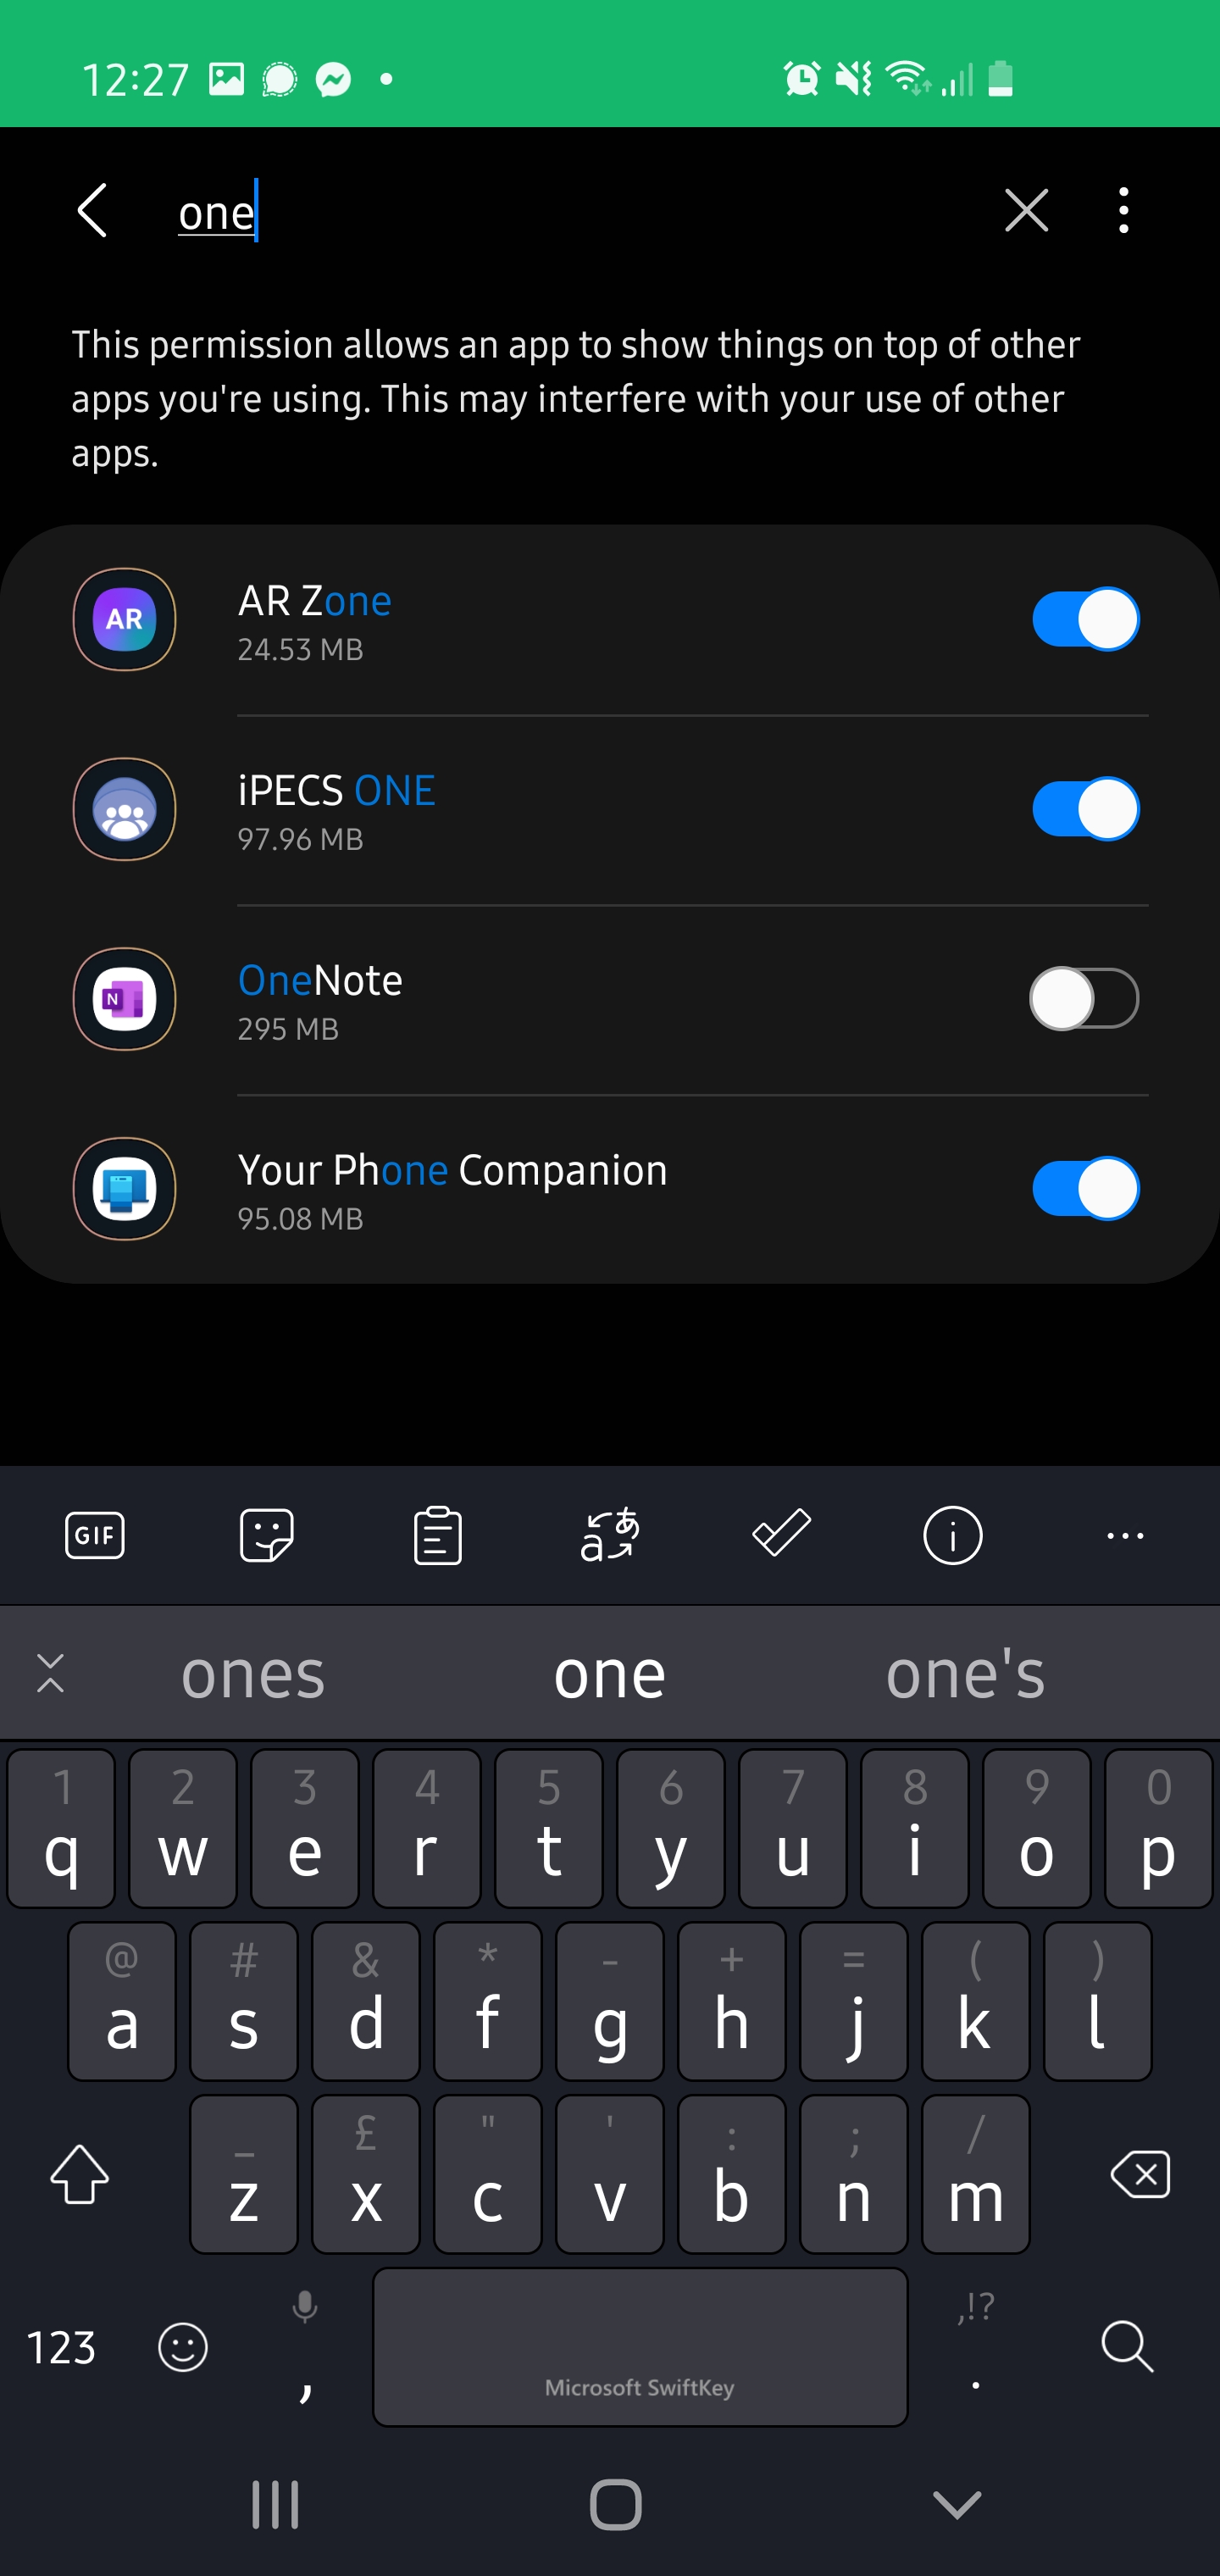
- You will now be taken to the settings menu for this particular setting. Search for iPECS ONE and adjust the radio button so that this setting is enabled. Once done you can return to iPECS ONE where you will be prompted for the next configuration change.
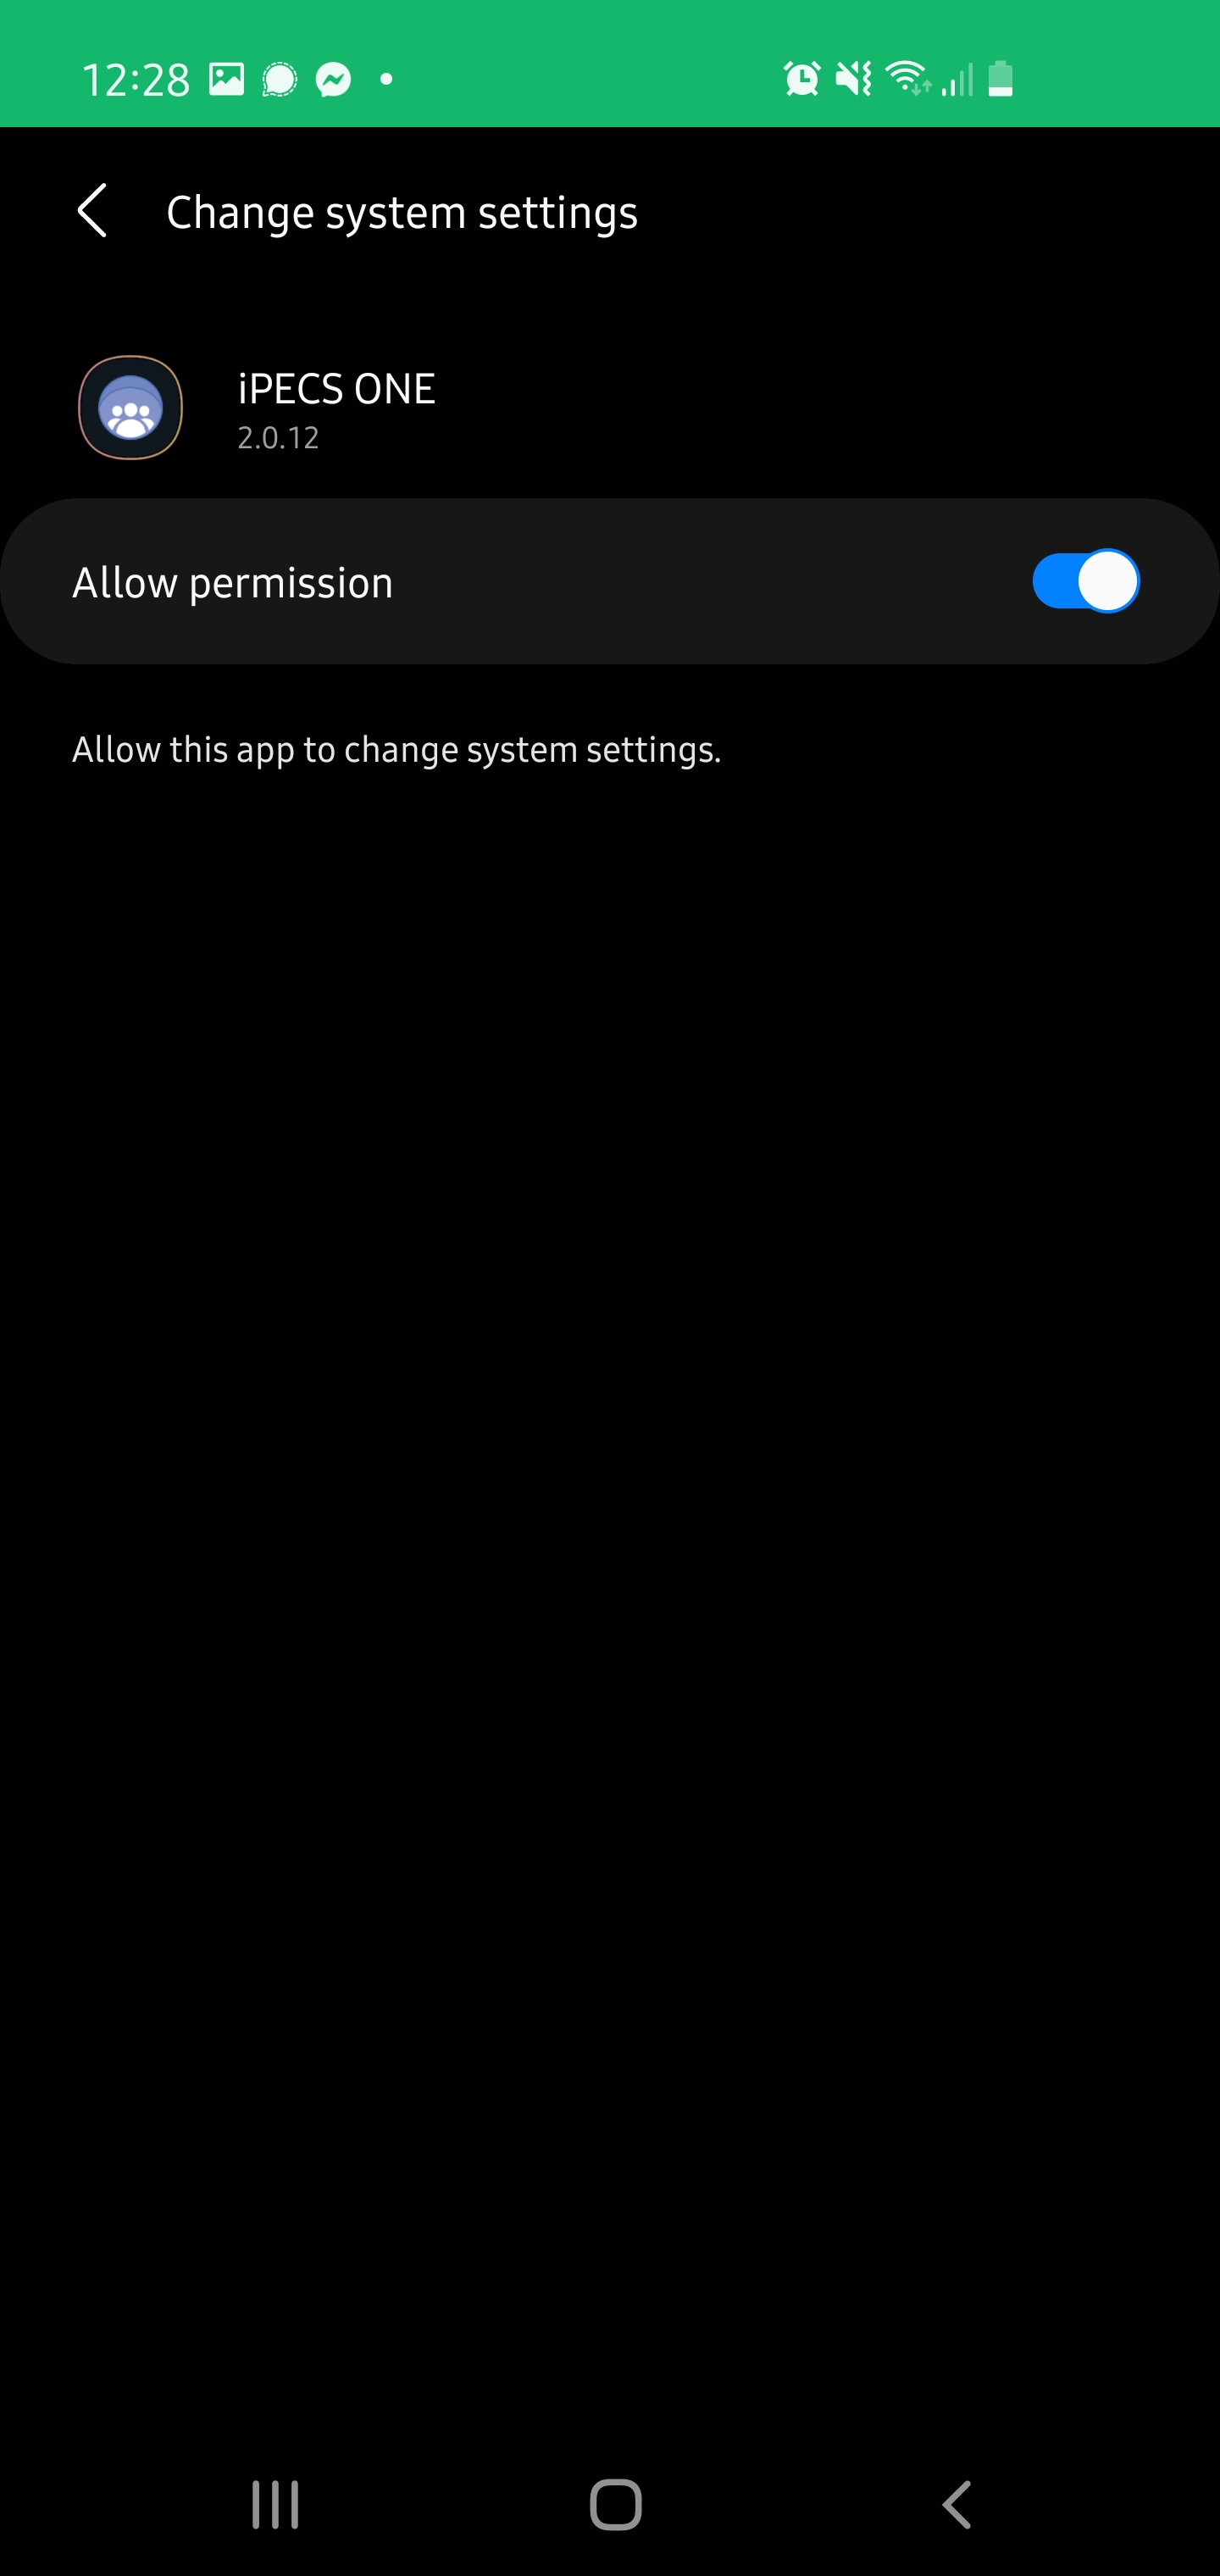
- The next setting to change is the “Write Settings”. When prompted please select “OK”
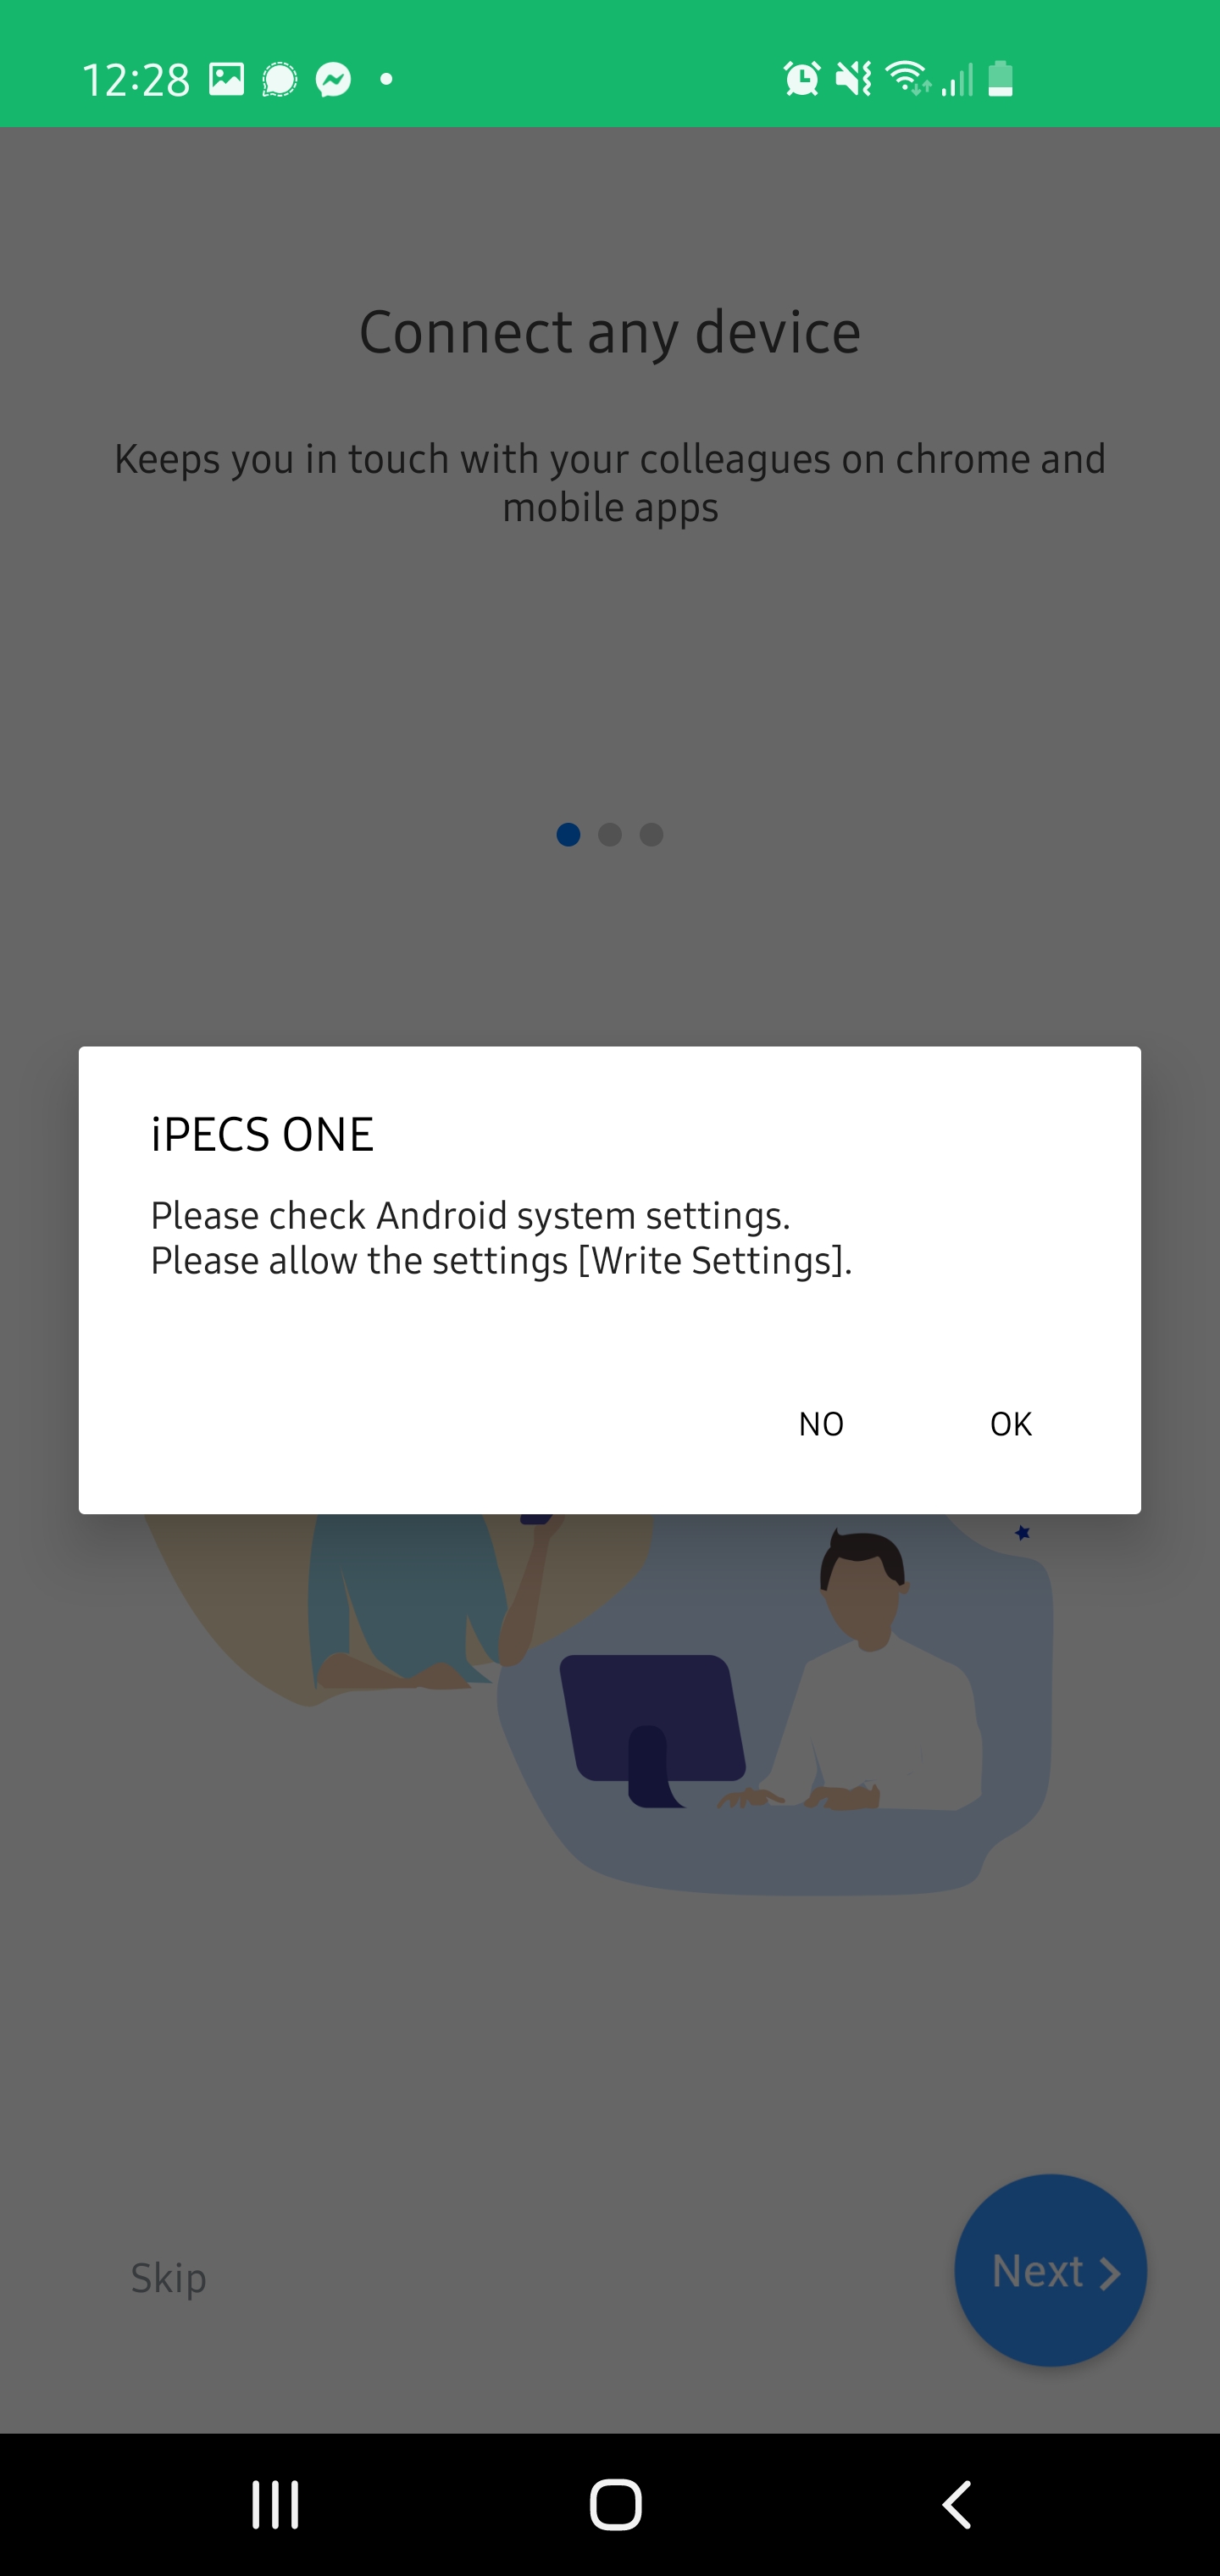
- Now enable the permission and return to the iPECS ONE app.
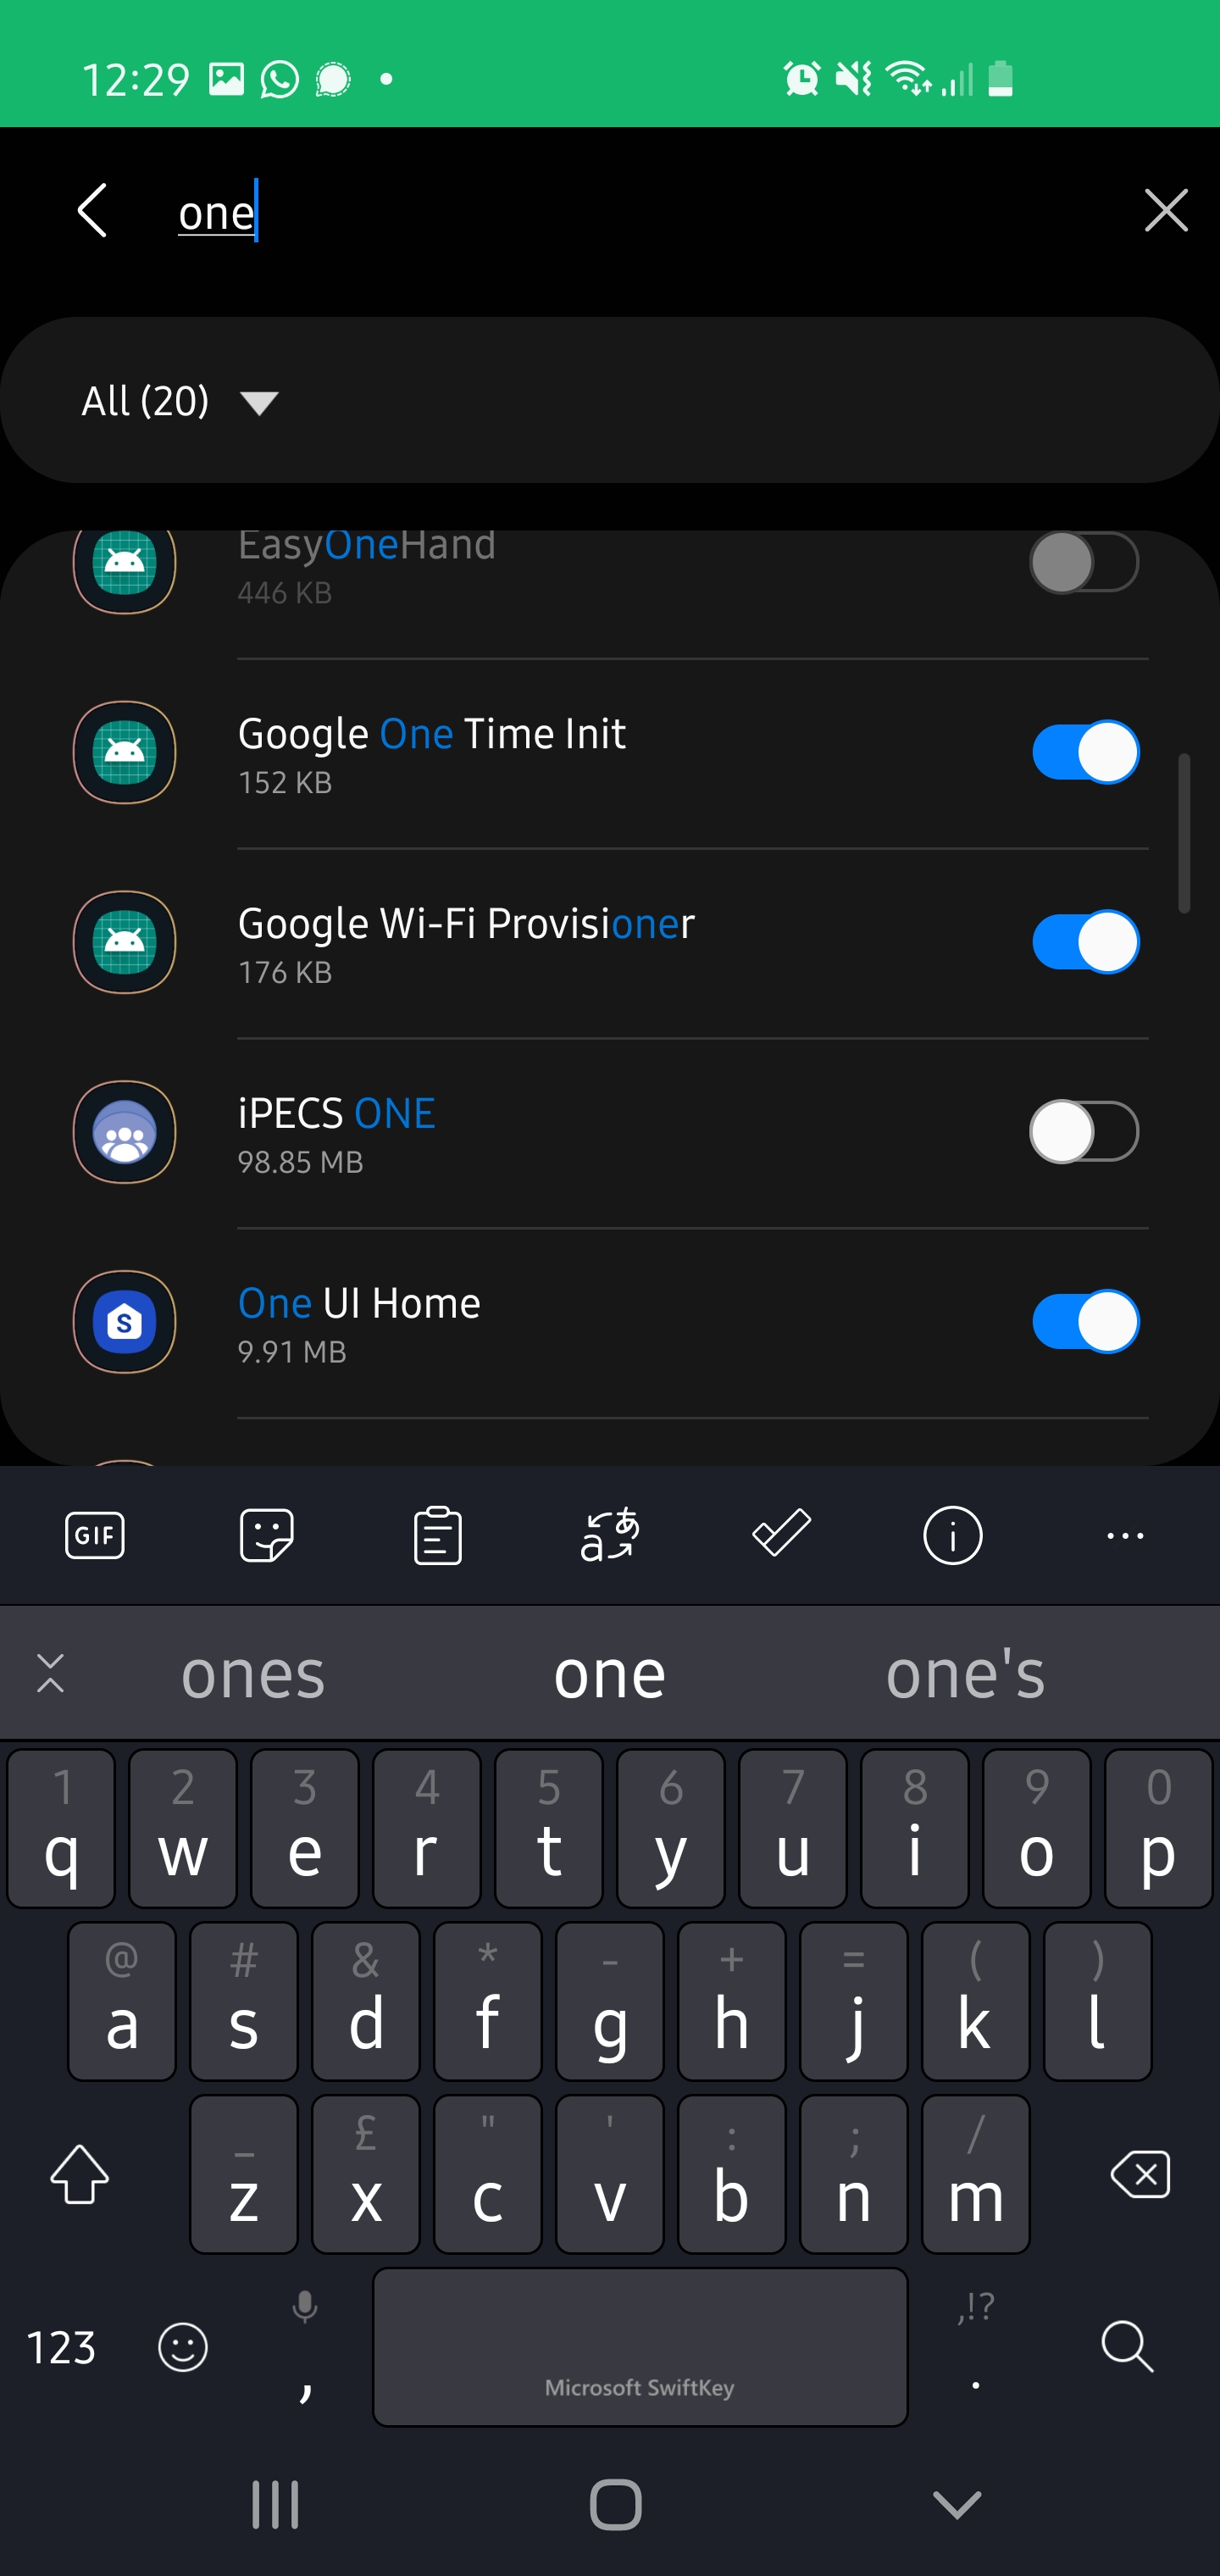
- Now you will be requested to disable “Battery optimization”. Select “OK” when prompted and this will take you to the relevant settings menu.

- On this setting page adjust the drop down menu to “All” and search for ONE. Please now ensure the radio button for iPECS ONE app is set to disabled as per the screenshot below. One this setting has been disabled please return to the ONE app.
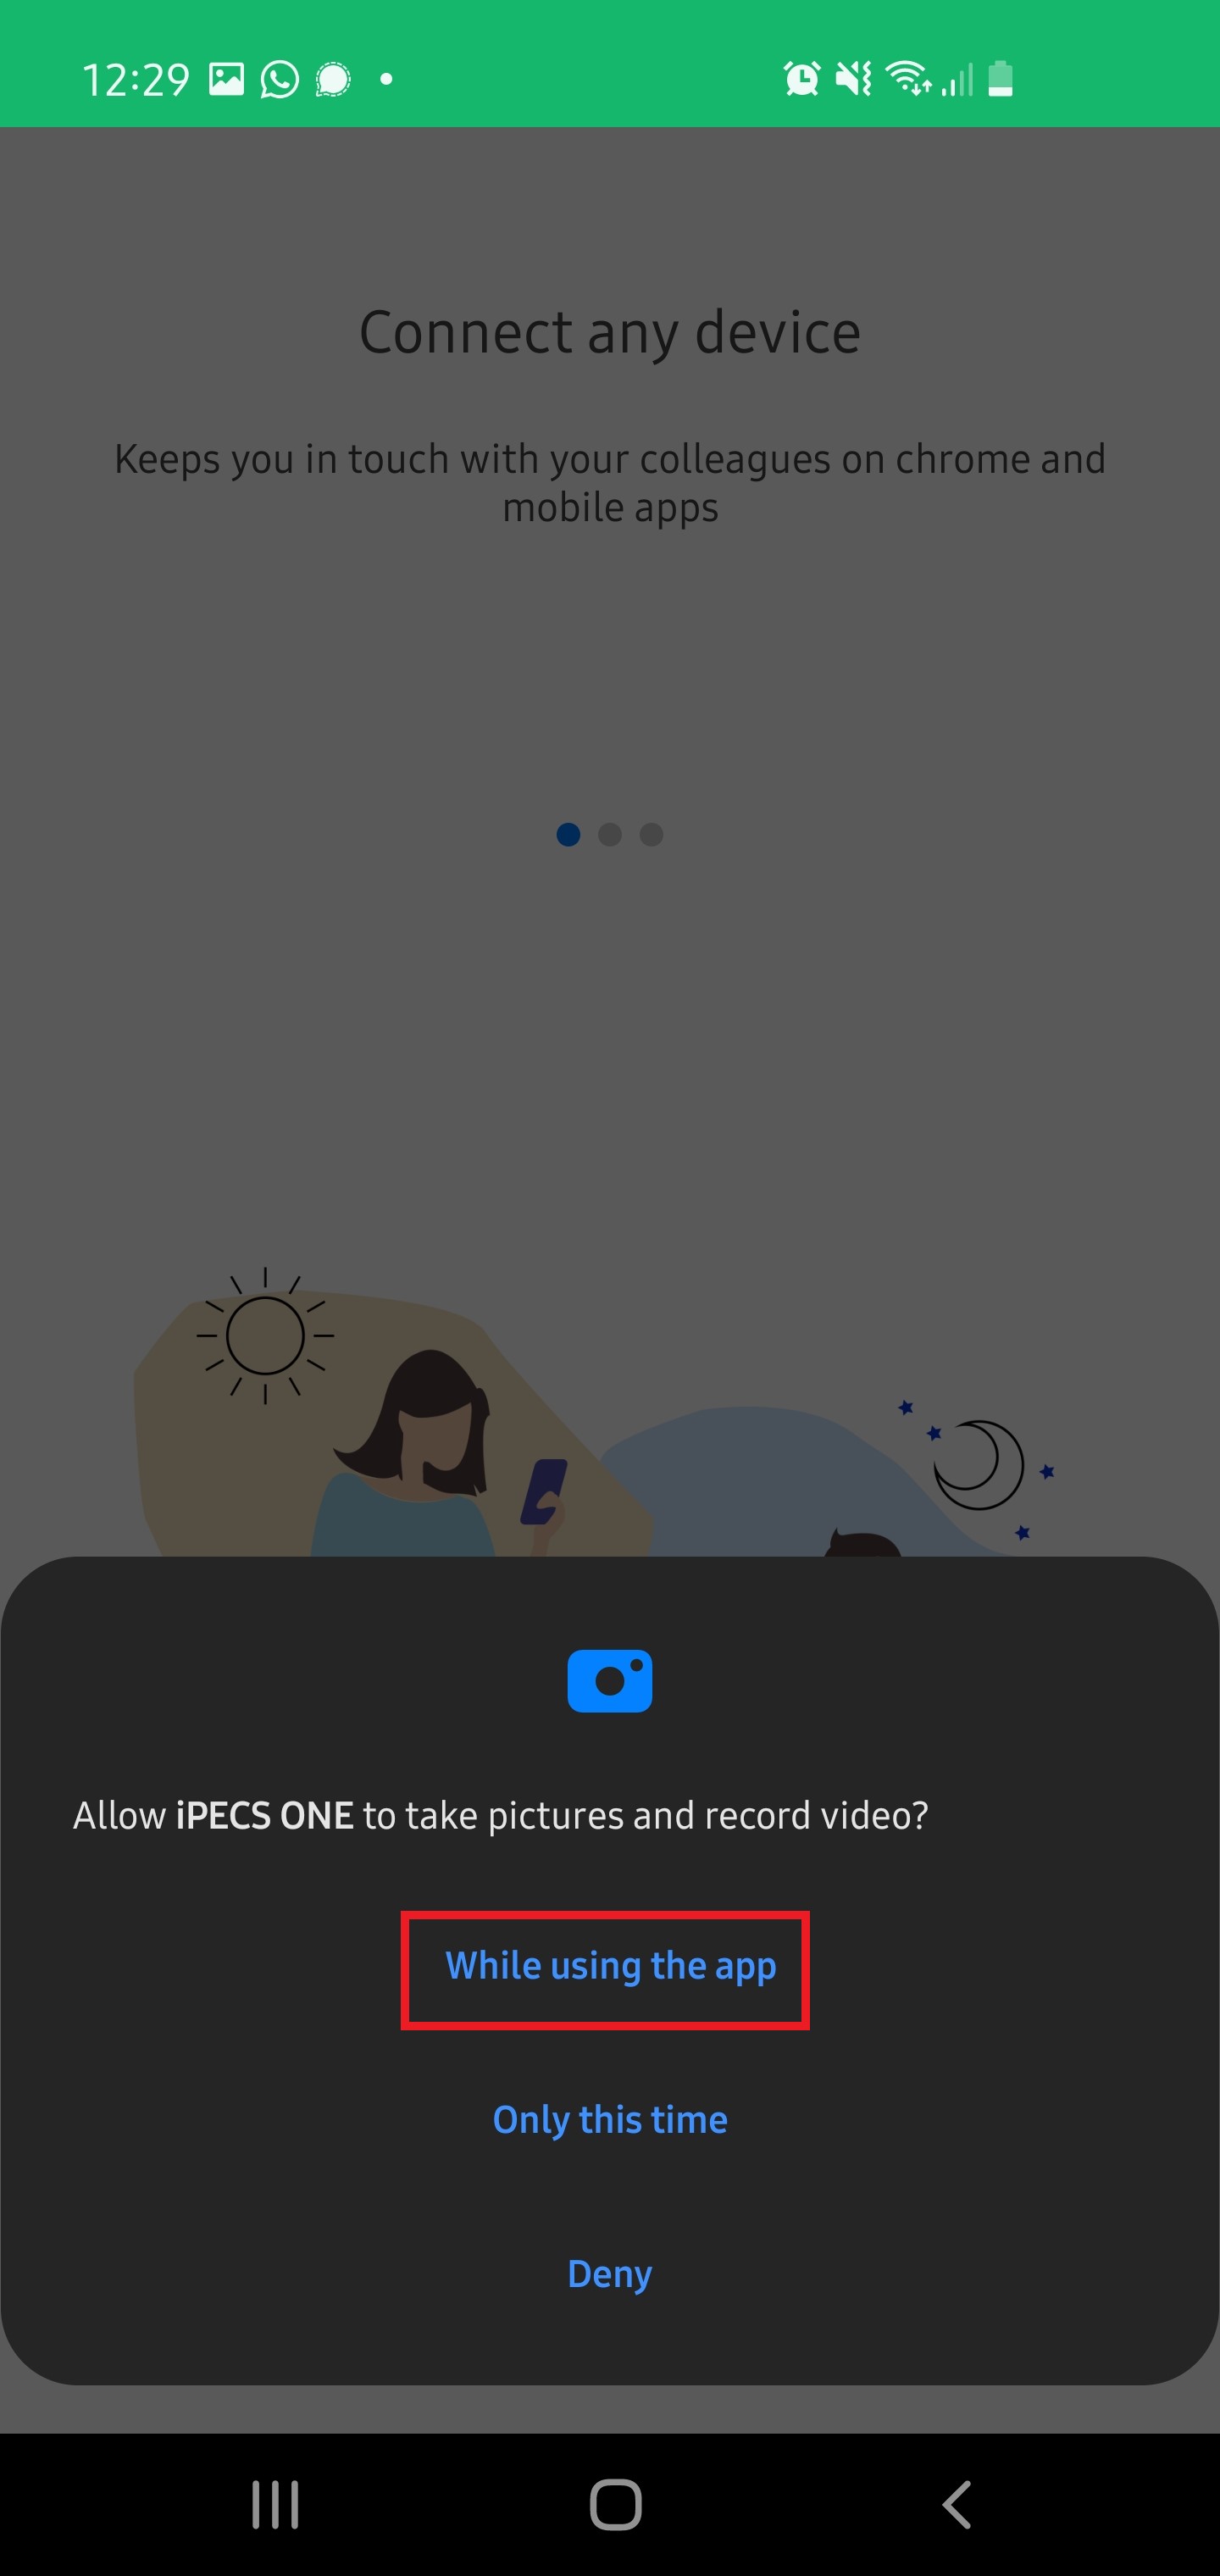
- You will now be requested to grant permissions to allow iPECS ONE app to take pictures and record video. Please select “While using the app” as per the screenshot below.
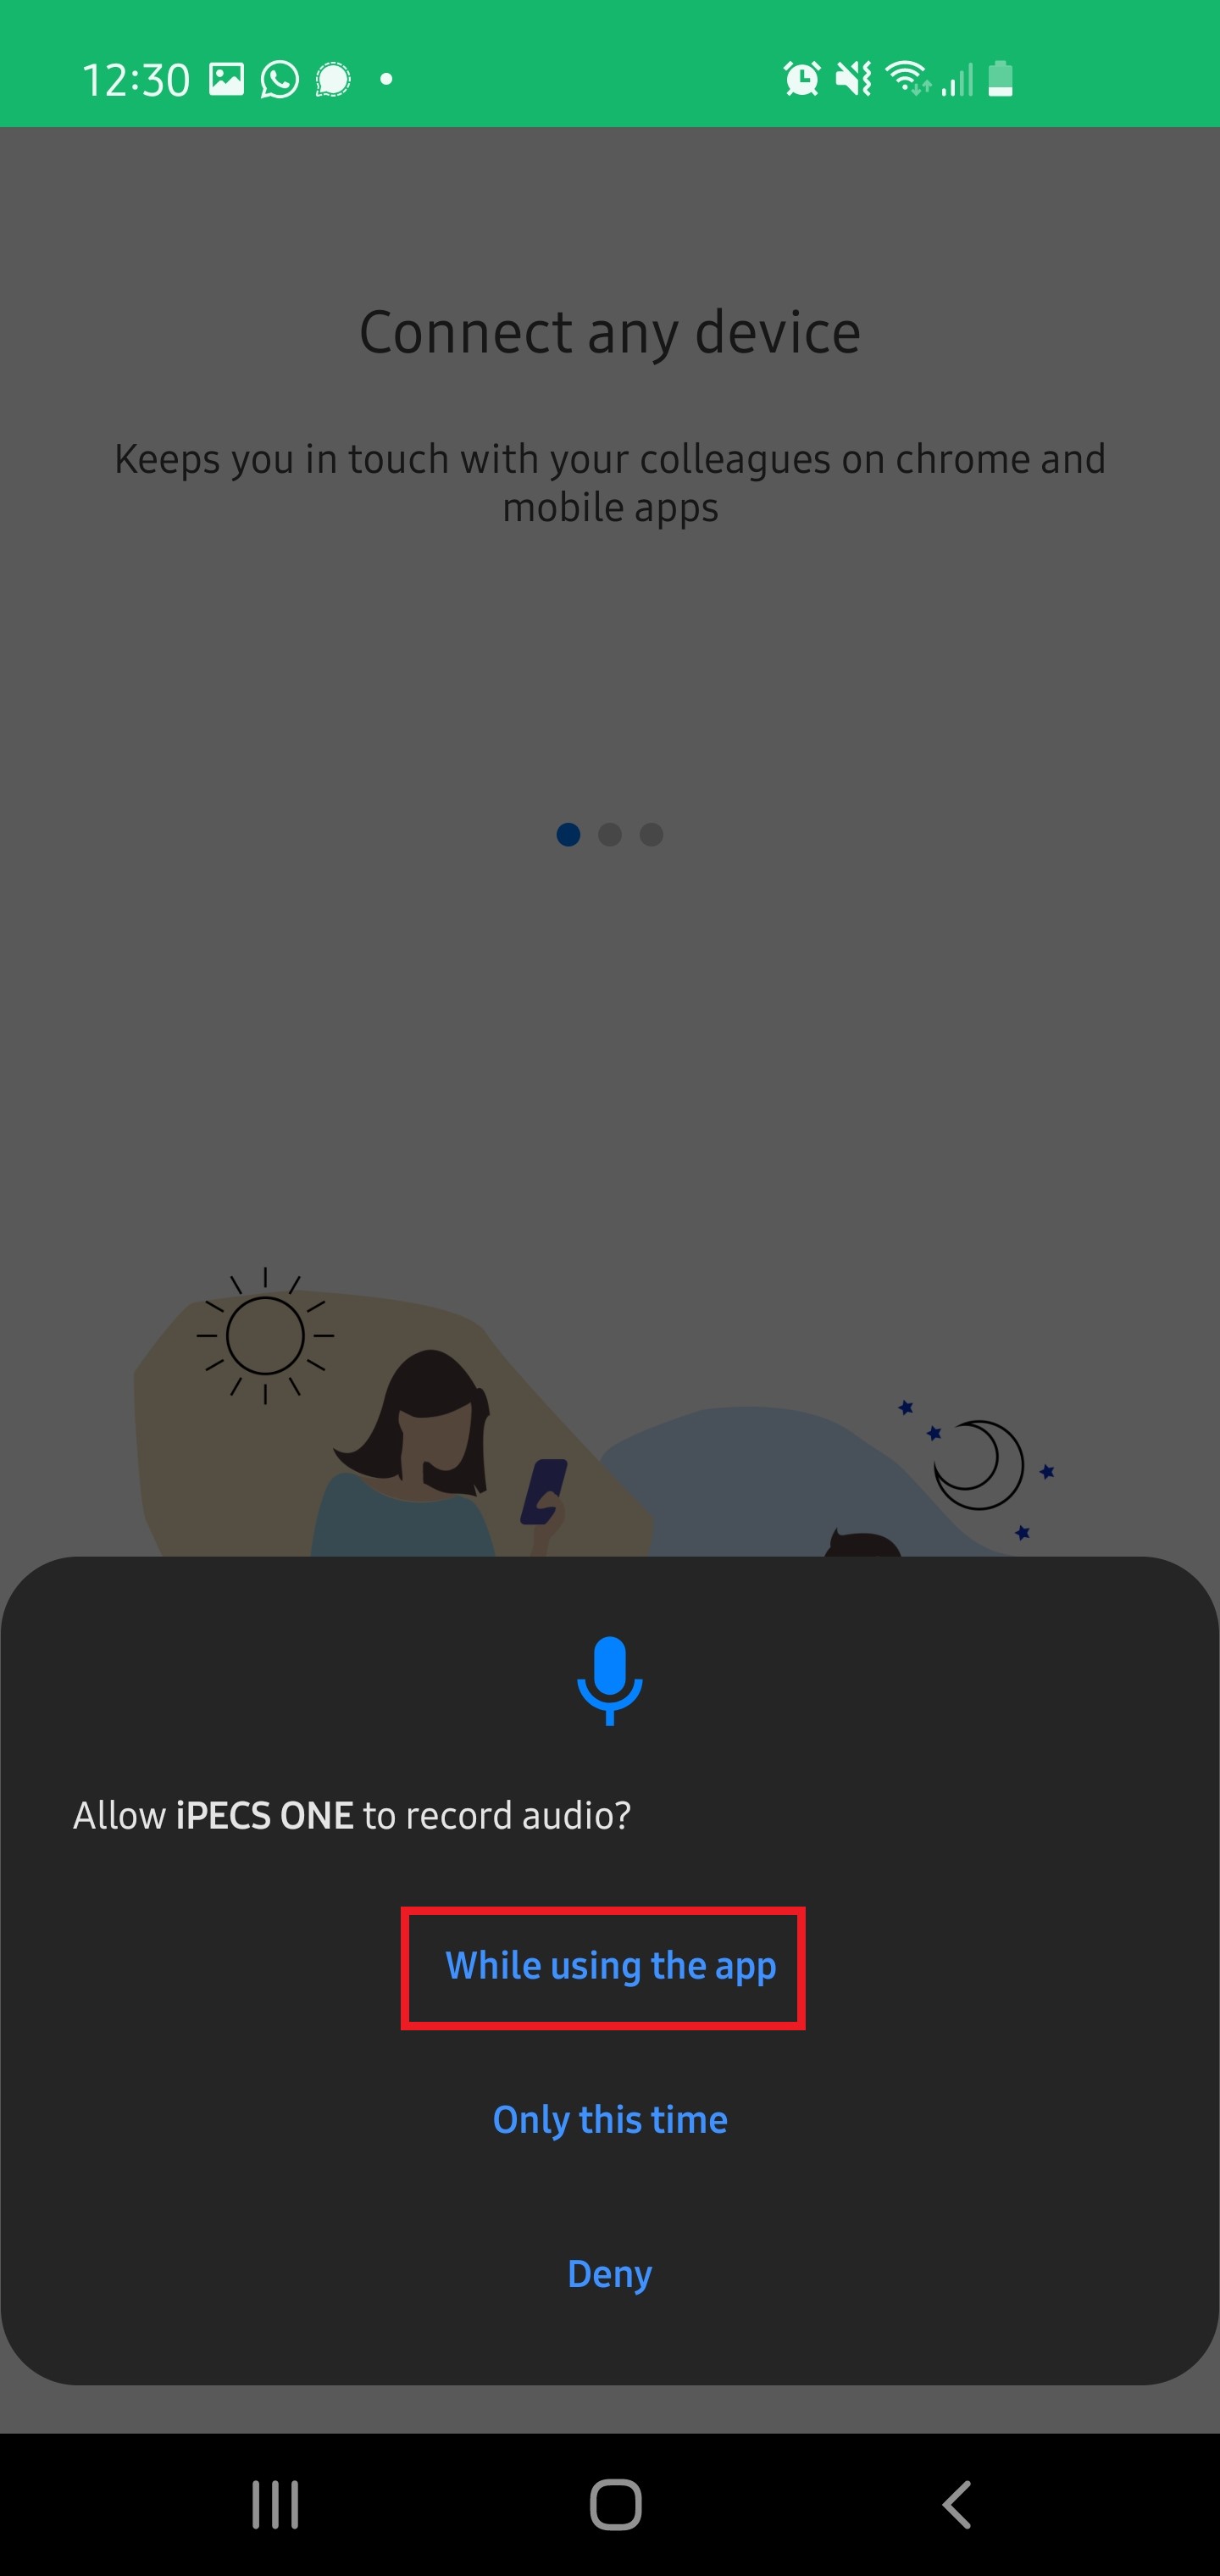
- You will now be requested to grant permissions to allow iPECS ONE app to record audio. Please select “While using the app” as per the screenshot below.
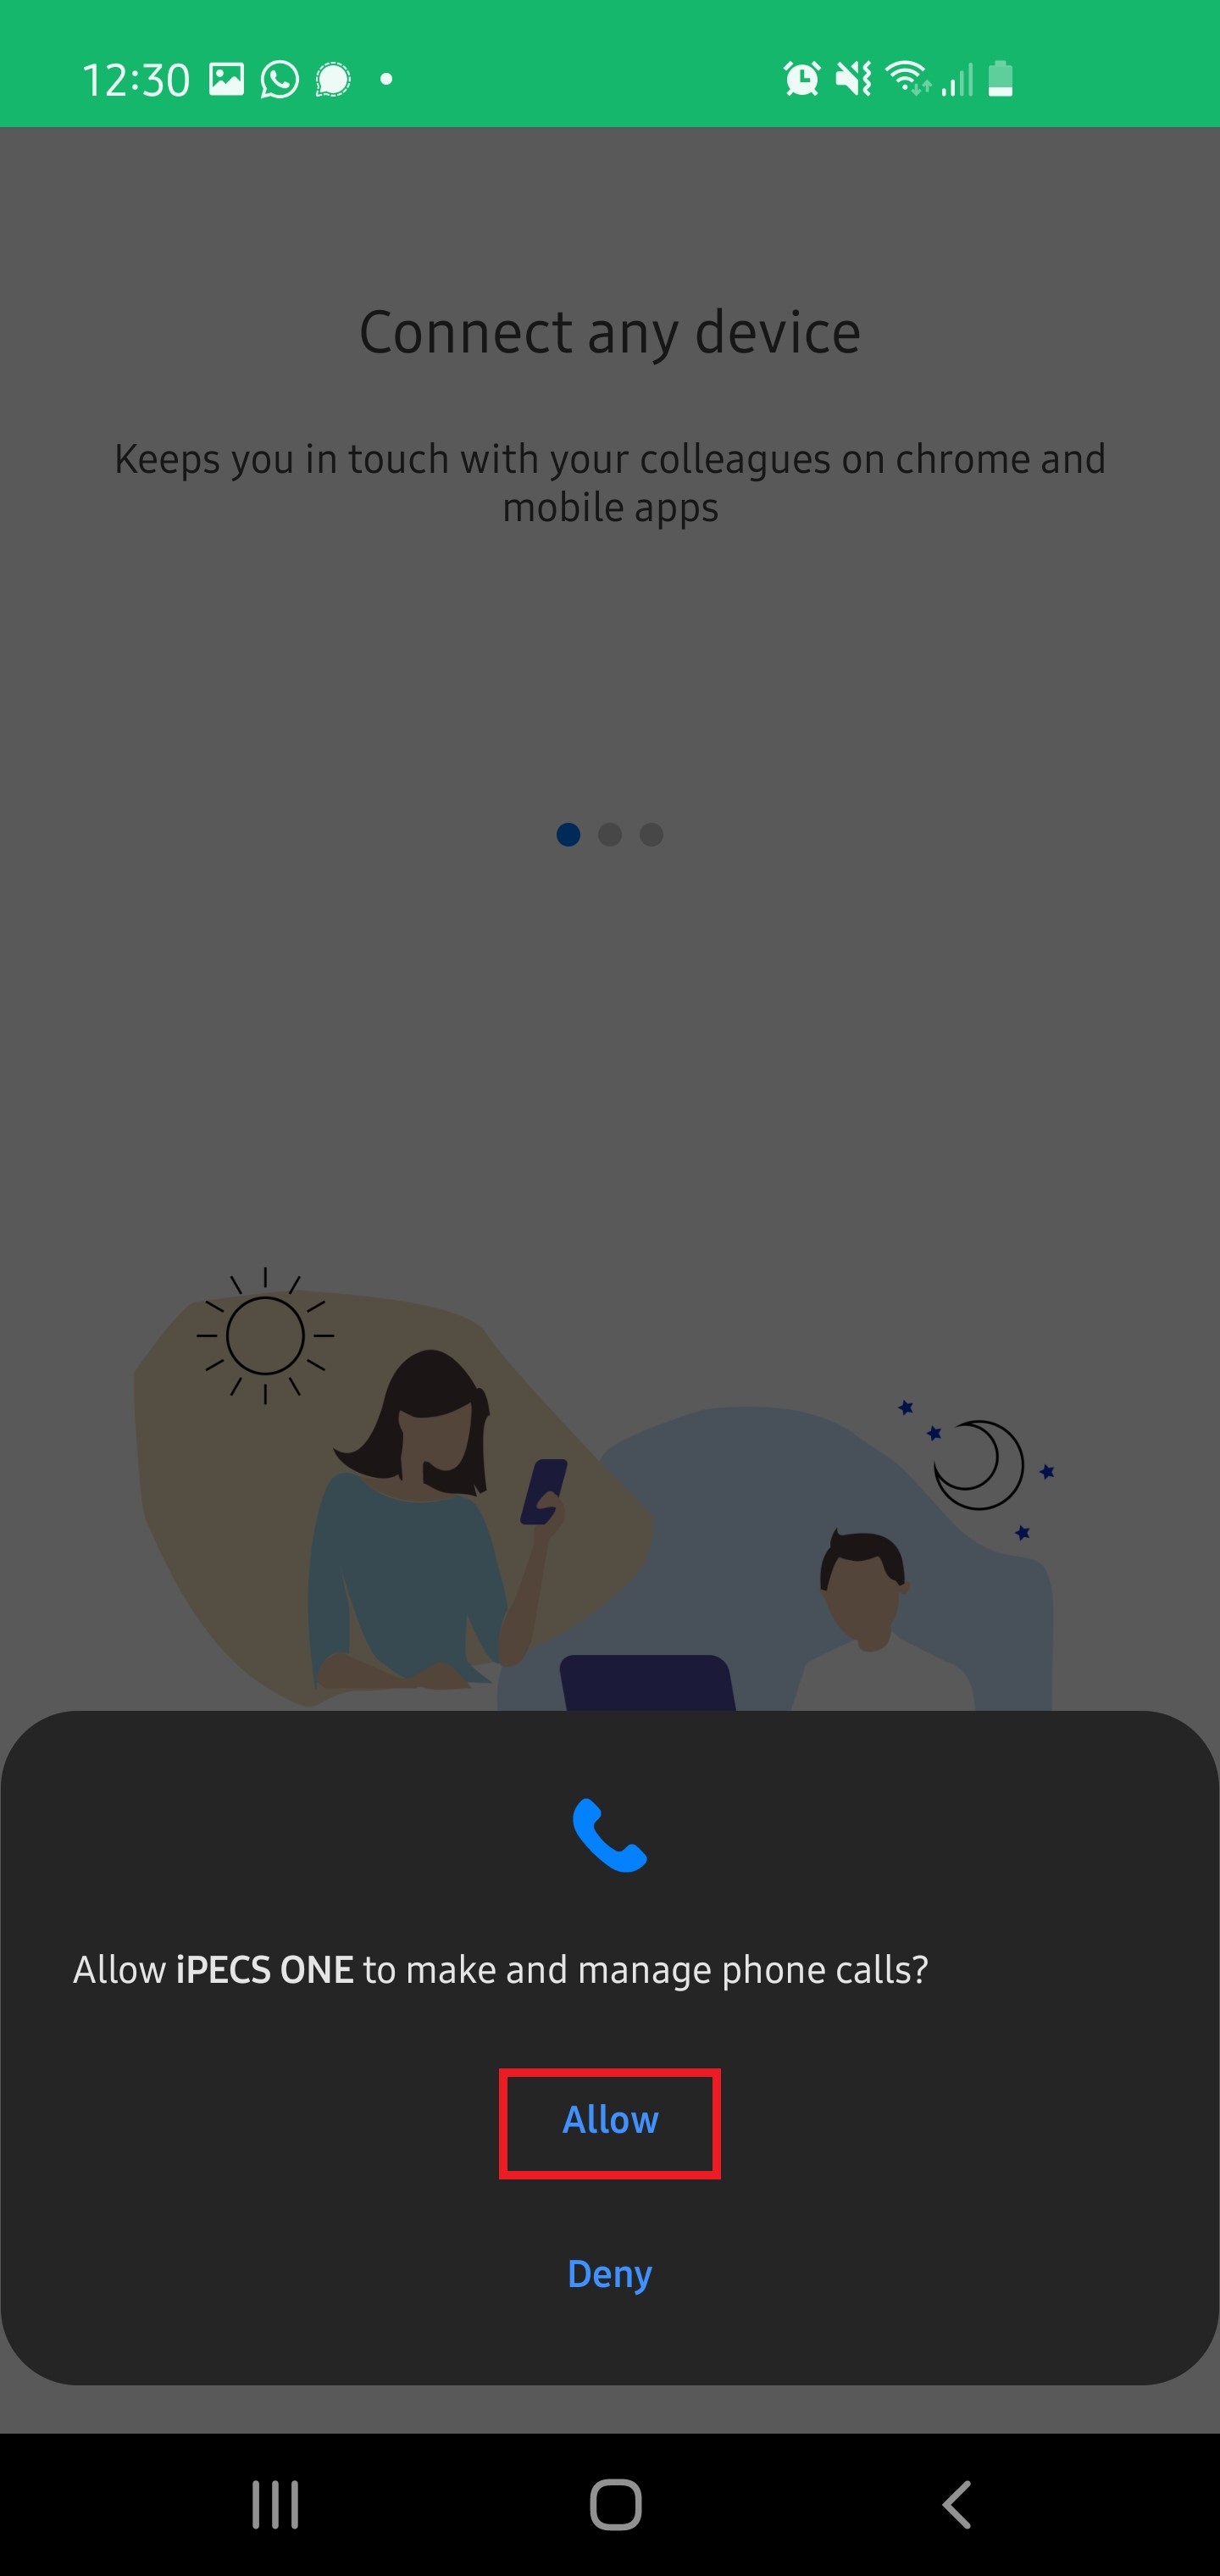
- You will now be requested to grant permissions to allow iPECS ONE app to make and manage phone calls. Please select “Allow” as per the screenshot below.
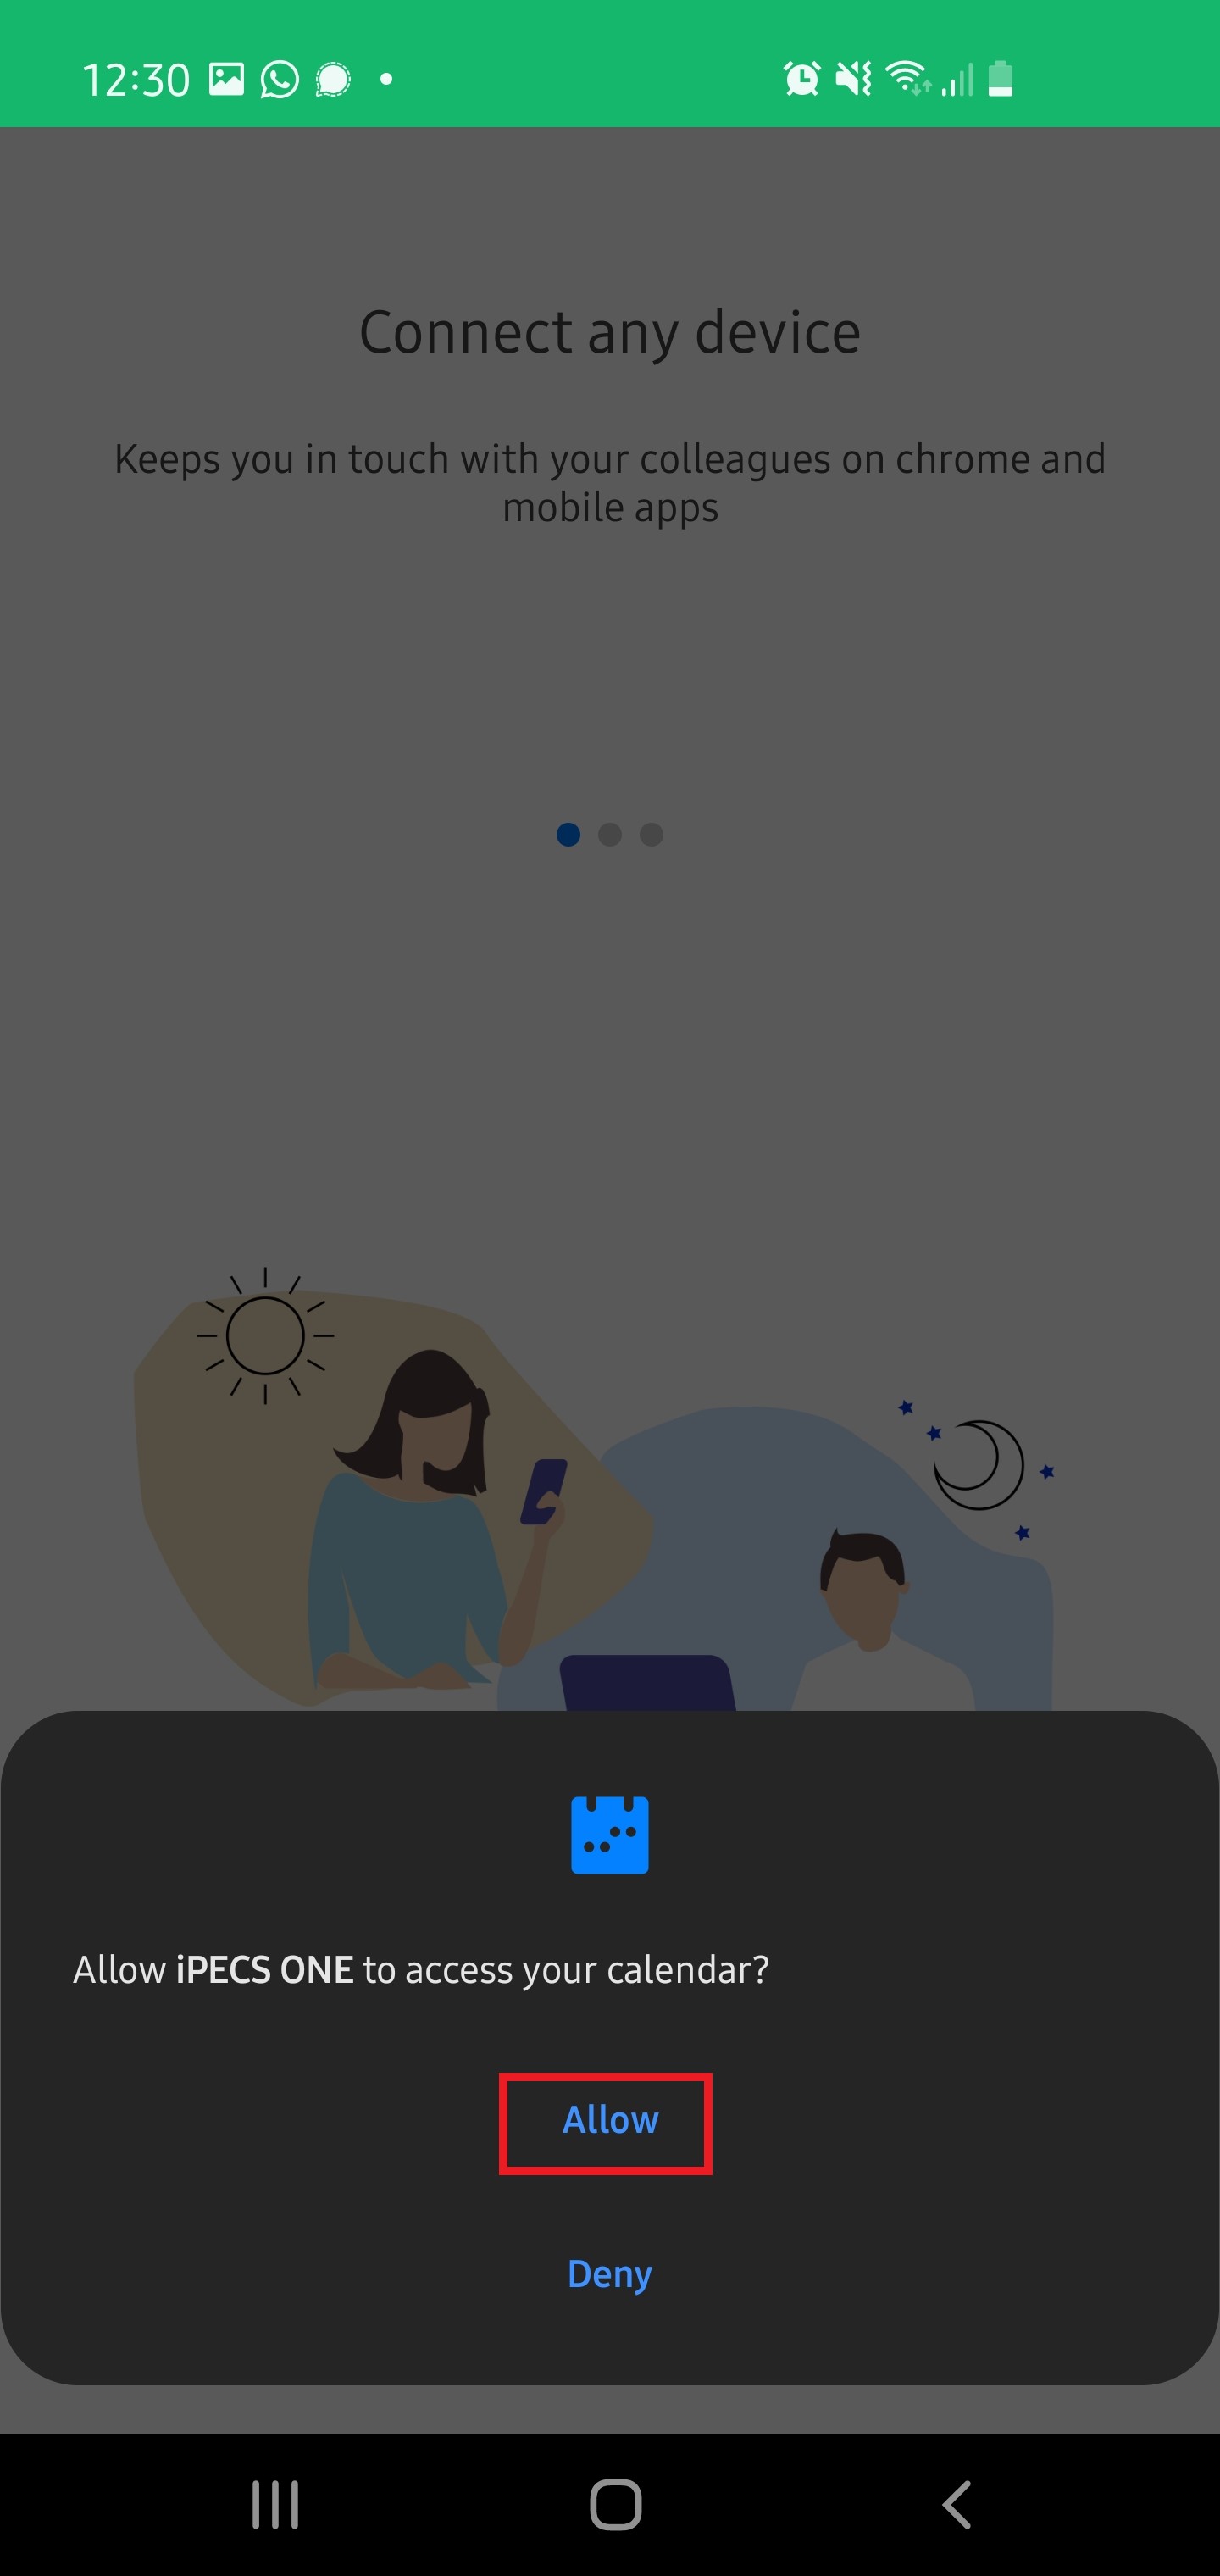
- You will now be requested to grant permissions to allow iPECS ONE app access to your calendar. Please select “Allow” as per the screenshot below.
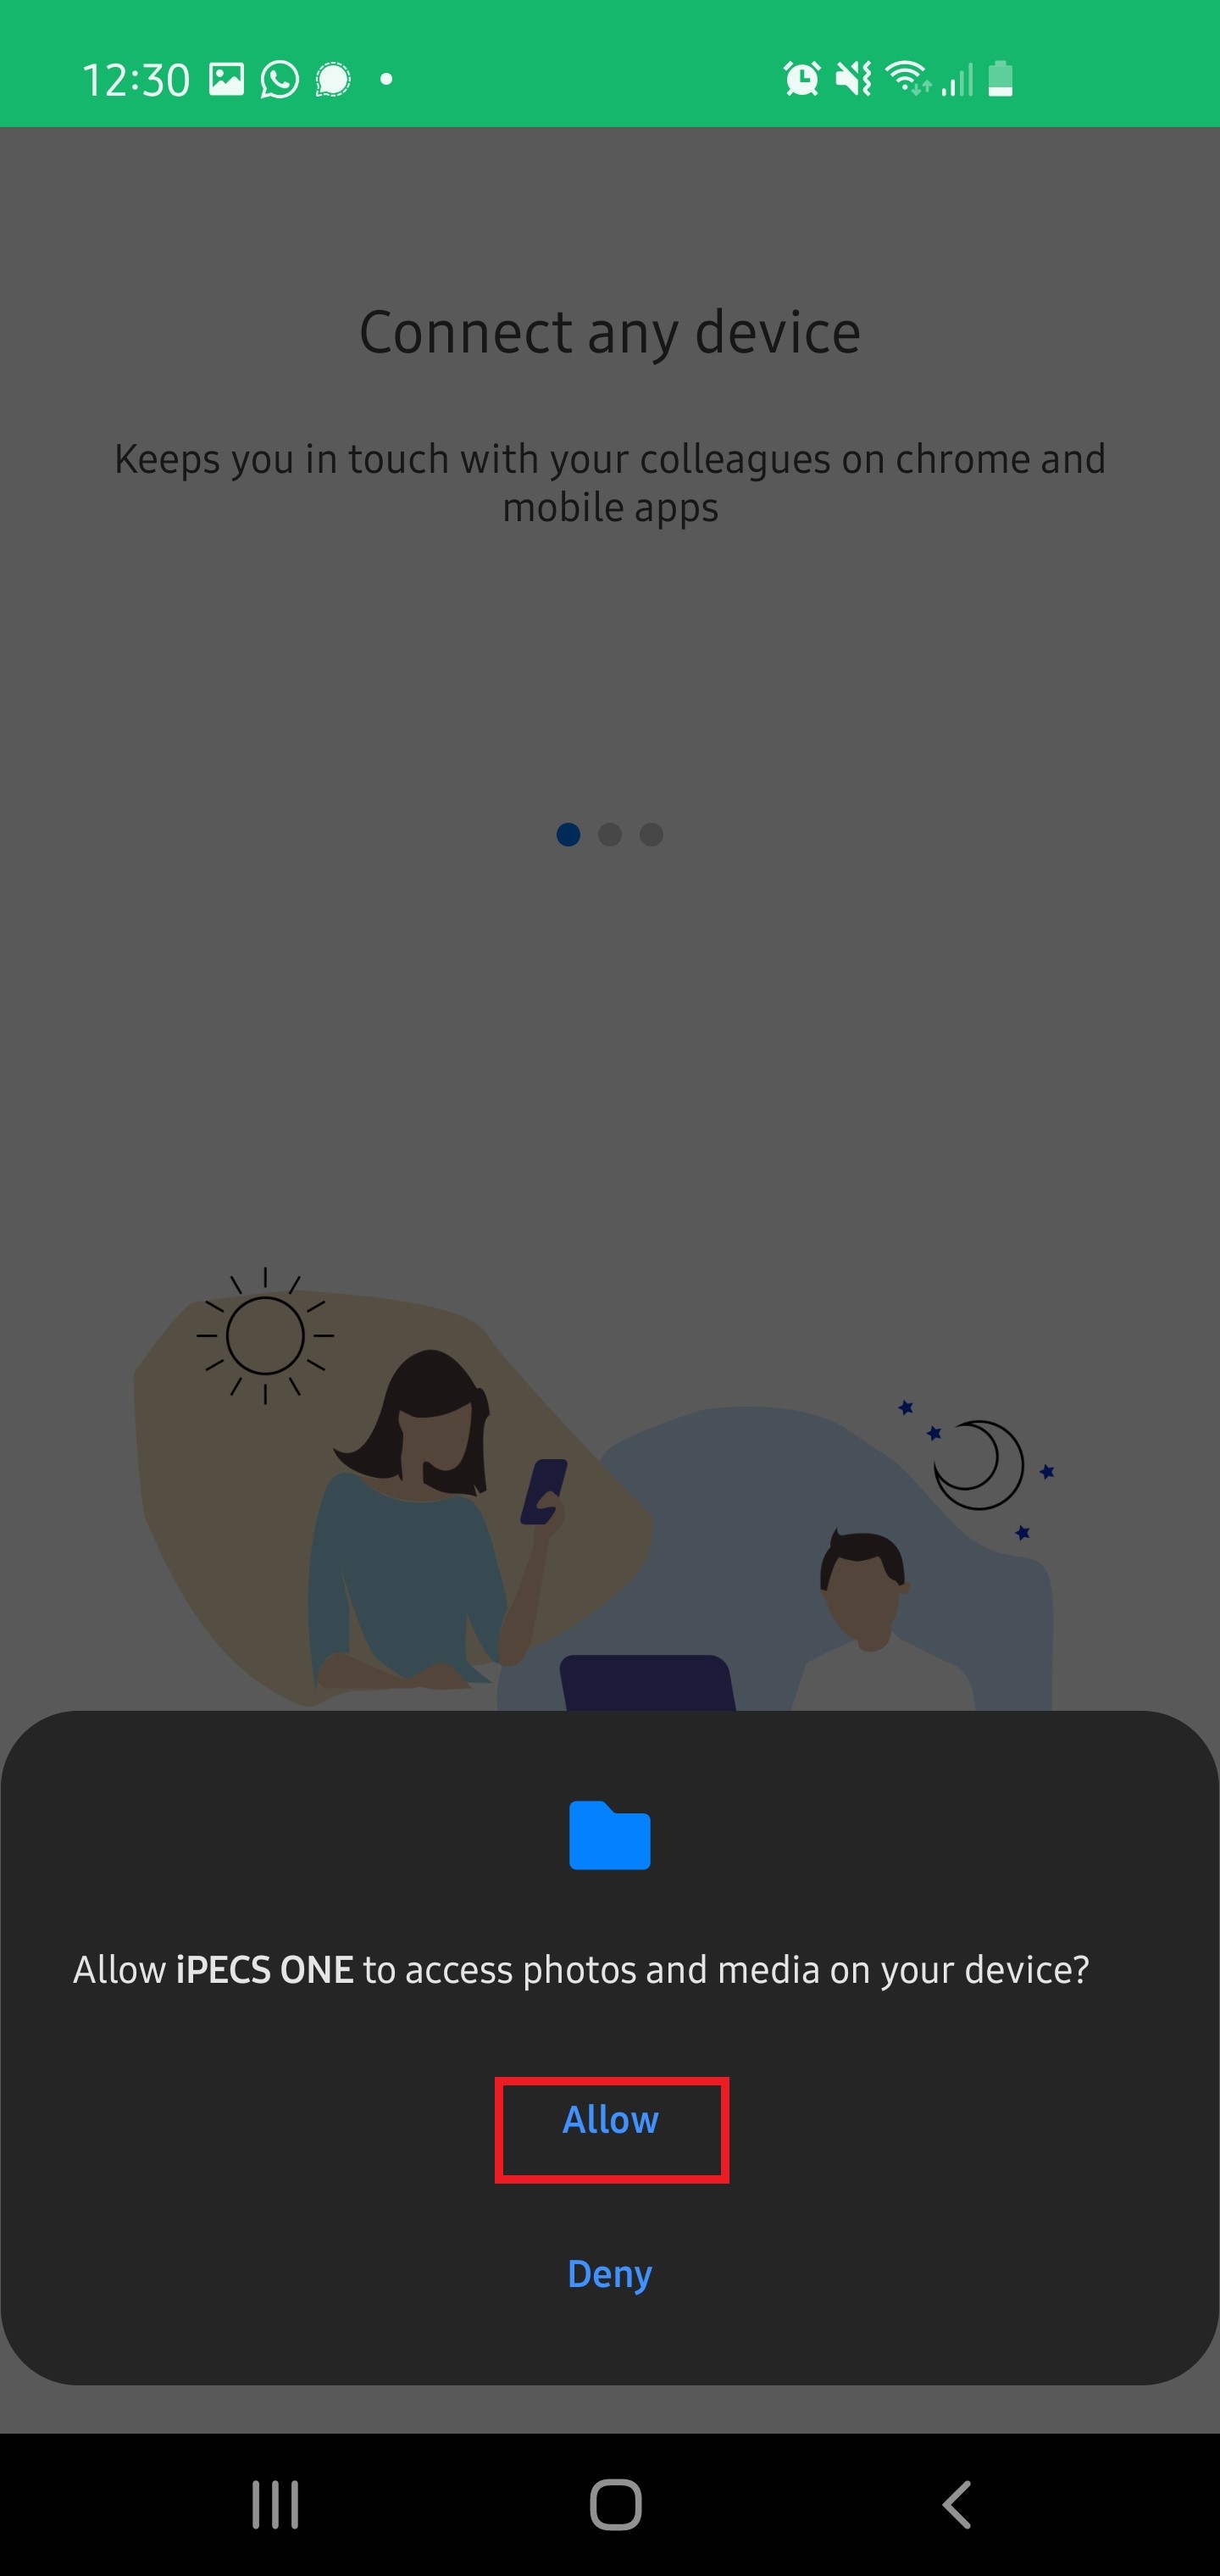
- You will now be requested to grant permissions to allow iPECS ONE app access photos and media on your device. Please select “Allow” as per the screenshot below.
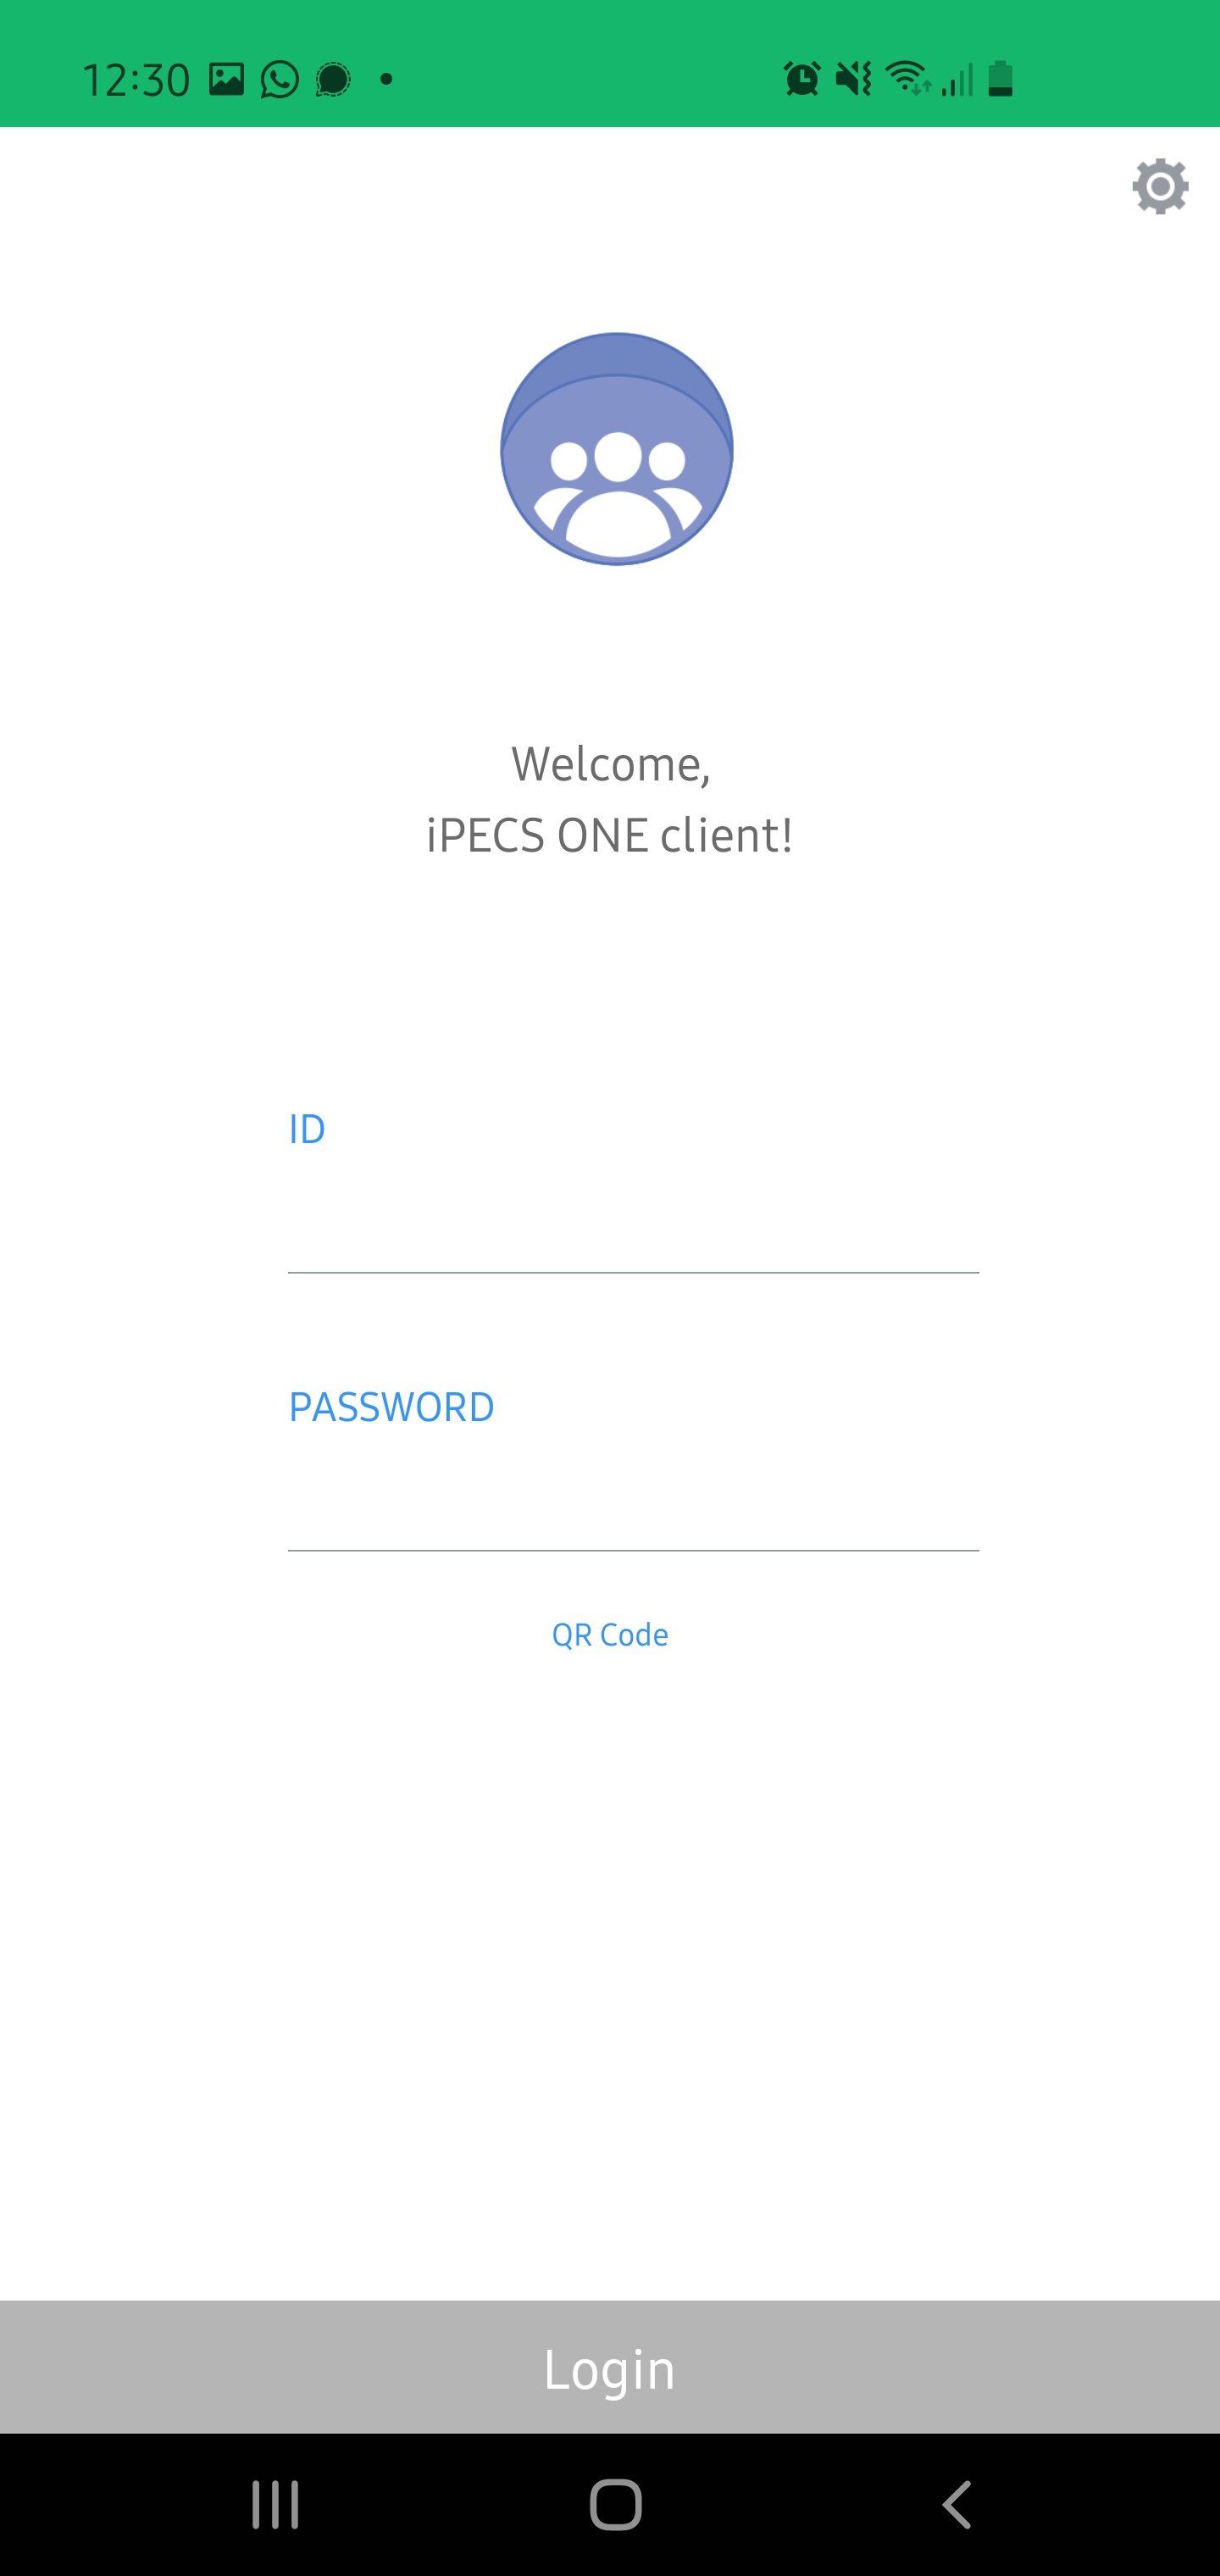
- Now the required settings and permissions have been granted you can either select “Next” through the overview of the app or select “skip” and go straight to the login screen. From here you can either scan a QR code using the link or alternatively you can manually configure the server settings using the settings icon at the top right and then manually entering a username and password.
If you require any further assistance then please log a ticket with our technical support team.
“

Leave A Comment