
1. Version Information
2. Document Purpose & History
This document is intended to provide the reader with the necessary steps to setup the Yealink W53H with a W60B on the cloud.
iPECS Cloud – Yealink W53H / W60B Setup
Note: This guide is to setup a Yealink W53H on a W60B base on the iPECS Cloud, if you are using a W70B base, please use a Yealink W70B licence.
Note: The W53H does display the CLI name from the Company Directory and the associated CLI number for an incoming trunk call
The first thing you will need before configuring the device is an authentication ID and password. If you need assistance on setting up a 3rd party SIP phone authentication ID and password please look at knowledge base article.
Important step to remember when setting up a 3rd party SIP device is in the image below:
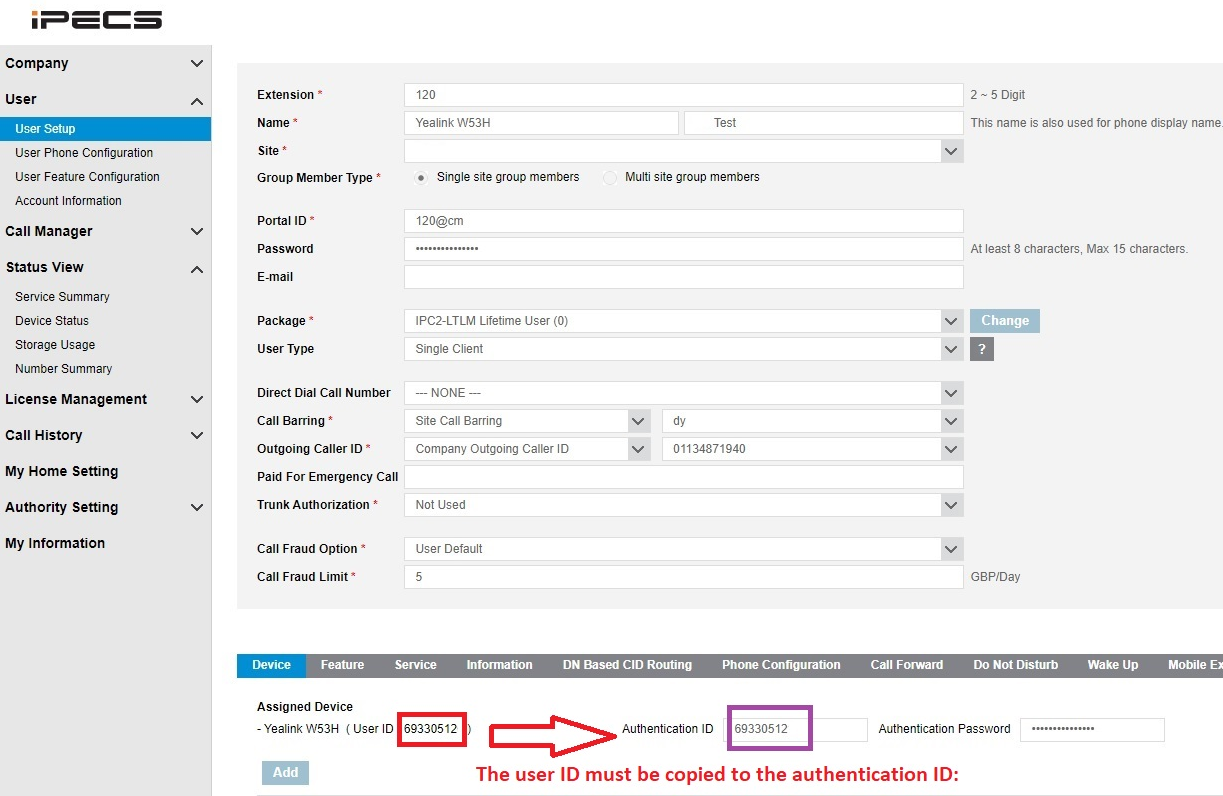
Now that the user is created, you will need to make sure that you have the correct User ID, Authentication ID and Password. This can be found against the user within User Setup as above.
You will also need to know the 3rd party SIP SBC address which is 185.110.180.13 (this will be different if you are a VSP reseller) – make sure this is set as the Outbound Proxy Server and Server Host in the device with 5060 as the preferred port.
To find the IP address of the Yealink W53H and the Yealink W60B base:
You can log into the Yealink through the HTML interface using the IP address that you will find by
Press ‘End call’ (red button) until you’re back on the home screen
Press ‘Ok’
Select ‘Status’ (the icon with a blue circle and the letter “i” in the middle) and press ‘Ok’
Select ‘Base’ and press ‘Ok’
The Yealink phone will show IP: and the IP address
1. Make sure that your computer is connected to the same network and then enter that IP address in your computer’s web browser address bar.
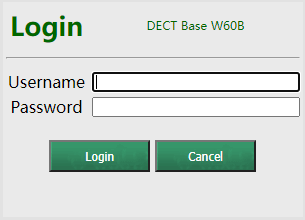
2. You should then see the Yealink login page, the default username is admin and default password is admin
1.) Go to the Account tab and then make sure the Line Active status is set to Enabled.
2.) Now enter your authentication ID from the cloud portal into the Register Name and User Name field.
3.) Lastly enter your password.
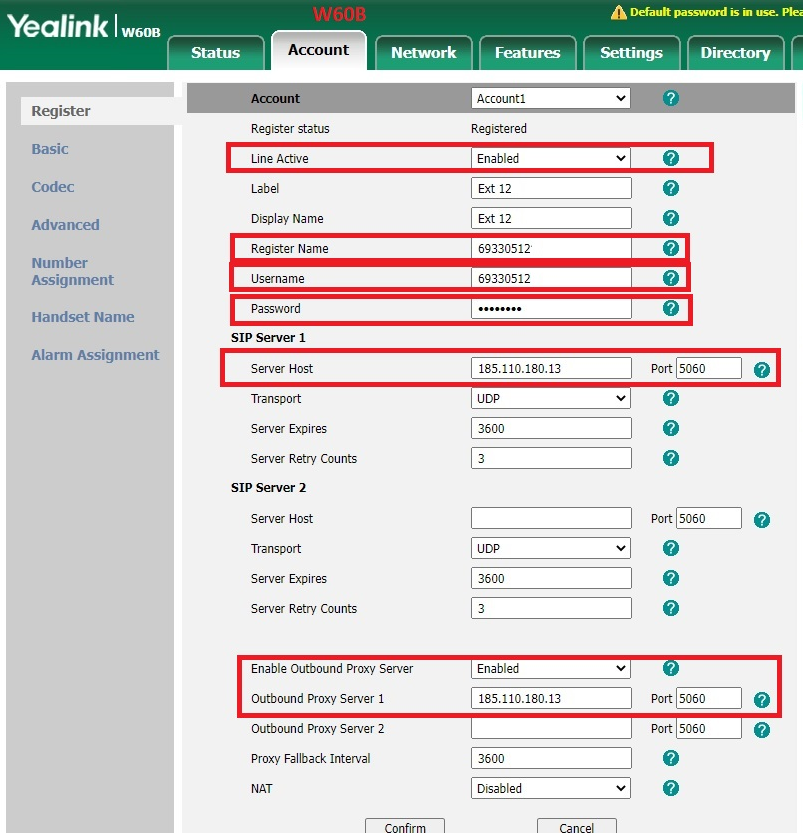
If all these details are correct your device will now register.
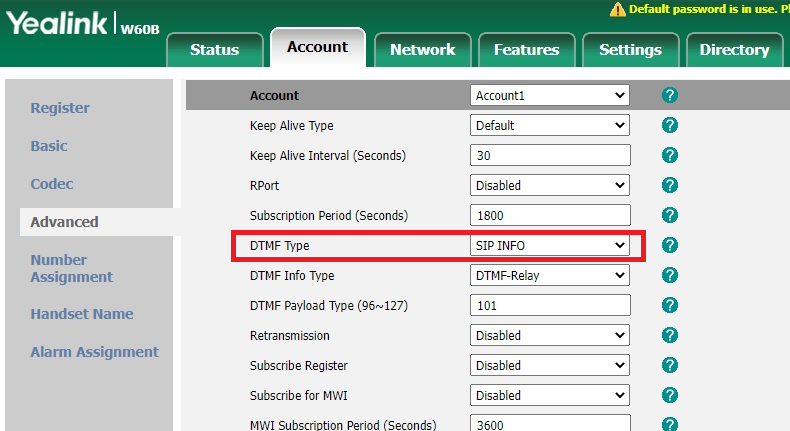
The other settings that need to be set but will not affect registration are DTMF and Codec.
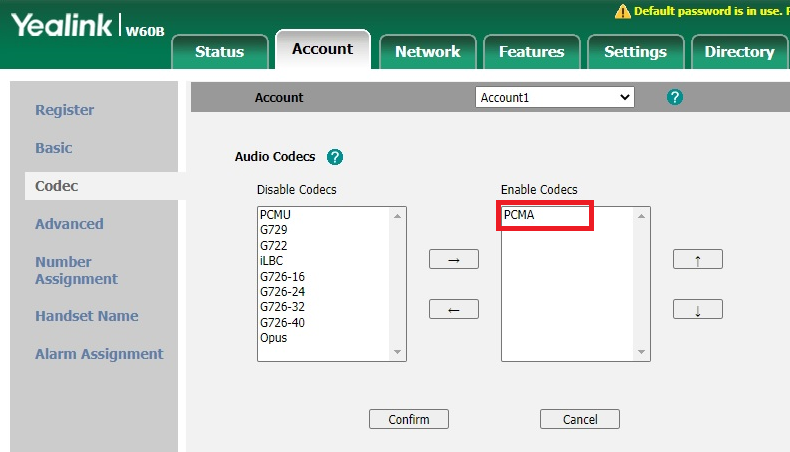
4.) The only Codec that must remain on the right as per the image is PCMA.
5.) The DTMF needs to be set to SIP Info as per the image:
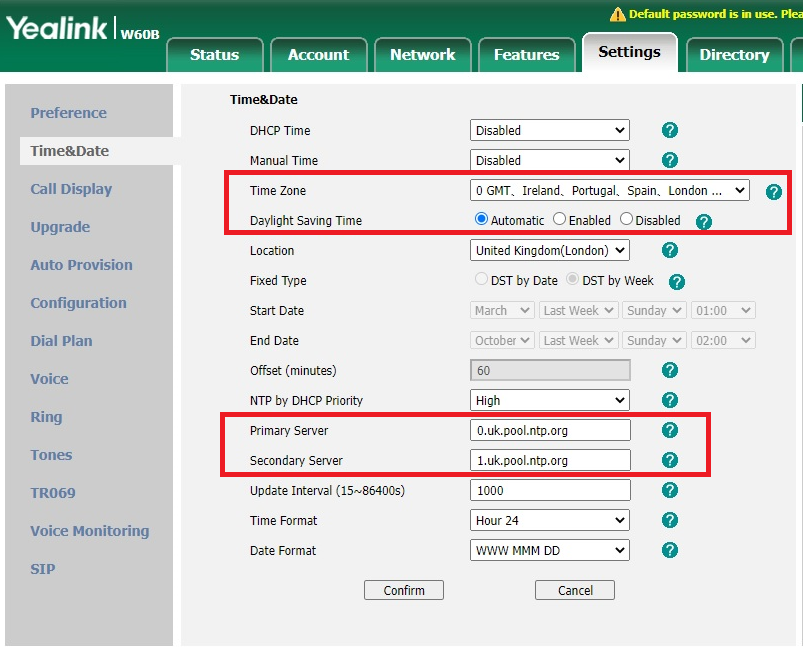
6.) Last you can set the time and date as below:
Best practice to secure your SIP DECT unit:
- Please take note that these settings are best practice and are not guaranteed to prevent the unit from unsolicited access.
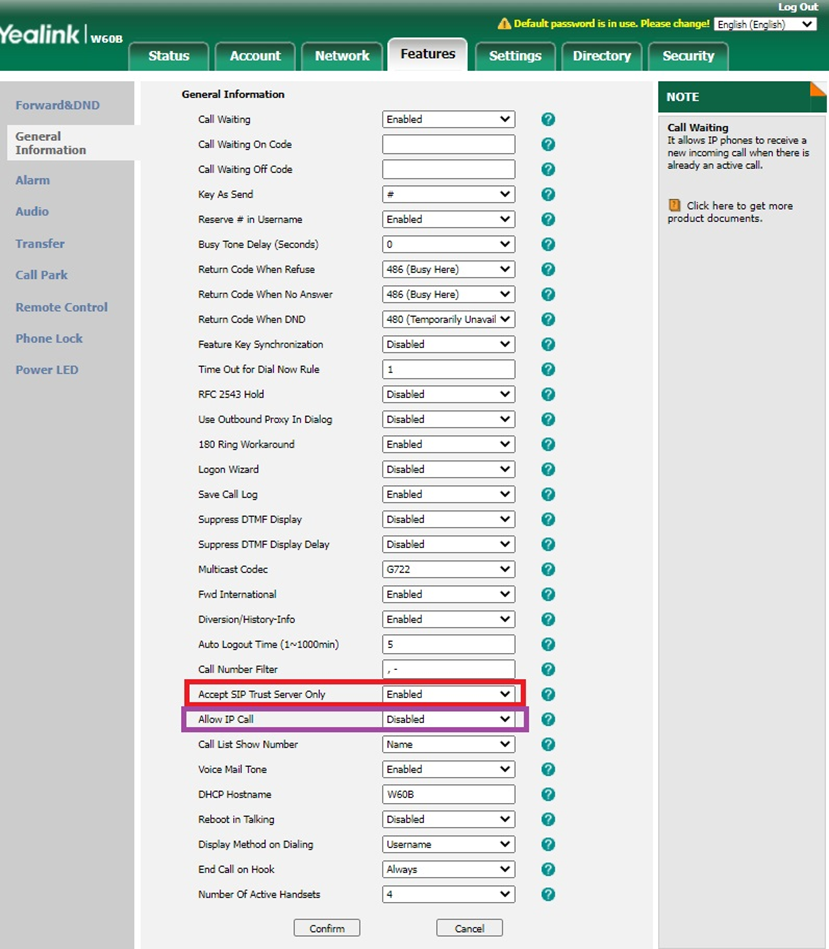
- Features tab under general information change, Accept SIP Trust Server Only to Enable. (Red)
- Features tab under general information change, Allow IP Call to Disable (Purple)
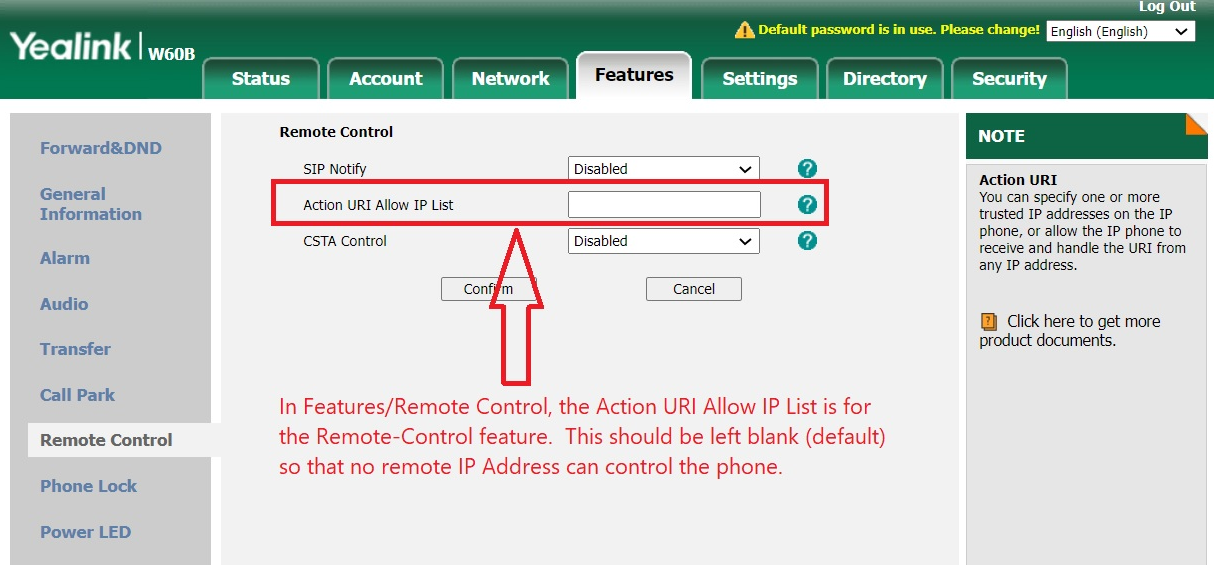
- In Features/Remote Control, the Action URI Allow IP List is for the Remote-Control feature. This should be left blank (default) so that no remote IP Address can control the phone.
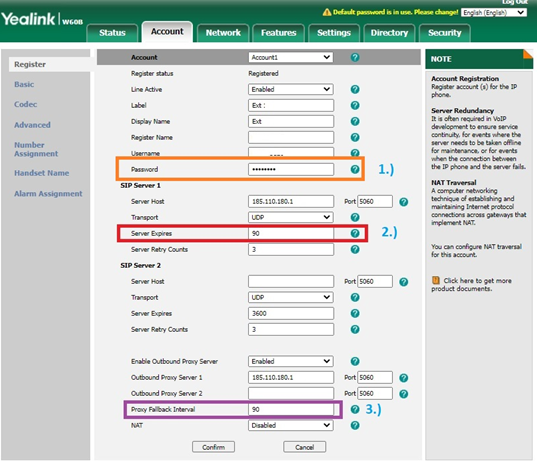
- Account tab left side Register and change Password, this password must be as secure as possible so please use uppercase & lowercase letters characters and numbers as a combination.
- Account tab left side Register and change Server Expires, change to 90 seconds.
- Account tab left side Register and change Proxy Fall-back Interval to 90 seconds.
-
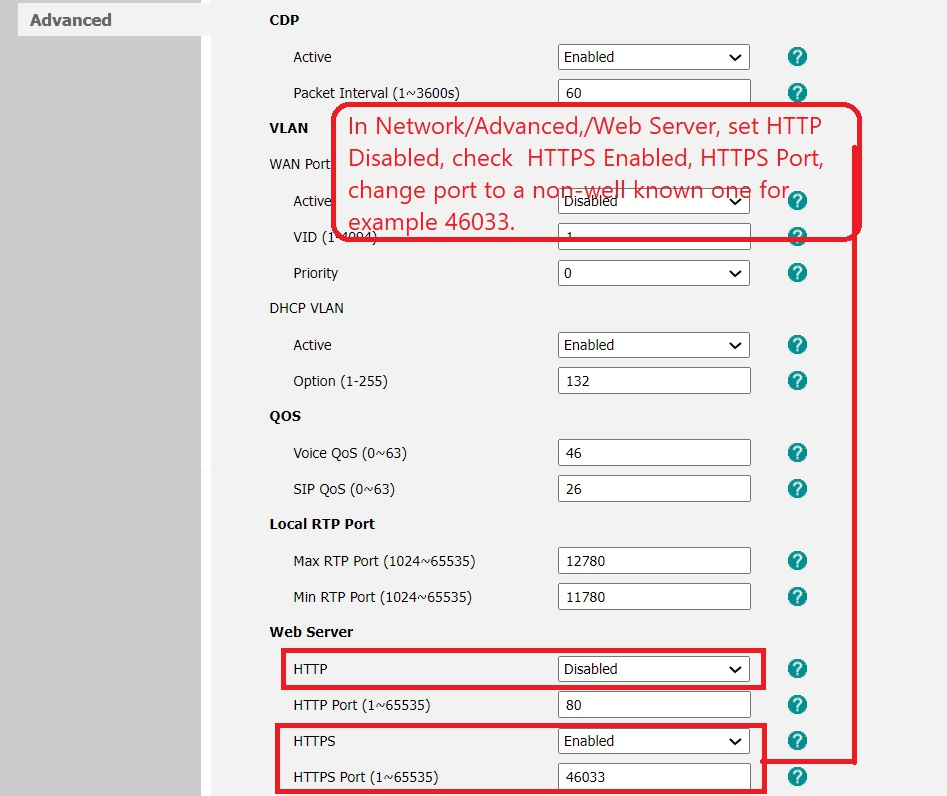
In Network/Advanced,/Web Server, set HTTP Disabled, check HTTPS Enabled, HTTPS Port, change port to a non-well known one for example 46033.
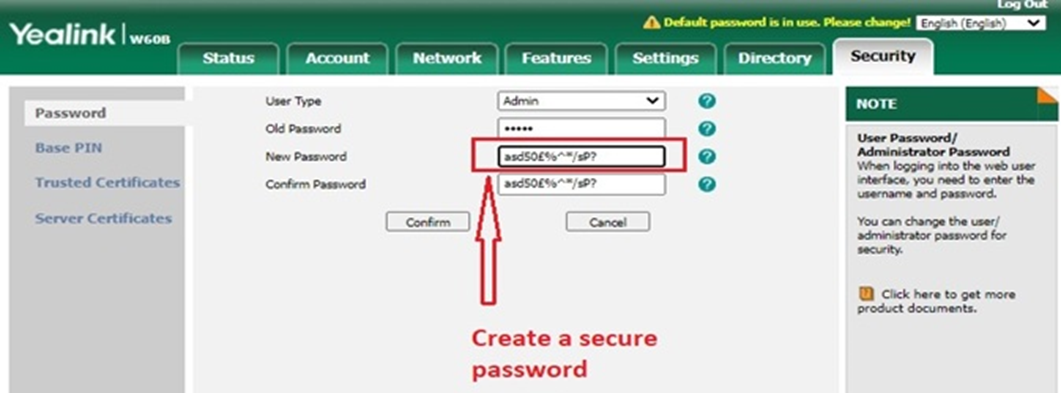
- Lastly secure the login details as the admin login, create the password as secure as possible as per the below screen shot. Do not use the same password on multiple devices as it compromises your password. At the time of testing the maximum length password was 28 characters. If you use mot than 28 characters, then it will be accepted but you would not be able to login to the device and will have to default it.
“

Leave A Comment