
1. Version Information
1.1
1.2
1.3
2. Document Purpose & History
This document is intended to provide the reader with the necessary steps to setup the Yealink W52P and Yealink W53 on the cloud.
iPECS Cloud – Yealink W52P and Yealink W53H Setup
The first thing you will need before configuring the device is an authentication ID and password. If you need assistance on setting up a 3rd party SIP phone authentication ID and password please look at knowledge base article
Now that the user is created, you will need to make sure that you have the User ID, Authentication ID and Password. This can be found against the user within User Setup and then in the device tab from within the cloud portal. The KB can be found here.
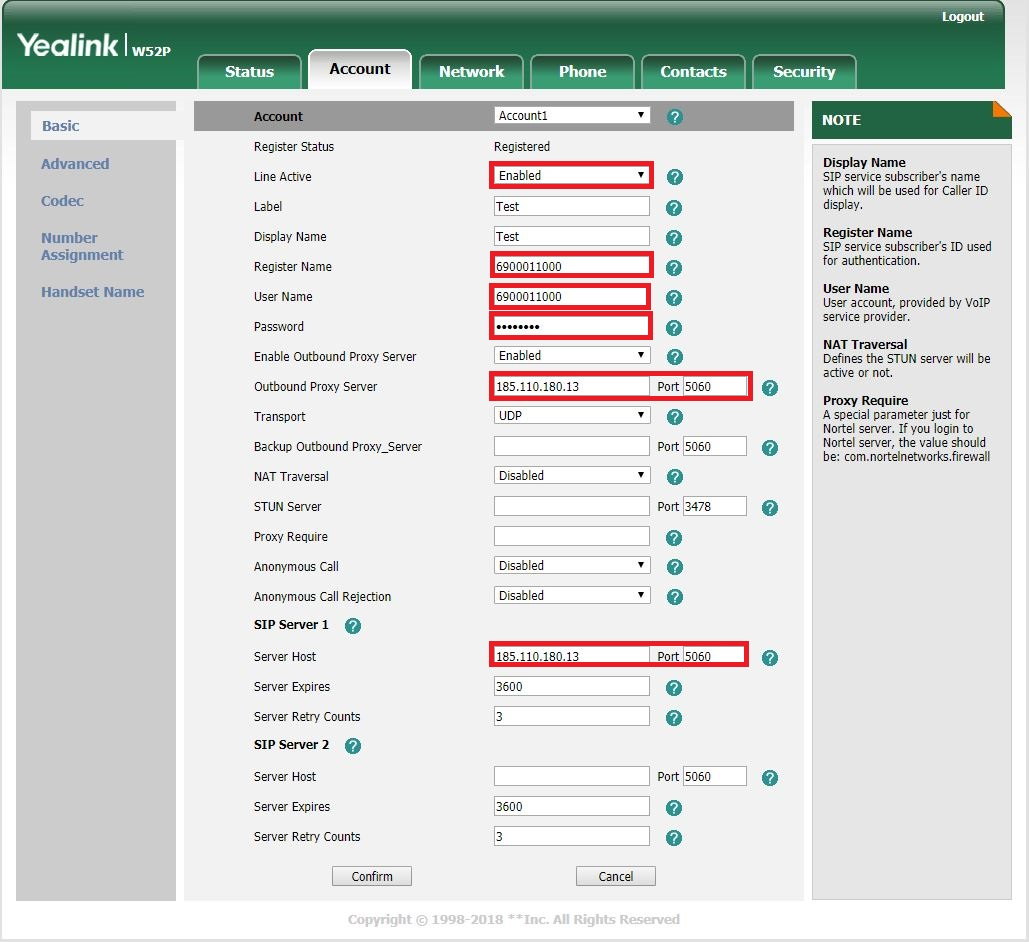
You will also need to know the 3rd party SIP SBC address which is 185.110.180.13 (this will be different if you are a VSP reseller) – make sure this is set as the Outbound Proxy Server and Server Host in the device with 5060 as the preferred port.
Then make sure the Line Active status is set to Enabled.
Now enter your authentication ID from the cloud portal into the Register Name and User Name field.
Lastly enter your password.
To find the IP address of the Yealink W52p and the YealinkW53 base:
Press ‘End call’ (red button) until you’re back on the home screen
Press ‘Ok’
Select ‘Status’ (the icon with a blue circle and the letter “i” in the middle) and press ‘Ok’
Select ‘Base’ and press ‘Ok’
The Yealink phone will show IP: and the IP address
2. Make sure that your computer is connected to the same network and then enter that IP address in your computer’s web browser address bar.
3. You should then see the Yealink login page, the default username is admin and default password is admin.
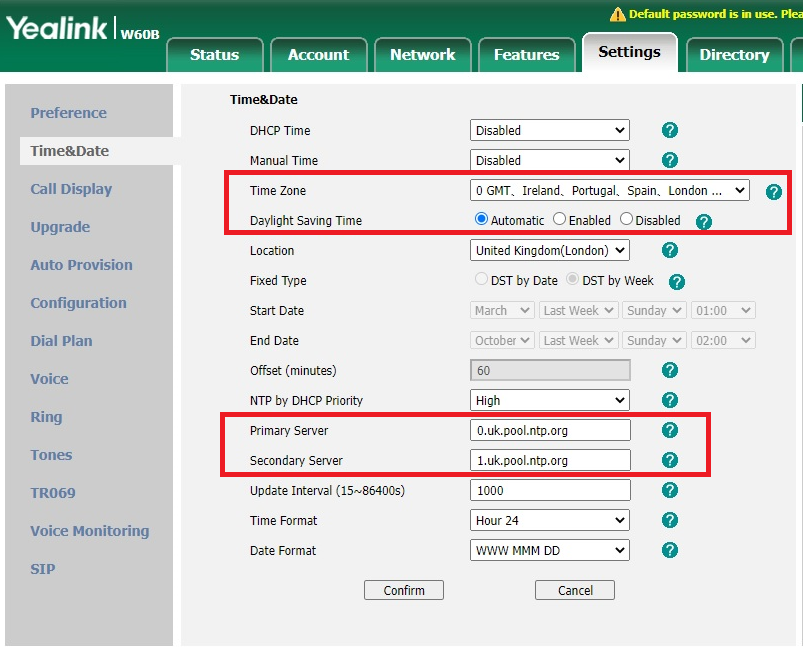
This screen is for the W60B – same settings slightly different layout:
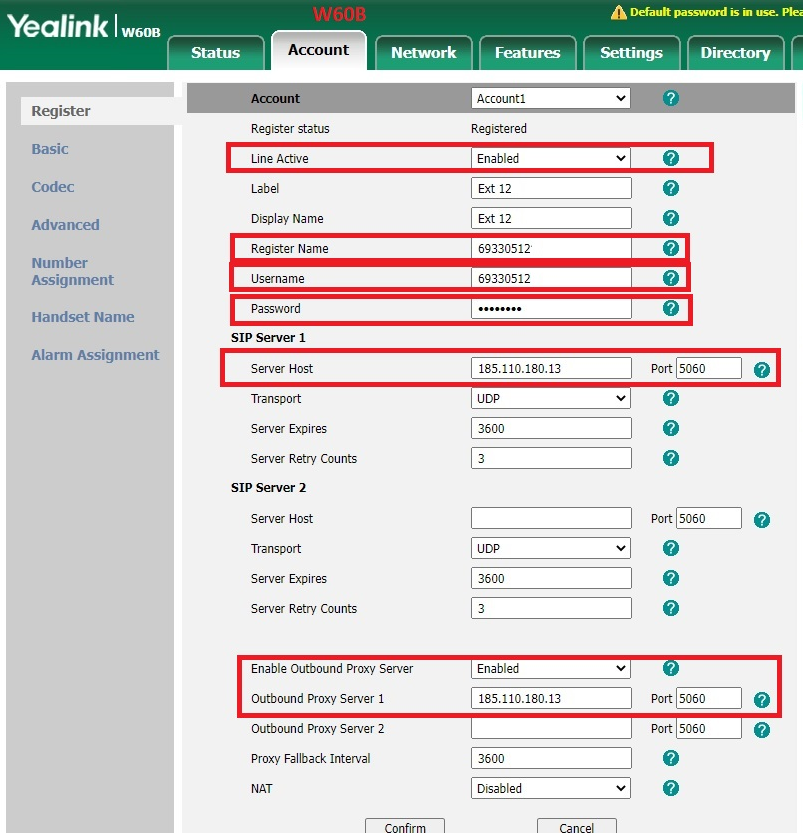
If all these details are correct your device will now register.
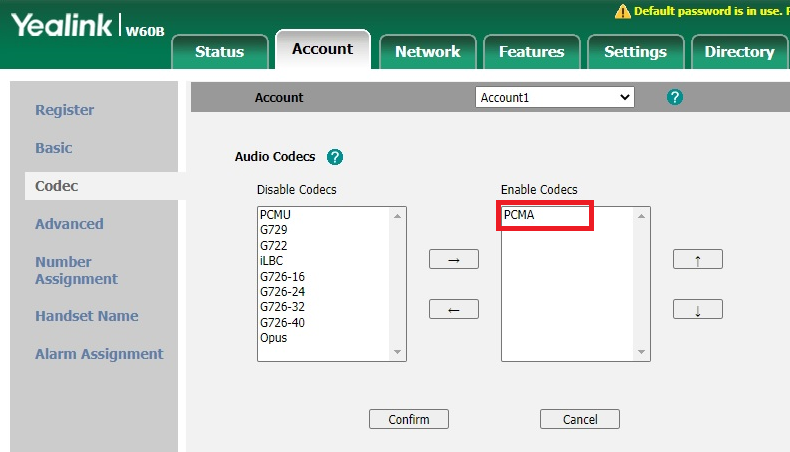
The other settings that need to be set but will not affect registration are DTMF and Codec.
The only Codec that must remain on the right as per the image is PCMA.
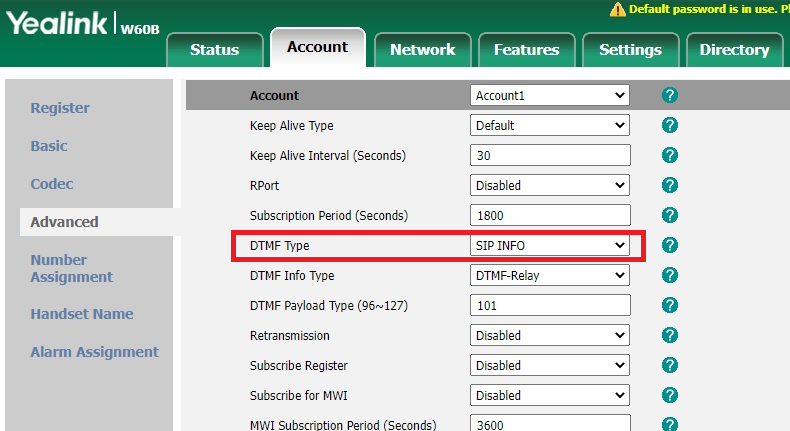
The DTMF needs to be set to SIP Info as per the image:
Time & Date you can set the time and date as below:
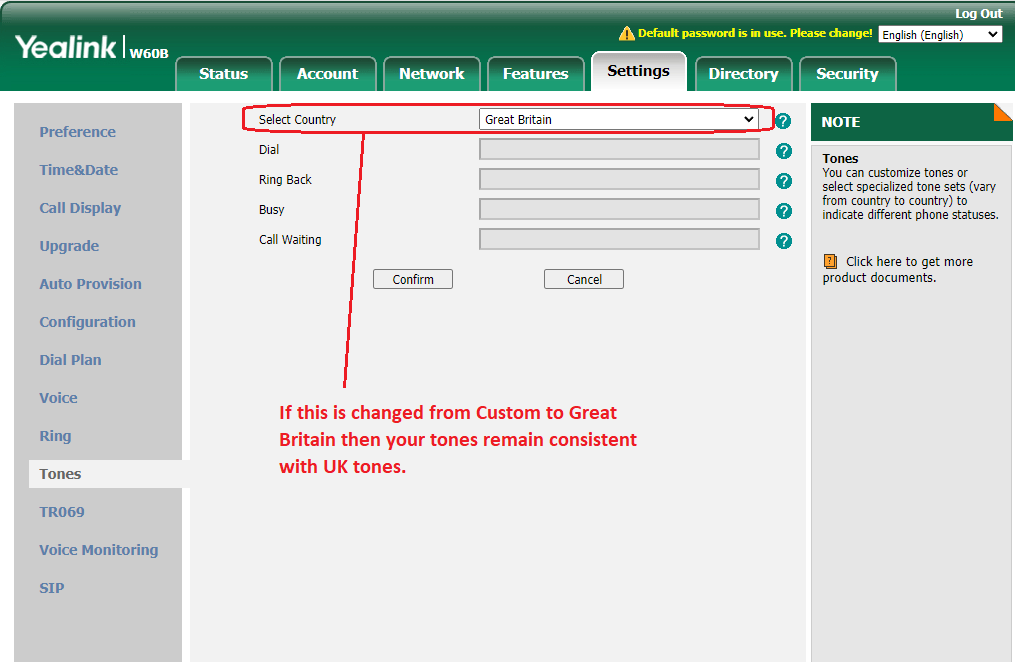
Comfort tones used in the UK.
“

Leave A Comment