
1. Version Information
2. Document Purpose & History
This document is intended to provide the reader with the necessary steps to setup Web Fax.
Alternatively, please find the video here.
iPECS Cloud – Web Fax User Guide
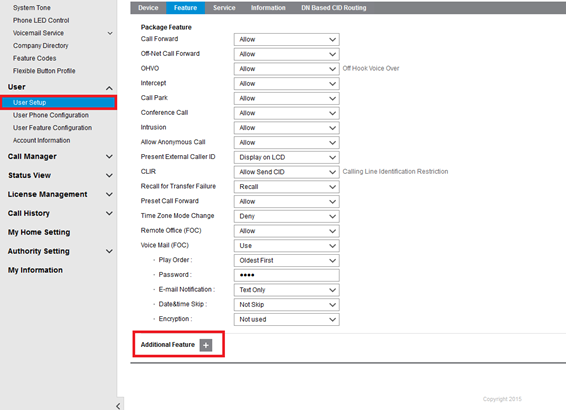
To utilise the Web Fax feature, first you will need to assign the Web fax licence to the users that you would like to use.
To add this licence go to User Setup, select your User then click Additional Features at the bottom.
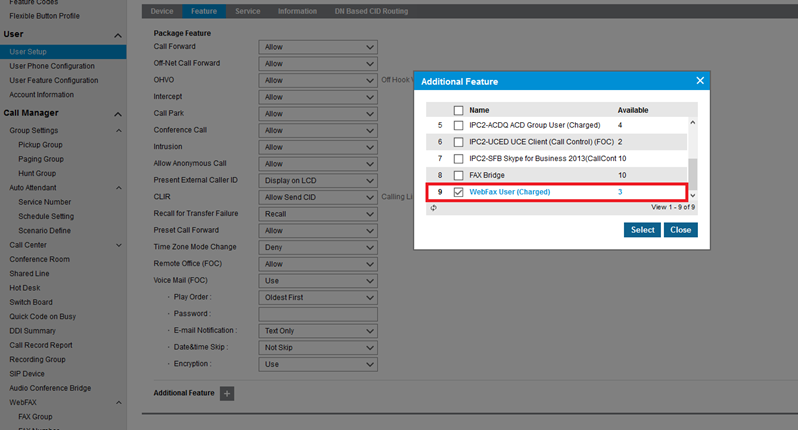
You will now see a popup with additional licences that can be added. We need to select and add the Web Fax User to enable the user to be set for fax.
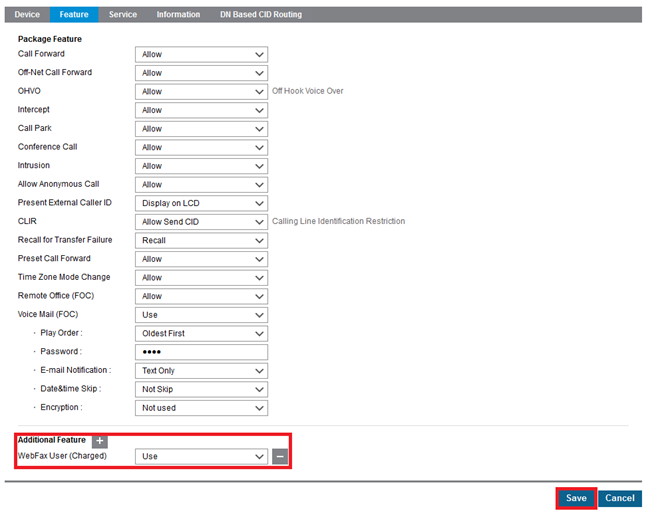
Once you have selected this you will need to Save the user to link the licence.
Now go to the user/s linked with the correct Web Fax User licence, we will need to configure our Fax Group.
First navigate to FAX Group to share a fax number with multiple members – if you want to do a single user fax then you can skip this step.
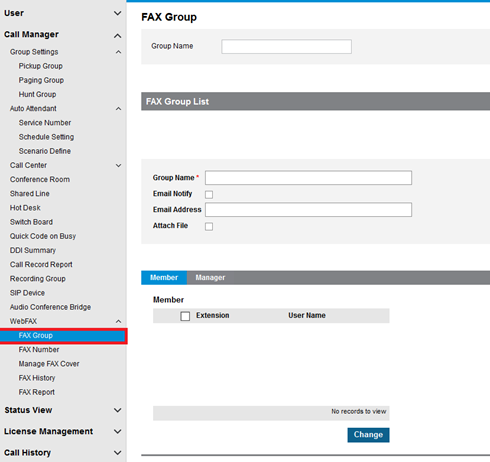
Next input the Group Name and email that will be linked with the group.
You can also choose if you receive email notification and attaching files for any faxes received by this group.
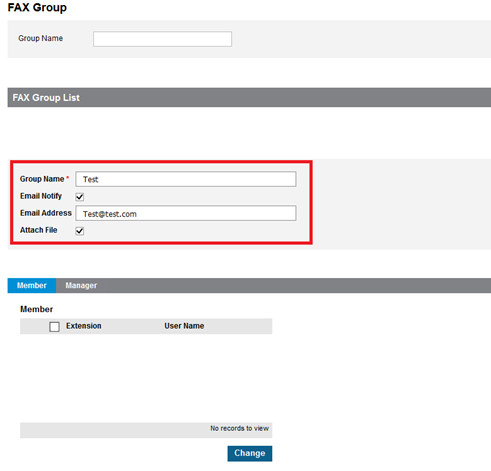
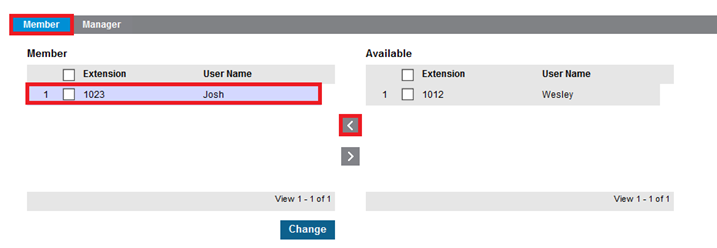
Now add the Members to the group. Click change and then move the user in to the group.
The Fax Group member is a user who has the ability to receive the fax’s if assigned by the Fax Group Manager.
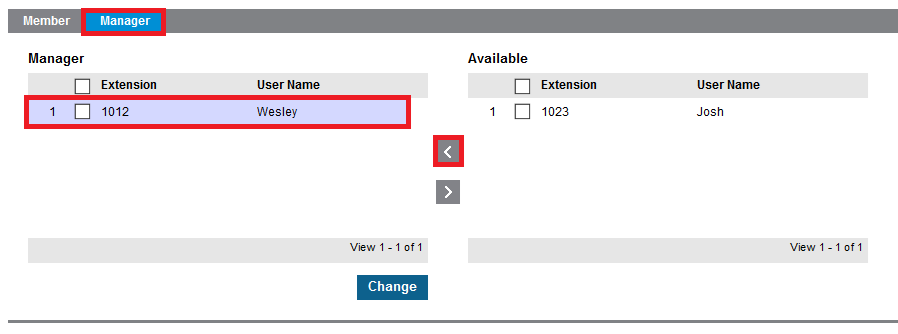
Add the Managers to the group. Click change and then move the user in to the group.
The Fax manager can first check the fax received by the fax group number and assign it to the appropriate member.
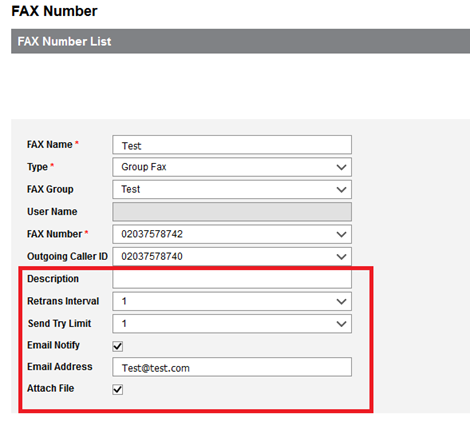
Next go to FAX Number to create our fax settings.
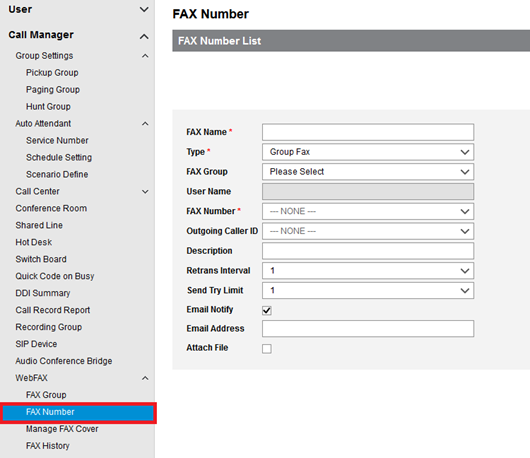
Now set the Fax Name, Fax Group Type this will be either Group Fax or User Fax linking the fax to either one user or many.
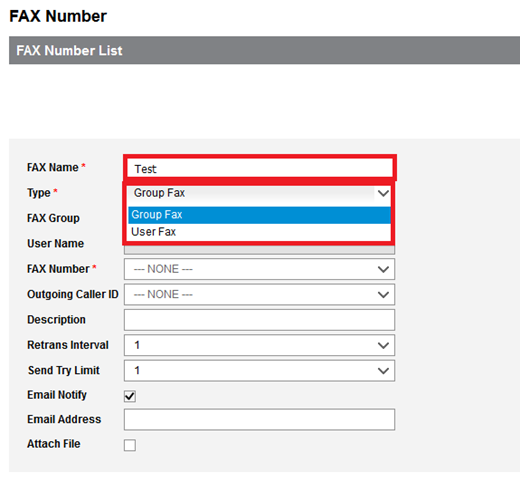
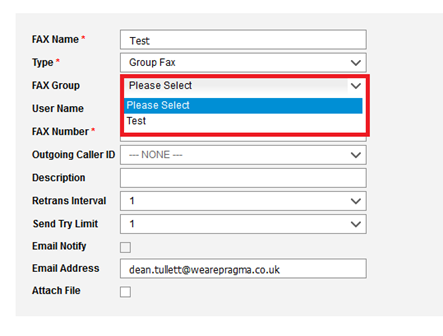
Then choose what will be set for the fax group. There are two options group or user. If the group is selected you will be able to choose from the created groups.
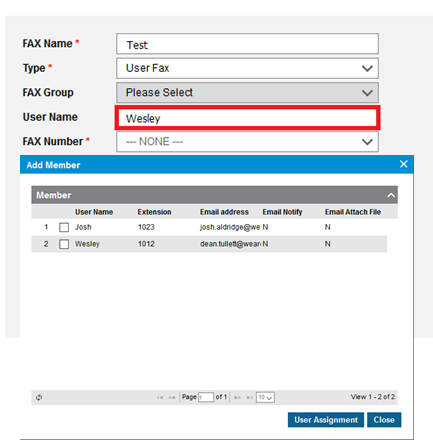
If the user is selected then you will be able to select from the users that have the web fax licence, once selected it will then populate the user name.
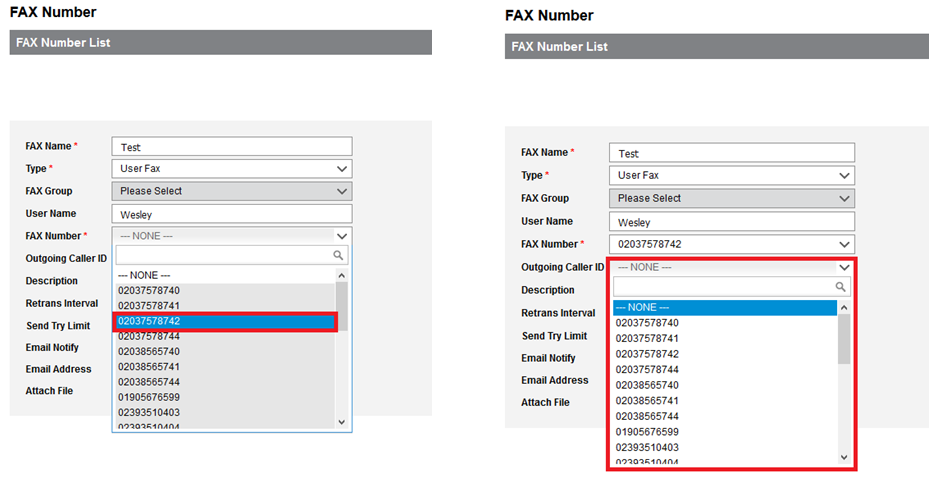
Next set the Fax Number this is the number fax’s will be sent to.
We will then need to set to Outbound CLI that the fax will be sent from.
Set a description and Retransmit interval and Send limit this is how many times the system will try to send the fax.
We can also change the option for email notification/ file attachment or amend the email linked with the Group / User. Once done then save
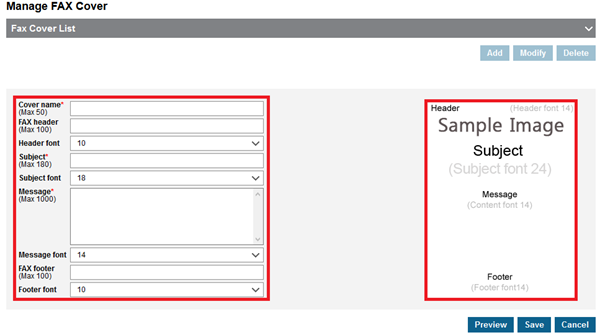
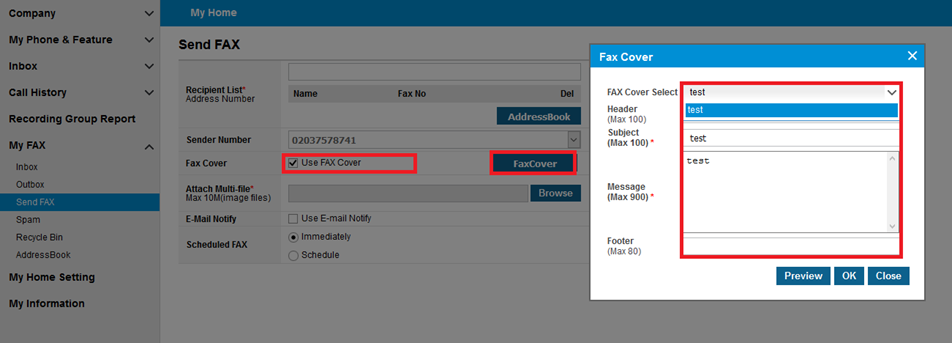
Navigate to Manage Fax Cover, from here we are able to create a Cover page that can be sent before the Fax.
Click add then you will be able to enter your text to show, the fields amendable are Cover Name, Fax header, font size, Subject, Message and Footer.
You will also see the layout on right hand side and preview this by selecting the preview button.
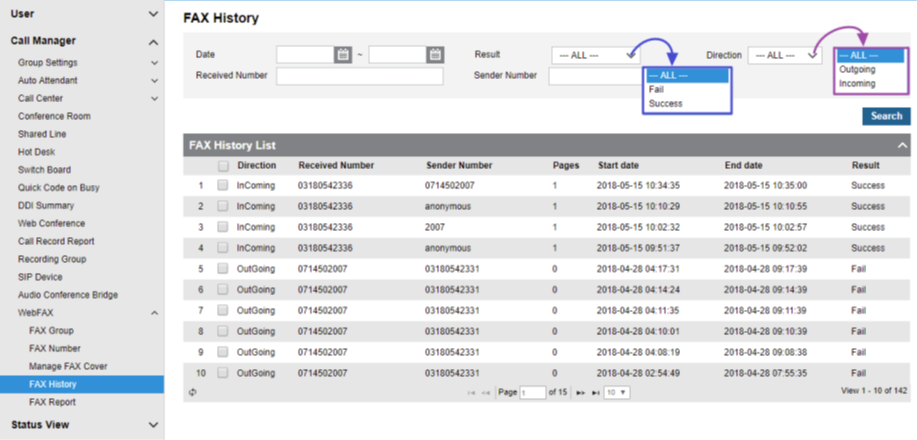
Go to Fax History this will show all of our historical fax’s.
We will also be able to sort by Result and Direction.
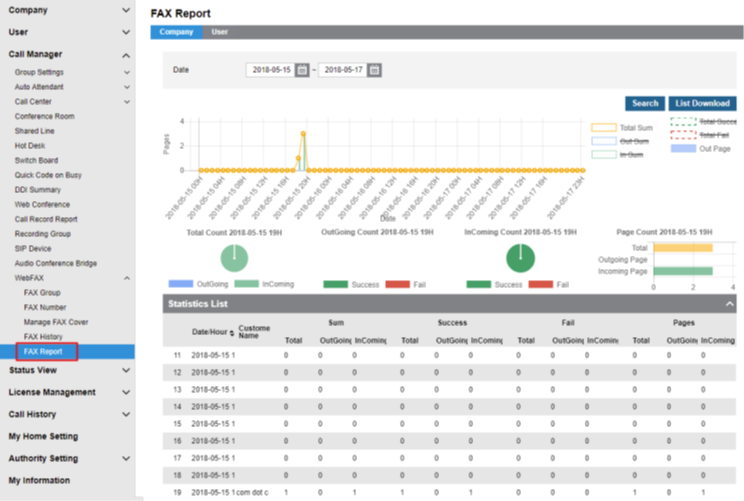
The final section on the customer manager we should go to is Fax report, this shows a statistical break down of your faxes.
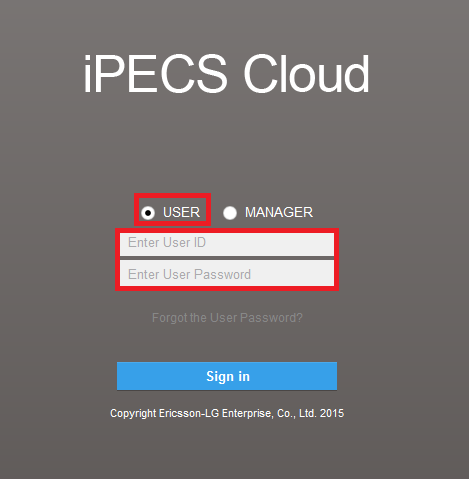
To configure the Fax in the Customer Manager portal we need to login as the user to utilise the fax options. Login to the user portal with your extensions portal ID and Password.
Next go to the user portal and navigate to the fax section of the user portal.
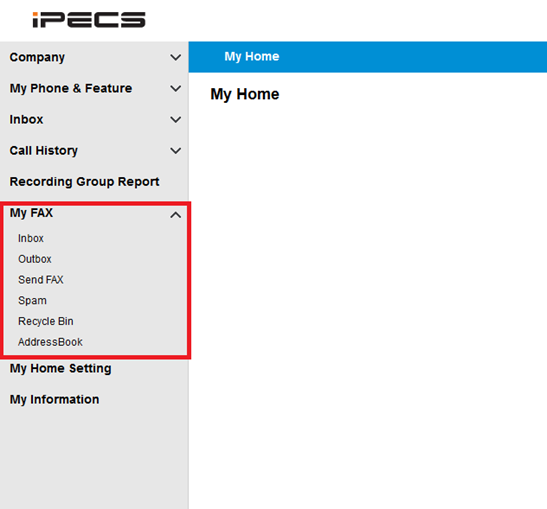
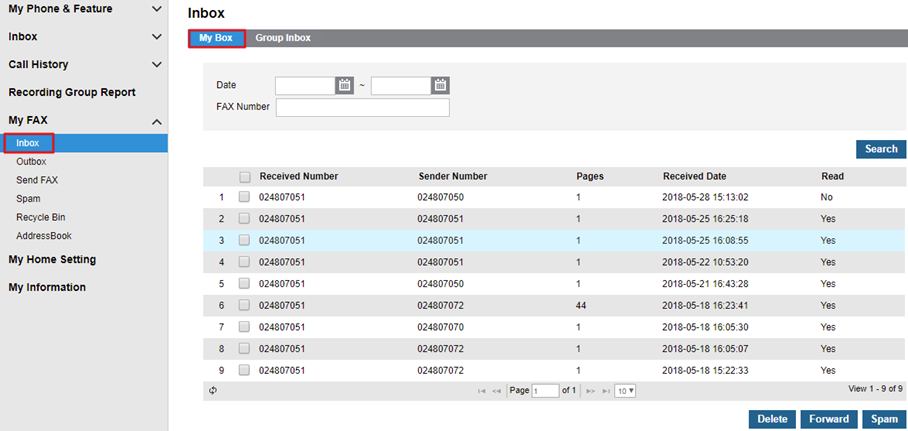
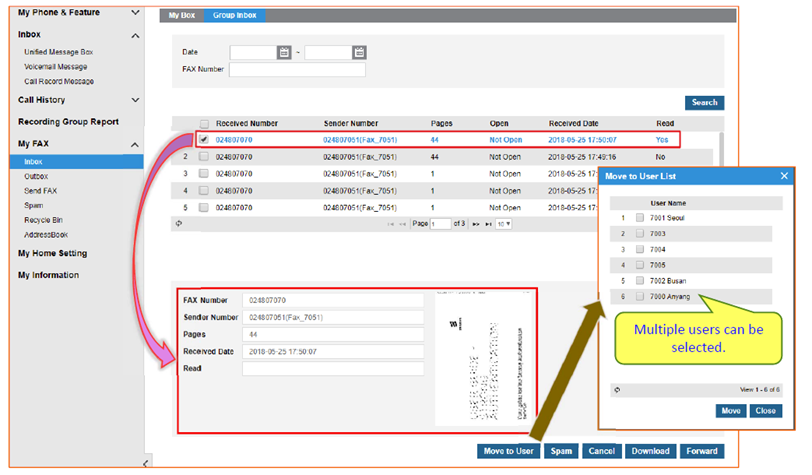
Go in to the inbox which has two sections. My Box shows faxes received by a User Fax.
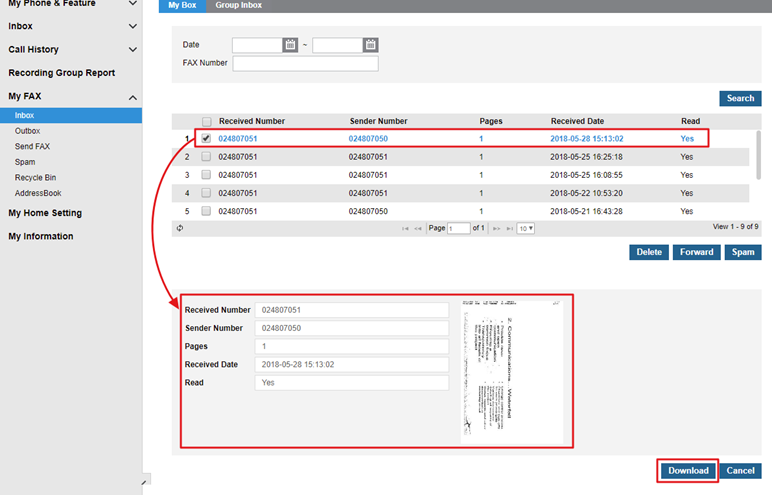
Select one of the faxes that has been received and you will be able to see further information and a preview of the fax, this can also be downloaded.
Within the group inbox view Fax’s sent to the group mailbox we can then move this to the relevant member in the group.
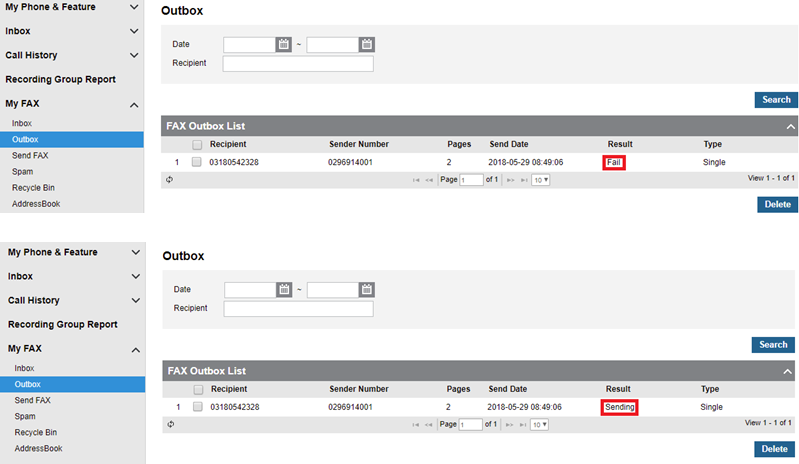
Next select Outbox this will allow us to view the status of sent / sending faxes.
As shown below we will be able to see if this has failed.
Navigate to Send Fax to instigate an outbound fax.
To select the recipient of the fax this can either be entered manually or you can select a record from the address book.
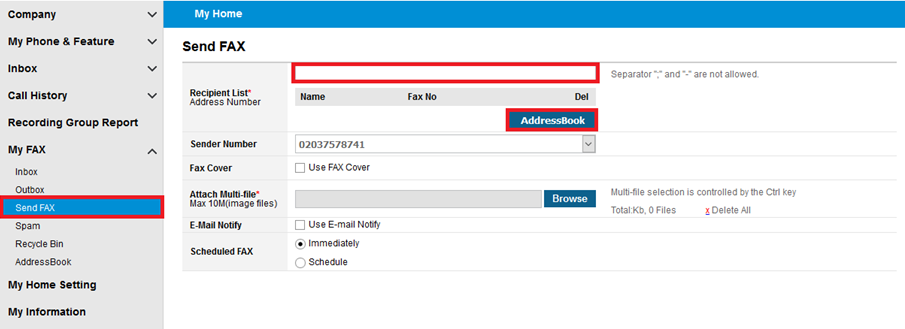
Select the outbound CLI that will be used for faxing. This will be chosen from the Sender Number drop down list.
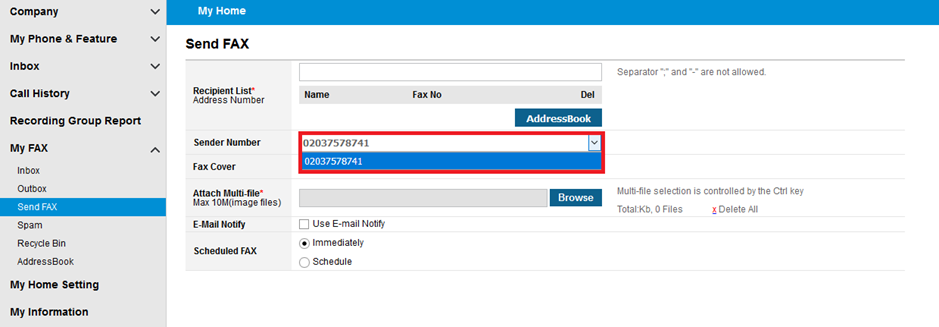
Now we can select if we are going to be using a Fax Cover.
If this feature is being used first tick the radio box and then you will get a pop up that will show your available Fax Cover’s to select from.
Choose the file that we are going to be sending, select Browse next to Attach Multi-file. We will now be able to select our file/s that we would like to add to the fax.
Once the files have been linked you will be able to see the total files and size and you also have the option to delete all files.
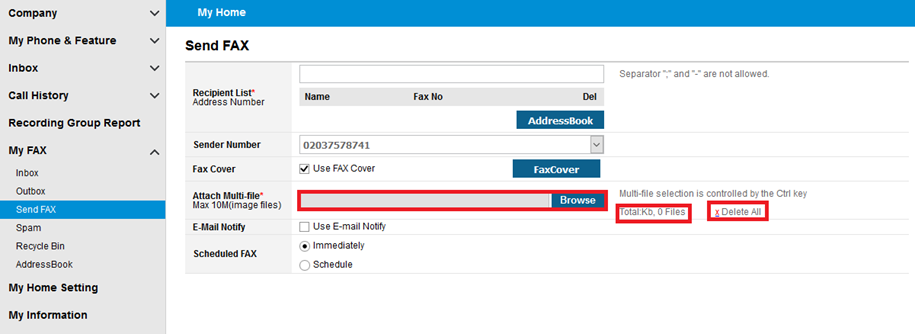
NOTE : To select multiple files use the control key and click the files.
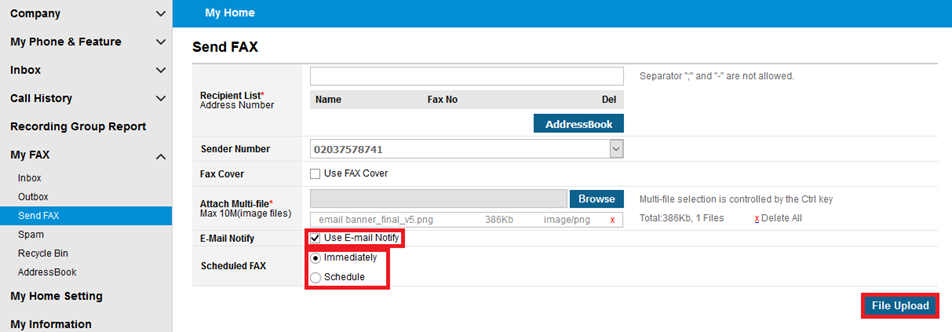
Select if we will received an email notification if the fax has been sent correctly or if it has failed.
Select when the fax will be sent either immediately or you can set this for a specific time.
Finally you can select to upload the file.
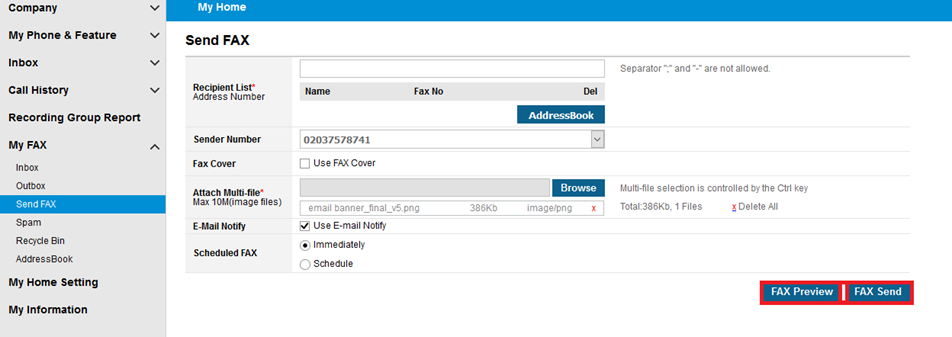
Choose to preview the fax and if we are happy with this we can then look to send the fax.
Navigate to Spam, in this section we can select numbers to be marked as spam and also view our spam list.
This will ignore fax’s from this user in the future, automatically sending any fax’s received by them to the spam box.
You can add view and delete user from the options at the bottom of the screen.
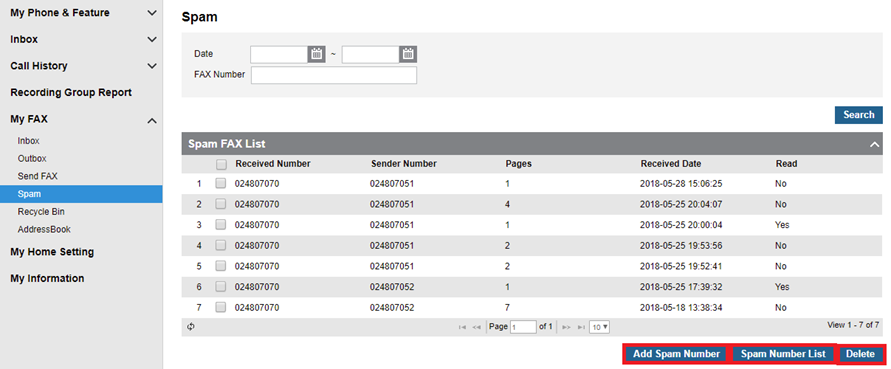
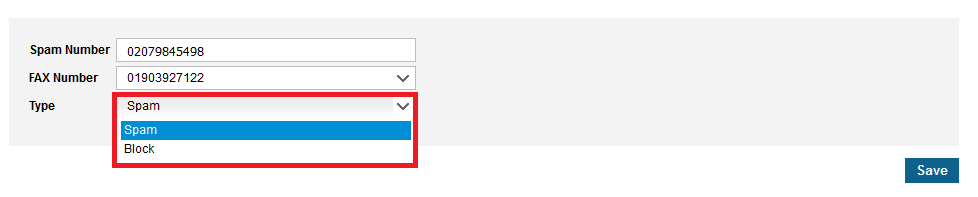
When we set a number to be set as spam we can choose to either set the record as spam or block the user completely.
This will then stop the number from having any contact with your fax service.
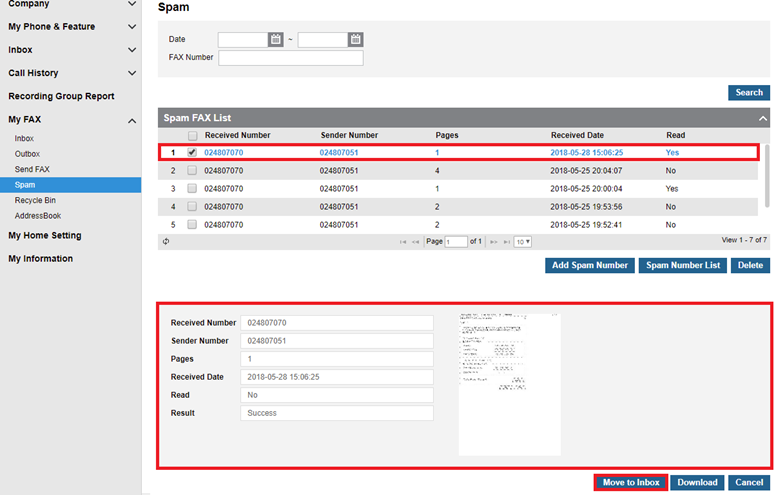
We can also move items back from the spam folder if they are not spam items. To do this select the row then select move to inbox.
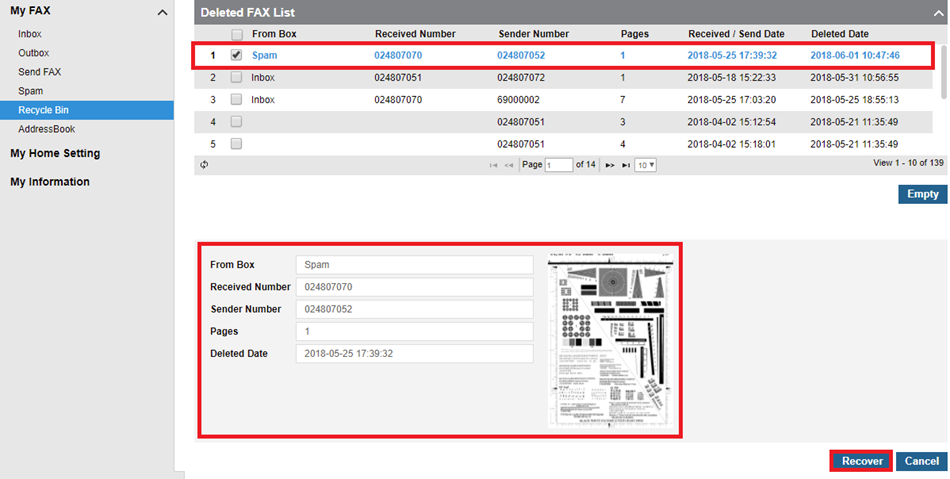
The Recycle Bin this is where any deleted fax’s will go.
In the Recycle Bin we have the option to select any fax’s and then empty to permanently delete the fax.
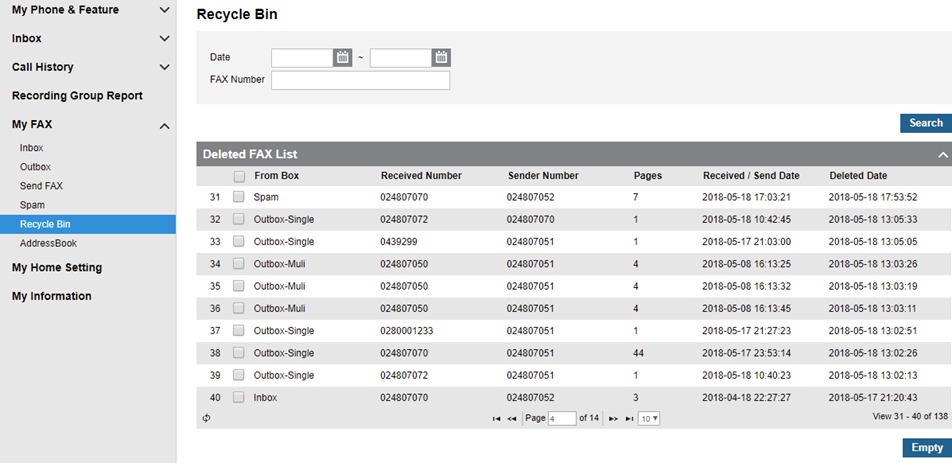
We can also reinstate any fax’s that may have been removed by accident.
To do this select the row and then select recover, this will send the fax back to the inbox.
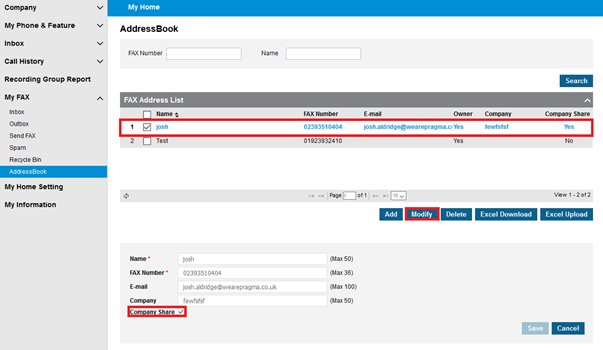
The final section that can be configured on the system is the Address book, this allows us to add contacts to be easily selected when sending fax’s.
This is done either manually for an individual record by clicking add, or if you have a large number or records you can upload an excel document.
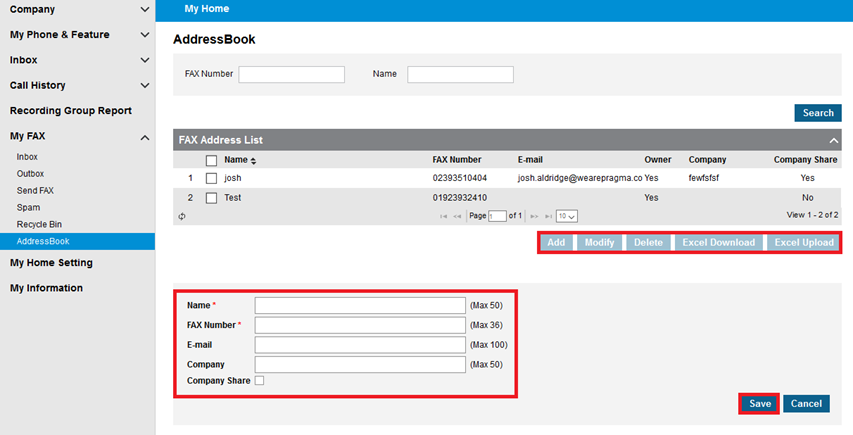
Records can be shared with the other fax users on the system by selecting the record as Company Share. This can be done when creating the user or can be modified on existing records.
“

Leave A Comment