
1. Version Information
2. Document Purpose & History
This document is intended to provide the reader with the necessary steps to setup the Grandstream HT802
iPECS Cloud – Grandstream HT802 Guide
Please check for the latest firmware for the HT802 and upgrade. https://www.grandstream.com/support/firmware
If this is to be used for an Analogue Door Phone, please check the compatibility of your Door Phone. The HT802 is 24v and may not work with your Device. We strongly advise to use the SIP Door Phones on the approved list. Pragma are unable to confirm compatibility of any 3rd Party Device used on HT802.
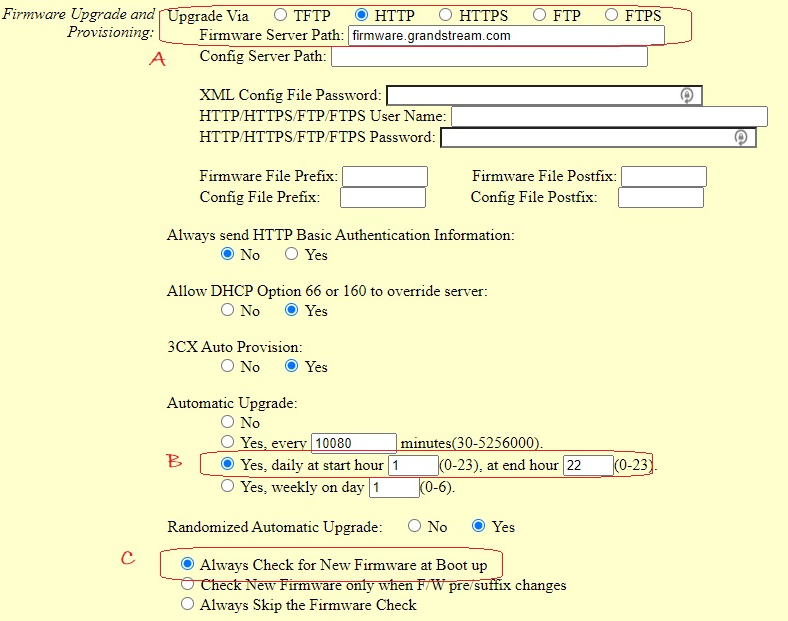
Please use one of the options available in the Firmware Upgrade Guide and make the necessary changes in the ATA so that the Firmware is Upgraded as below: The option used depends of the engineers choice from the upgrade guide. At the time of this KB the Firmware was 1.0.35.4
Firmware Upgrade guide click here:
All other Grandstream ATA802 documentation can be found here: https://www.grandstream.com/support/resources?title=HT802
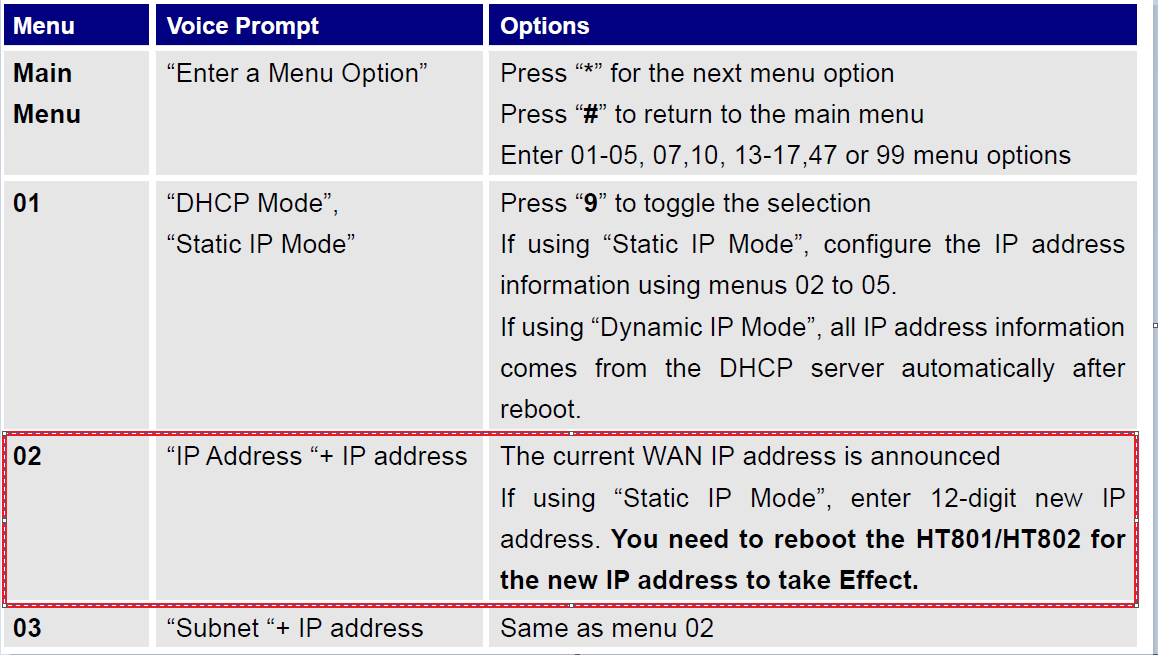
First you will need to access the web interface, this can be obtained by either checking the IP on your DHCP device or using an IP scanner. You can also get the IP by connecting an SLT handset to the device, you can then dial *** and use the programming code 02 – this will then read out the IP of the device to you. This step is covered in the handset manual.
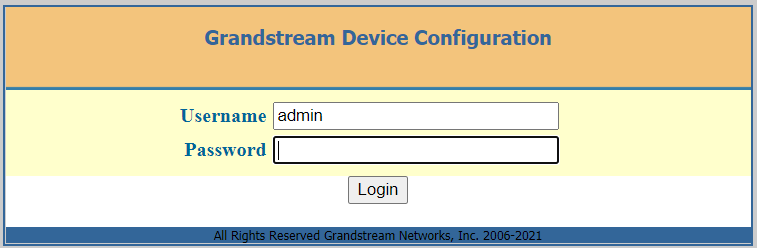
Now we can access the Web interface we can log in to the module using admin and admin as the default user and password
(Note this should be changed for a secure password once accessed.)
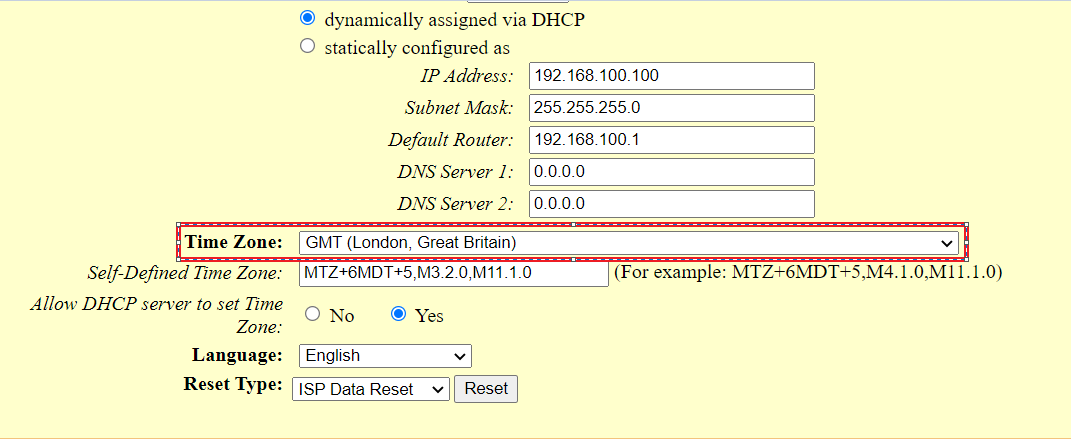
You will then need to click on Basic settings and set the Time Zone to UK
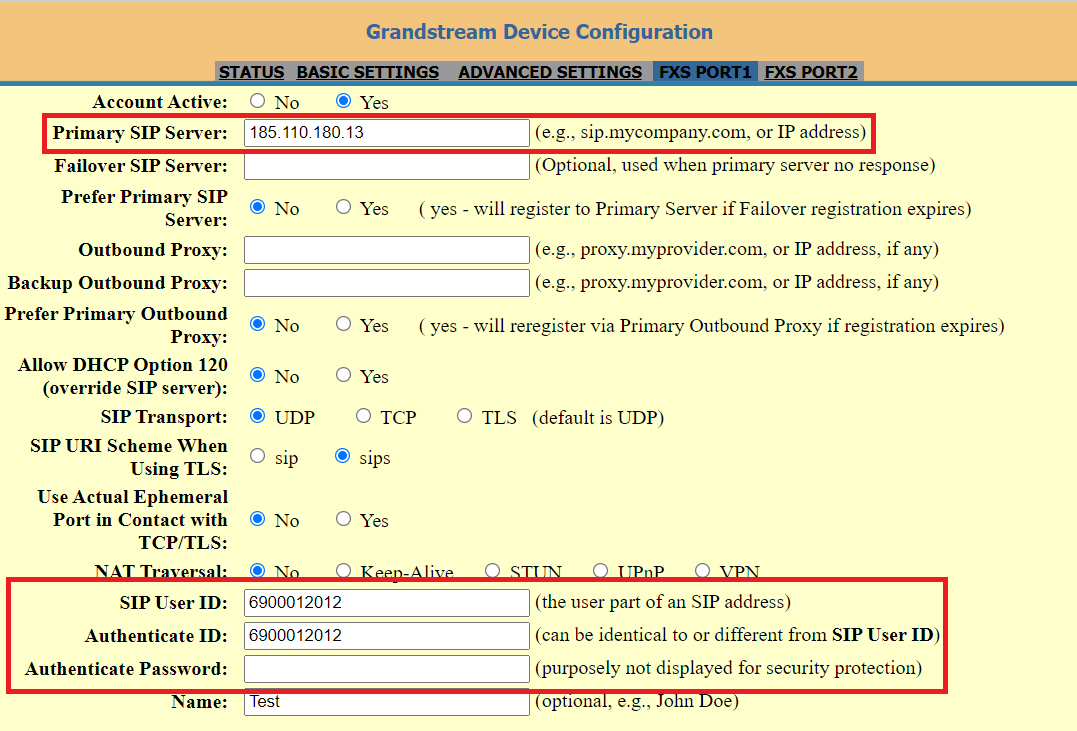
Now that you have logged in you will be taken to the quick setup page. This where you can enter the device registration details. You must create the user on the Cloud Customer Portal first.
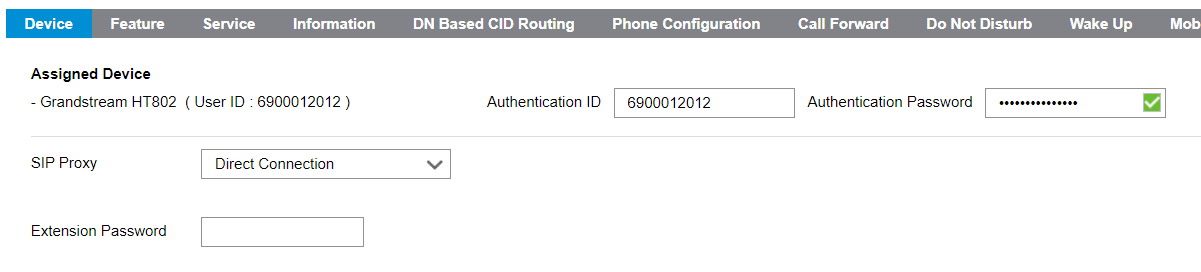
The SIP server address must be entered which you can find from your Reseller Portal and Customer Info
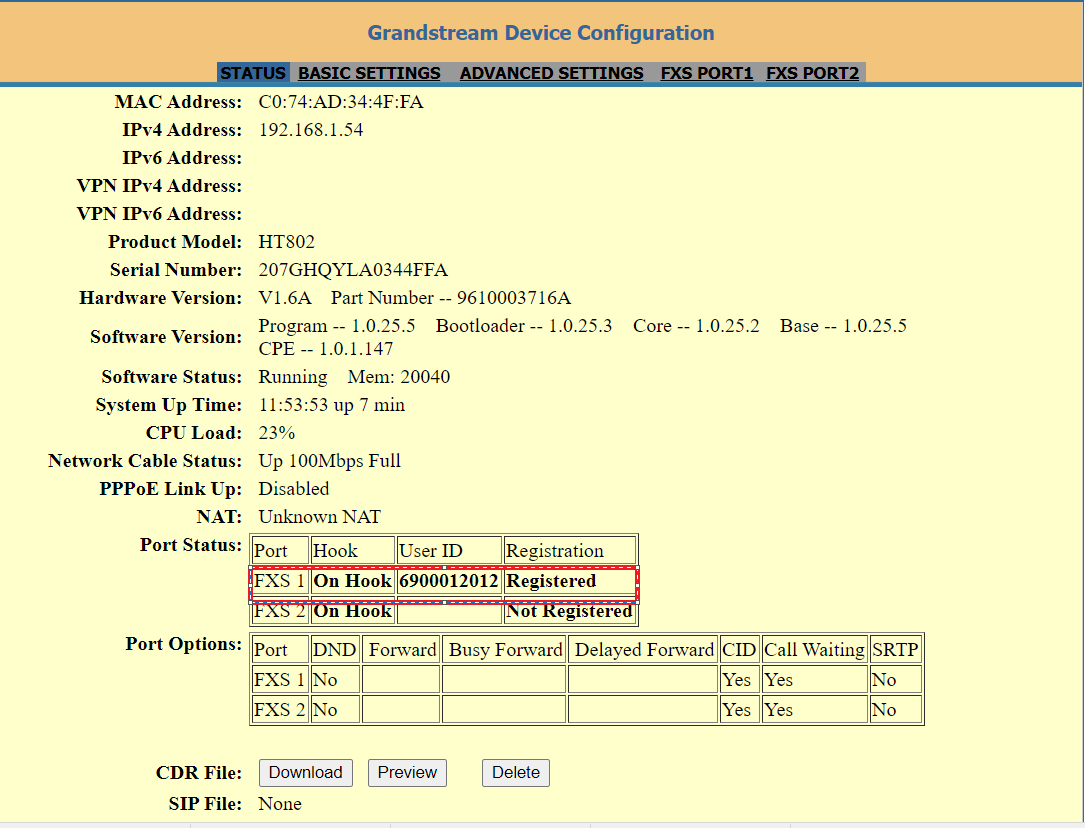
You can see if your device is registered by clicking on Status
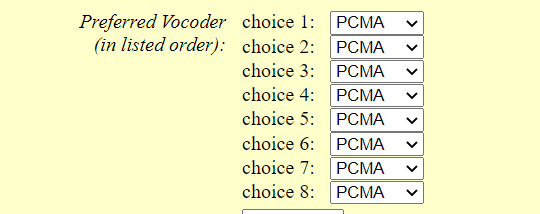
You will then need to select the codec to PCMA for the line you are using, FXS Port1 or FXS Port 2
Change the DTMF Method to SIP Info for FXS1 or FXS2

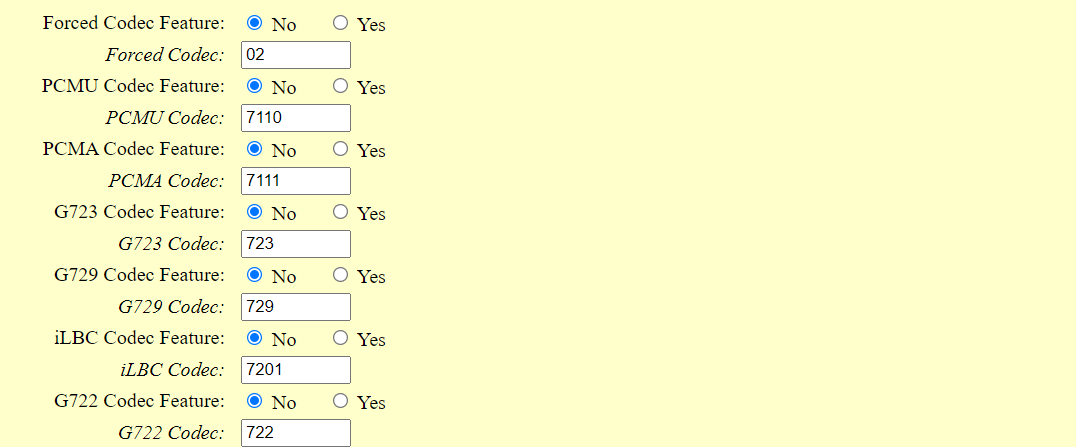
Set all codec features to No in FXS Port 1 or FXS Port 2
To enable the device to transfer calls correctly. Enable Hook Flash. The Minimum Hook Flash Timer must be set to 40 and Maximum set to 900
Set this in FXS Port 1 or FXS Port 2, dependant on which one you are using.

The Dial Plan must be set to UK. Copy the following string into the Dial Plan
{[1-8]x.|999|112|00.|90[123456789]x.|900.|0[123456789]xxxxxxxxx|#.|*.}
This is done is done on a per line basis in FXS Port 1 or FXS Port 2. The HTA802 will not dial correctly if the UK Dial plan is not entered

Disable DTMF Negotiation

Attached is Grandstream HT802 Guide for further information
“

Leave A Comment