
1. Version Information
2. Document Purpose & History
This document is intended to provide the reader with the necessary steps to setup the Cisco SPA112
iPECS Cloud – Cisco ATA / SPA 112 guide
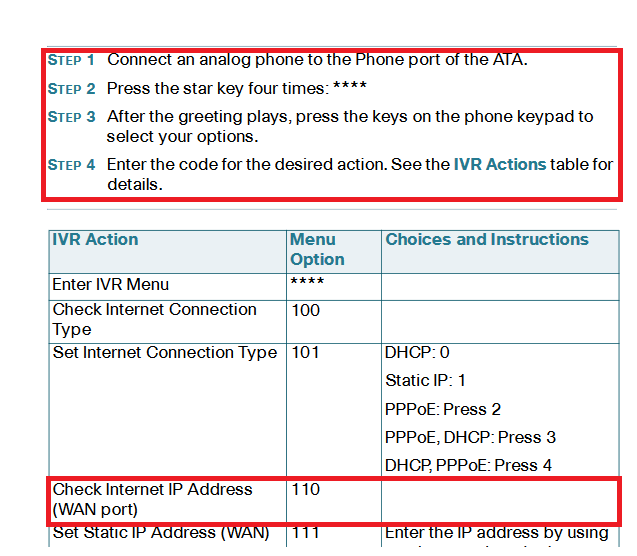
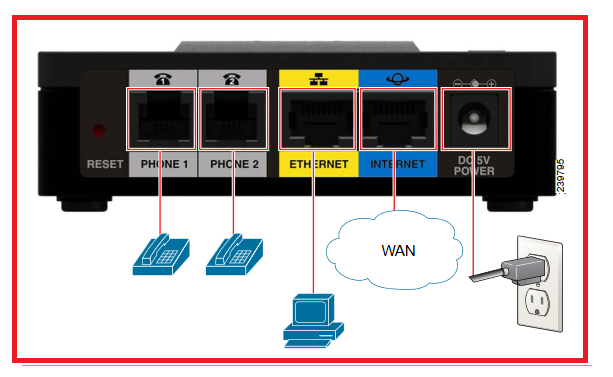
First you will need to access the web interface, this can be obtained by either checking the IP on your DHCP device or using an IP scanner. You can also get the IP by connecting an SLT handset to the device, you can then dial **** and use the programming code 110 followed by # – this will then read out the IP of the device to you. This step is covered in the handset manual.
See Link to view guide information found on page 6 and 7
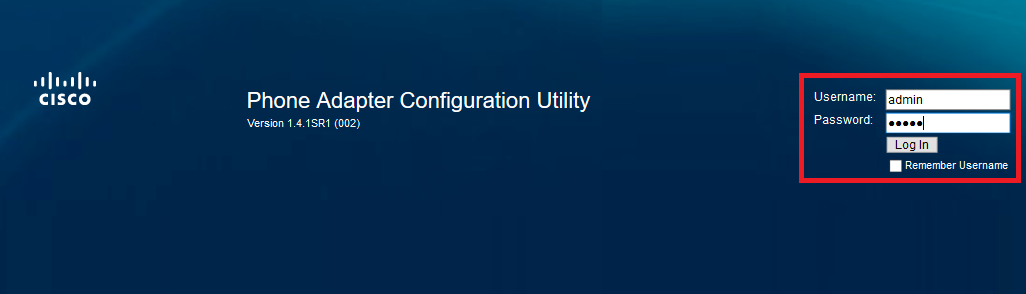
Now we can access the Web interface we can log in to the module using Admin and Admin as the default user and password
(Note this should be changed for a secure password once accessed.)
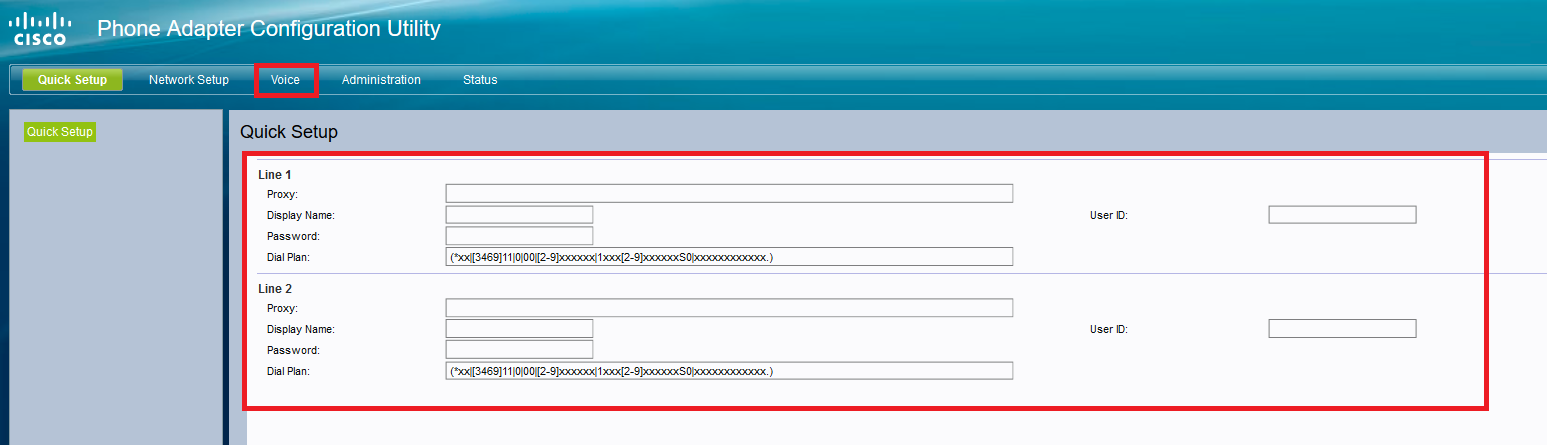
Now that you have logged in you will be taken to the quick setup page. Some people like to use this to input the basic configuration but in this guide we will not use this page.
To register the device we will now need to navigate to Voice.
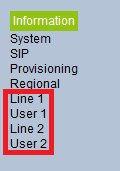
Now that we have navigated to Voice we will be taken to the Information screen this provides a overview of the registration, software level, and will show us what current state the line is in.
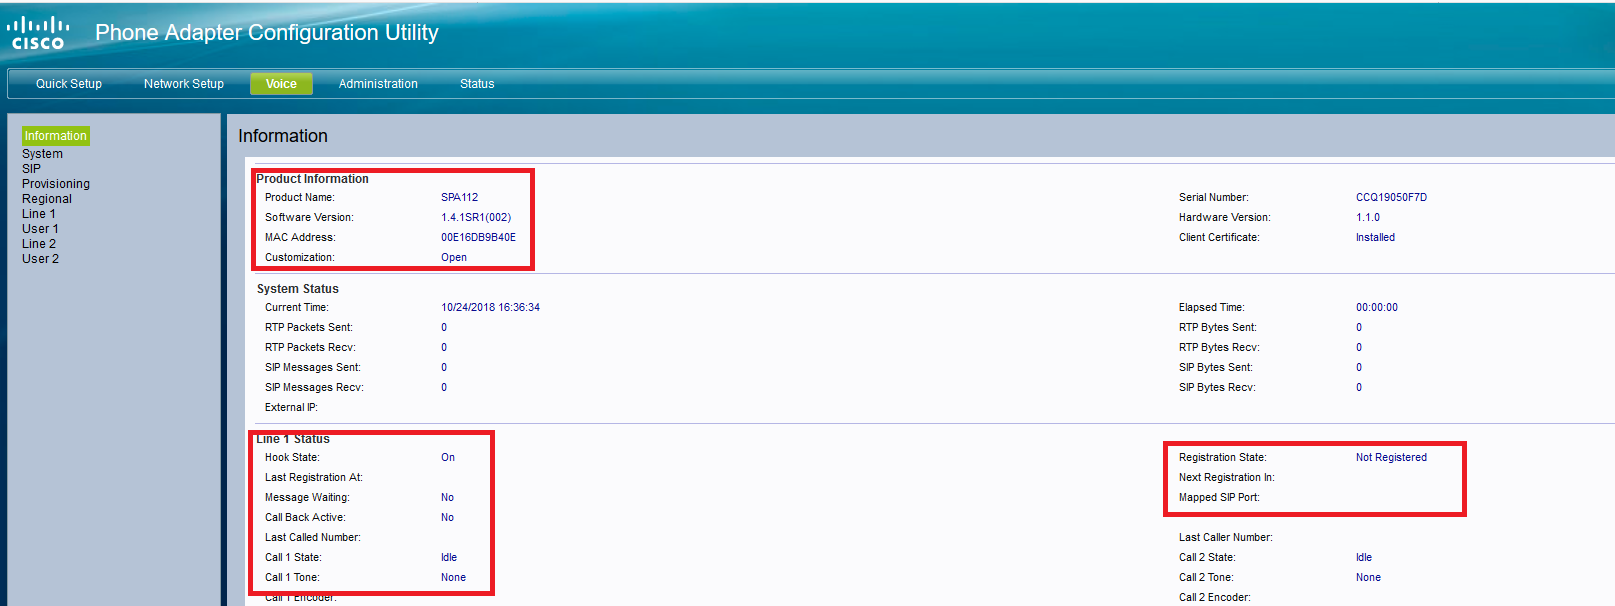
There are 2 analogue phone ports on the unit and the SPA can support up to 2 SIP registrations at any time. In the Voice tab you will see you have Line 1 and 2 as well as User 1 and 2. The Line Settings will be used to register the SIP Extension and the User settings will configure the permissions that you have against that line.
Before we go into the line settings, we will need to make sure that we have created our SIP user on the iPECS Cloud portal.
If you need assistance on setting up a 3rd party sip phone please look at knowledge base article Ticket 7465.
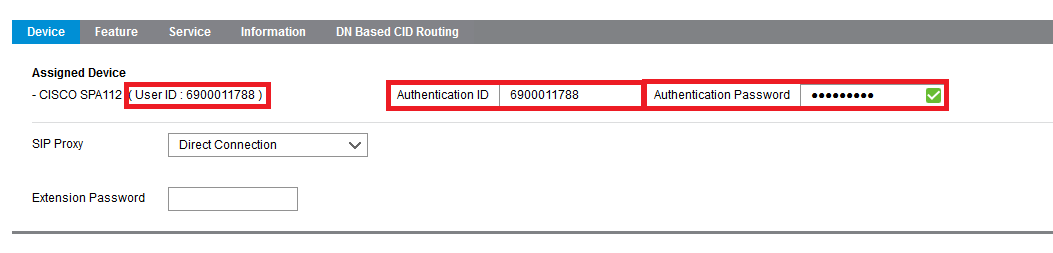
Now that the user is created, we will need to make sure that we have the User ID, Authentication ID and Password. This can be found against
the user within User Setup and then in the device tab.
You will also need to know the 3rd party SIP SBC address which is 185.110.180.13
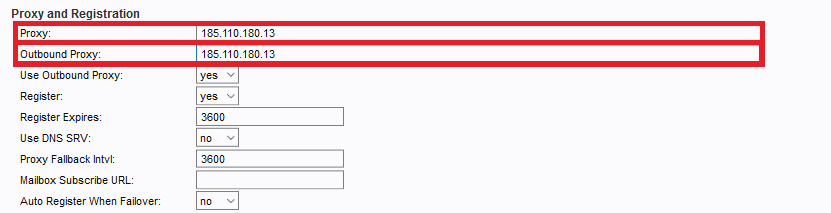
Now we will select the line that we are going to register, to start we will register line 1, once we are here we will need to to enter the Proxy address and Outbound Proxy address which is 185.110.180.13. (Note if you are an SP or VSP reseller you will have your own address to register to)
Now we will need to scroll down and enter the Subscriber information. First will be the Display name, this will be what you would like the station to be shown as.(Note the Cloud portal information will show when calling from one user to another)
Next we enter our User ID and Password that we have found by navigating to the extension on the Cloud portal as shown above. If we have a different User ID and Authentication ID then we will also need to make sure that Use Auth ID is set to Yes and then enter your Auth ID.

Now if we scroll down again we can configure our codec settings, within Audio Configuration you are able to select the Preferred codec this should be G711a we would also advise to set Use Pref Codec only to Yes.

Finally within users I would advise to amend the Dial Plan to a UK Dial Plan, depending on the source you have obtained the unit it will most likely come with a US Dial Plan.
Within the dial plan replace what is shown with the below string.
(08xxxxxxx. | 0[15]xxxxxxxxx. | 0[2379]xxxxxxxxxS0 |14108xxxxxxx. | 1410[15]xxxxxxxxx. | 1410[2379]xxxxxxxxxS0 | 147008xxxxxxx. | 14700[15]xxxxxxxxx. | 14700[2379]xxxxxxxxxS0 | [2-8]xxxxx. |
 <911:999> | <112:999> | 1[0-5][0-5]S3 | 166S3 | [2-8]xxS3 | 999S0 |
 1[45]7[1-9]S0 | 116xxxS0 | 118xxxS0 |
 00[1-9]x. | 14100[1-9]x. | 147000[1-9]x.)
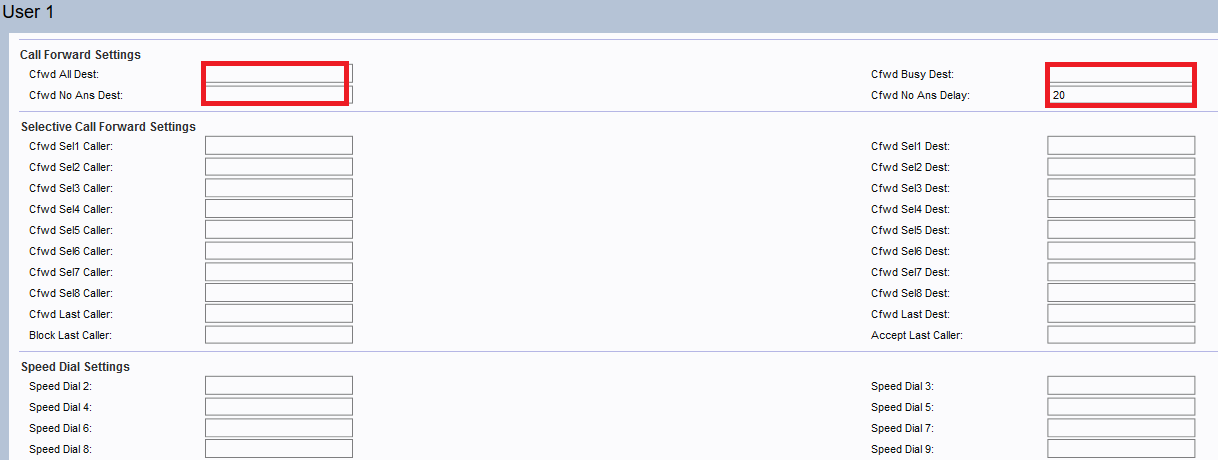
Within the User section, you can also amend the call forwarding for the user as below.
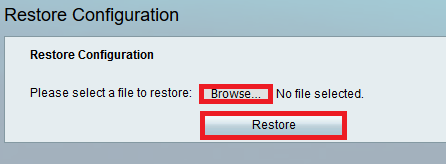
I have created a template, attached, that can be uploaded in to your device. I have already populated the IP to register to and given a self explanatory name for what needs to be completed. This can be uploaded in Administration, Config Management then Restore Configuration. You can then select the file and then click restore to add the template to your device.
“

Leave A Comment