
1. Version Information
2. Document Purpose & History
This document is intended to provide the reader with the necessary steps to setup the Audio Conference Bridge (ACB) feature.
Alternatively, you can watch the video on how to setup a conference room on iPECS Cloud here.
iPECS Cloud – Audio Conference Bridge
This guide will enable you to set up and configure the Audio Conferencing Bridge (ACB).
The main feature of the ACB are shown below.
- S/W based Audio Conference Bridge
- Authentication with Security Code
- Participant Name Recording & Play
- Support Secure RTP
- Conference Control
- Conference Scheduling
- Web‐based management
- Local System Redundancy
- SNMP
The Audio Conferencing Bridge is available in 3 different sizes
- 8 User Conference
- 25 User Conference
- 100 User Conference
Please note you will need to make sure that you have enough channels linked with your account to connect.
Conference members will be greeted with a prompt and be expected to enter their randomly generated pin to connect.
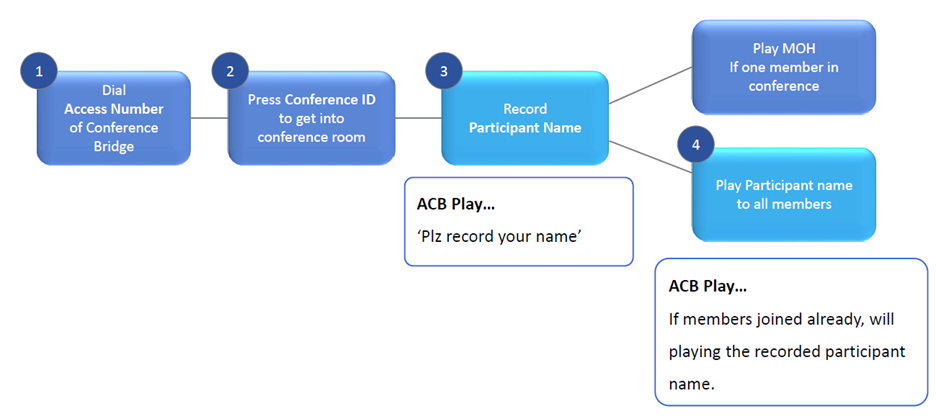
You can also add the need for a security code.
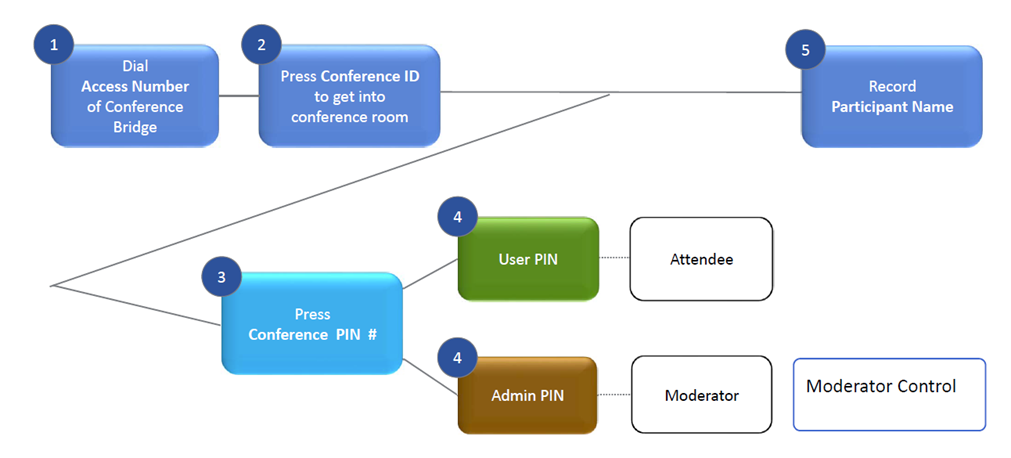
DTMF Options
You also have the ability to amend some options within the conference using a DTMF keypress.
The options available depend on your status within the conference.

Now to set up ACB you will need to first order the licence.
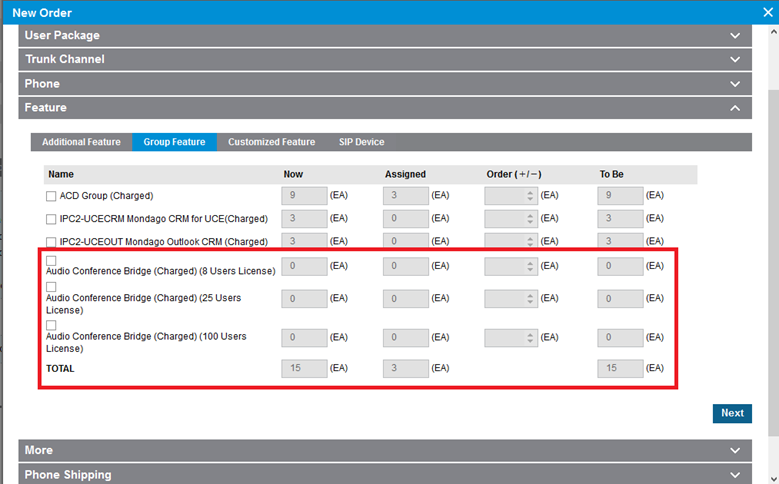
Once the licence has been added and is available navigate to Audio Conference Bridge within Call Manager.
You will now need to set a conference access number and you have the ability to link a DDI to the conferencing service.

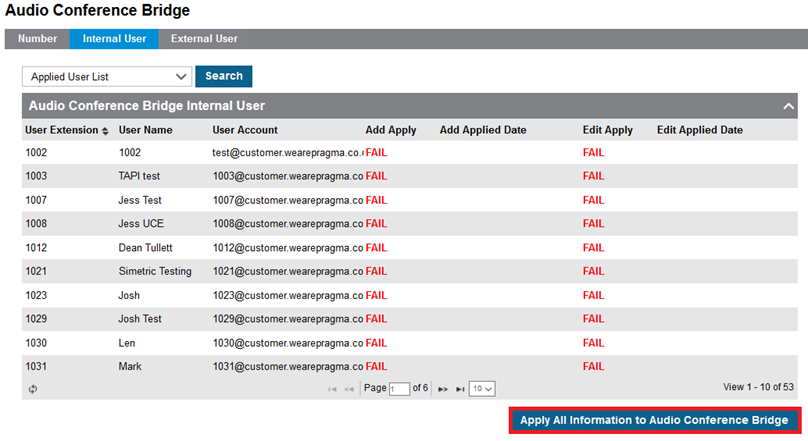
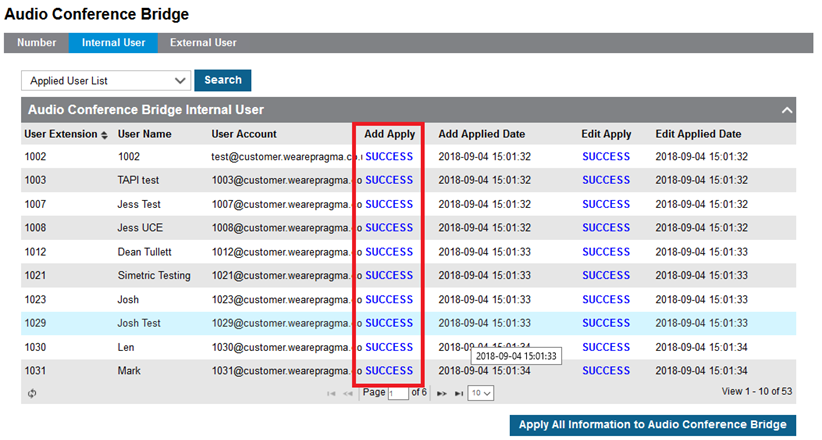
Select the internal users tab, currently ACB is a shared resource so there is no way to restrict a users access. To link users click Apply All Information to Audio Conference Bridge.
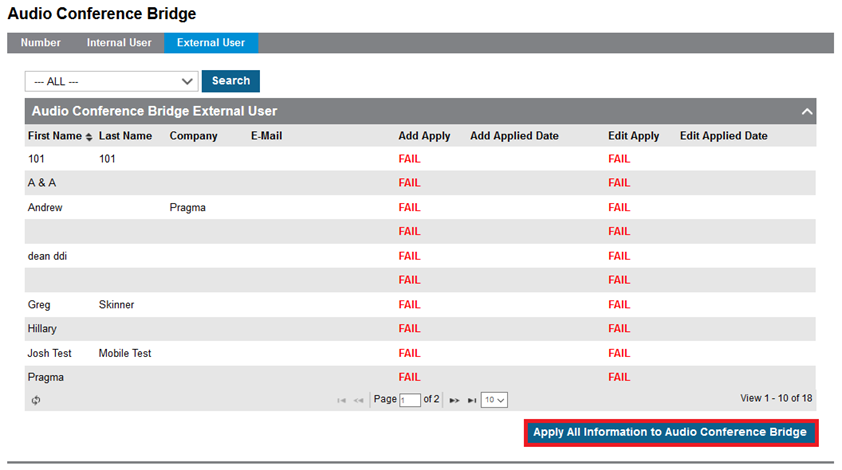
You can also Sync your directory to include external numbers within the ACB service.
Now you will need to navigate to https://acb.ipecs-cloud.co.uk/
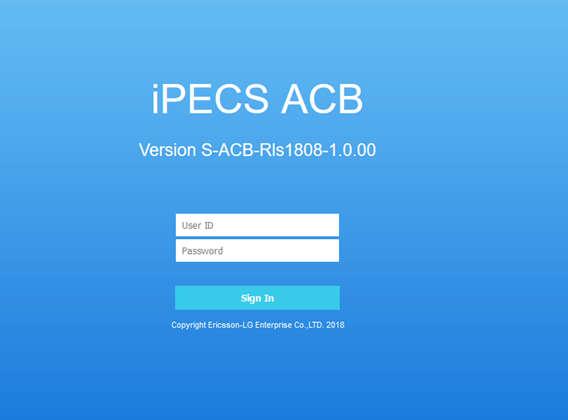
Login to the ACB using the Portal ID and Password for your user from the customer manager portal.

You are now logged into the ACB Portal. This will show you your current conferences
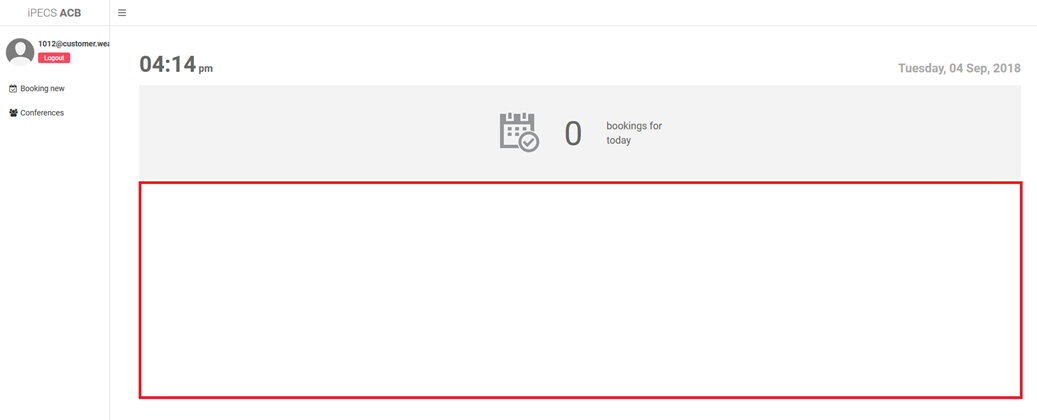
To create a new conference select Booking New

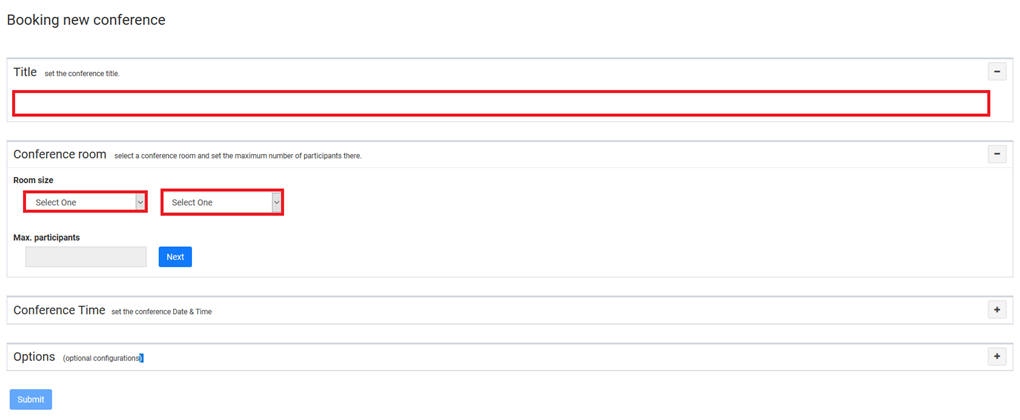
You will now need to enter a title and then select your conference room that you would like to use.
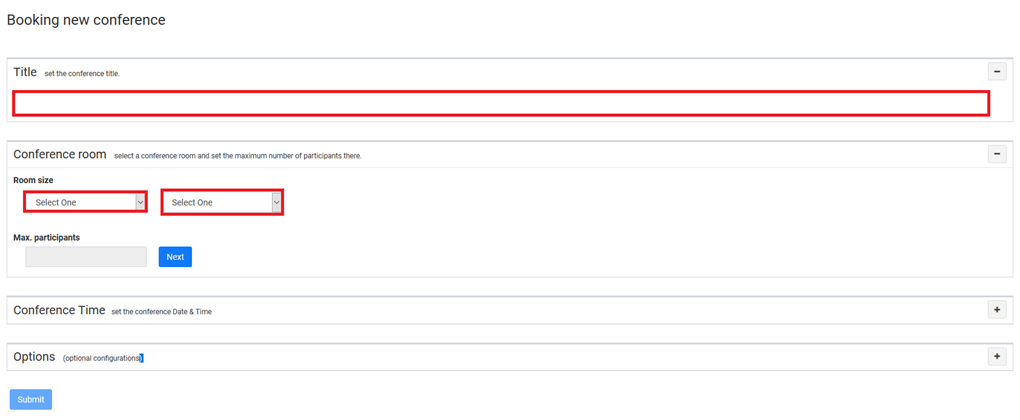
You will now need to enter a title and then select your conference room that you would like to use.
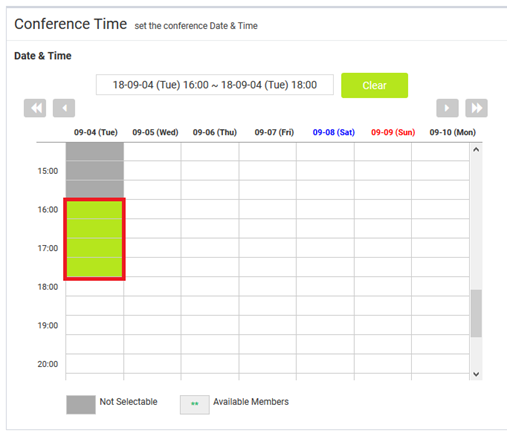
You can now select the time frame for your conference, if this has already been booked the time frame will show in grey. As you can see the date is shown next to each day.
You can now set the Options, this allows you to set an Admin Pin and User Pin.

Once you have selected submit you will be prompted with a popup similar to the below.
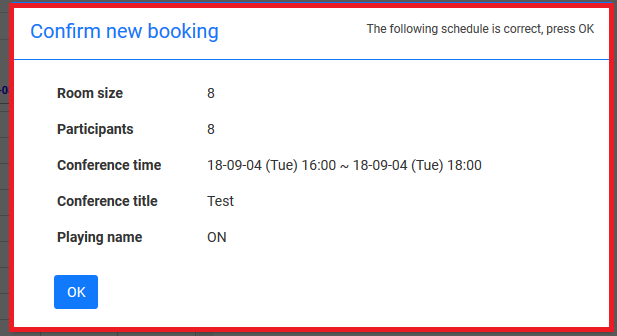
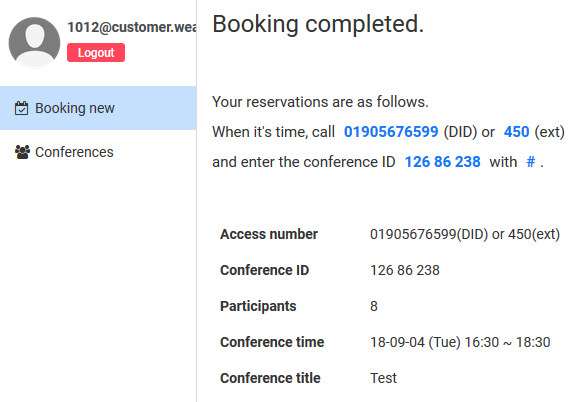
You will now receive a message to confirm if the booking has been completed and this will also show you details of the conference.
Now, if you navigate to Conferences to show your currently available conferences you will be able to see the information for this conference and if this is currently active.
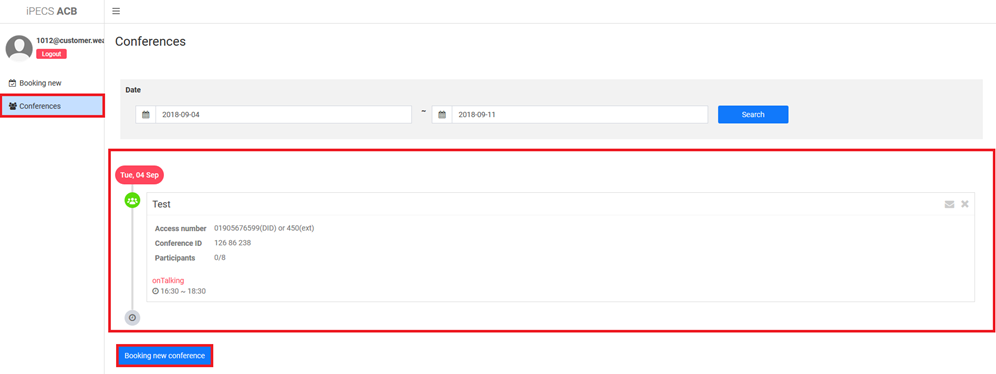
If you click the Mail icon you are then able to copy the invite information to your clipboard to then be pasted in to a outlook invite.

If you click on the conference you are then able to enter an admin or user pin, once this has been input you can see the participants of the conference.
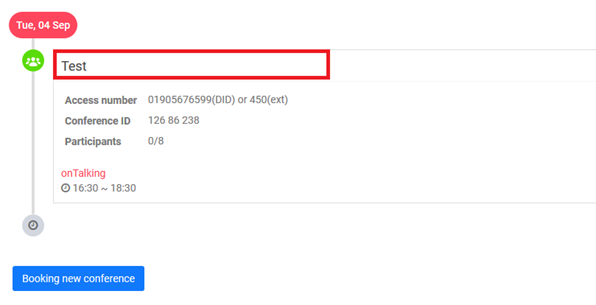
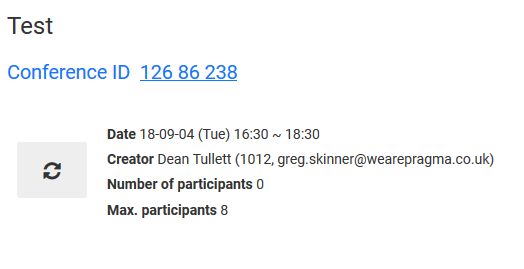
If you click on the conference you are then able to enter an admin or user pin, once this has been input you can see the participants of the conference.
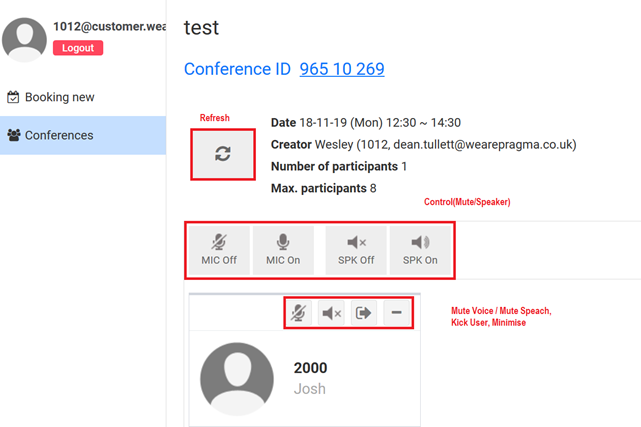
You are also able to make amendments from this portal if you are the admin.
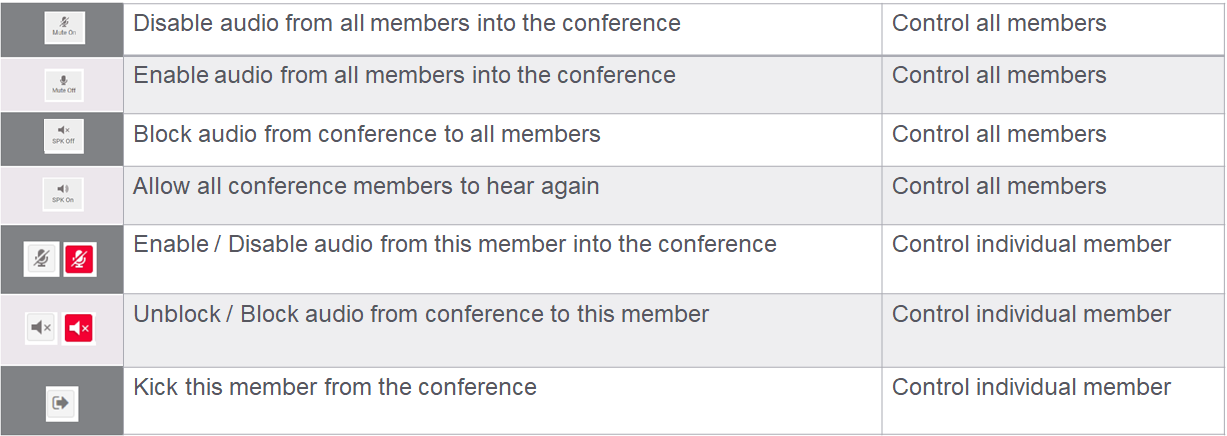
“
Leave A Comment