
1. Version Information
2. Document Purpose & History
This document is intended to provide the reader with the necessary steps to setup an IP Attendant (iPECS Attendant) on Cloud.
Cloud – Setup IP Attendant
NOTE: You must only be using 1 IP Address on your NIC card to be able to log into IP Attendant
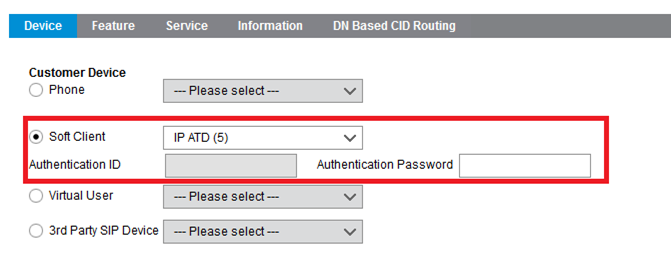
First create a single client user then in device, select Soft Client: IP Attendant.
You will need to set an Authentication Password we advise to use a strong password as this is going to be used for your registration
You will notice the Authentication ID is greyed out and that you will not have to populate this. The Authentication ID will be used for registration so please make sure to make note of this once the station has been created.

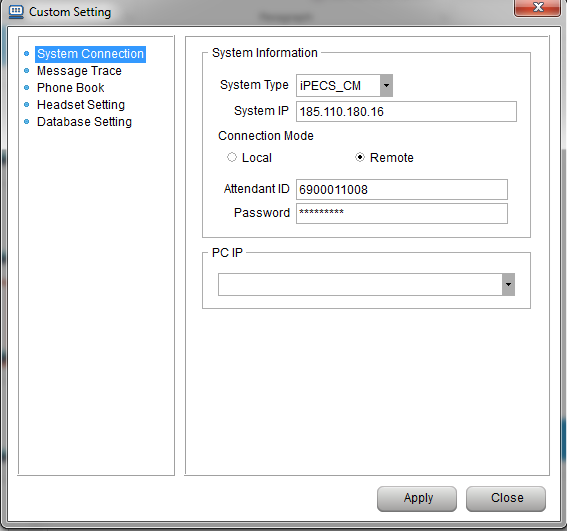
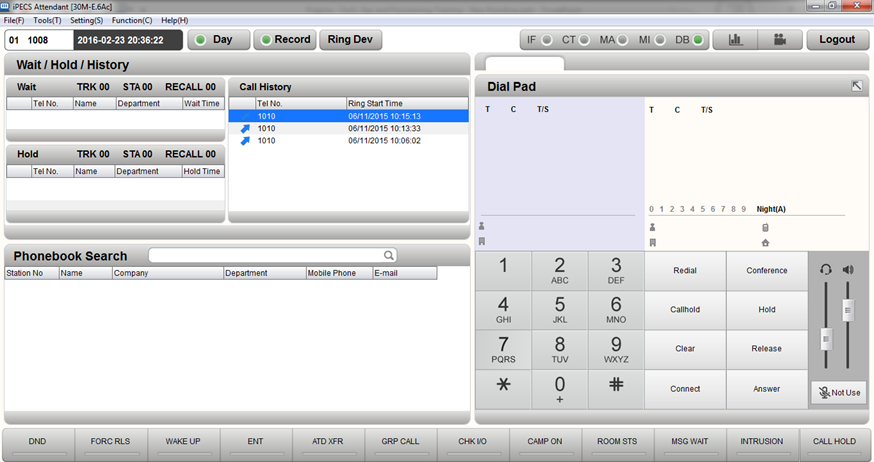
Now lets set up an Attendant client and register this. Once installed you can go to settings and then you will need to enter the phone registration address, set the connection mode to remote and your user name and password.
Next login with admin 1111 this will let you let you login to the default profile to then be able to set up your own profile/s.

Next we need to go to Tools > Account > Account Info
You can now set up the ID and password that you will login with
Next set the Permissions for the user and the Attendant ID and Password this is the same as we have set under settings.
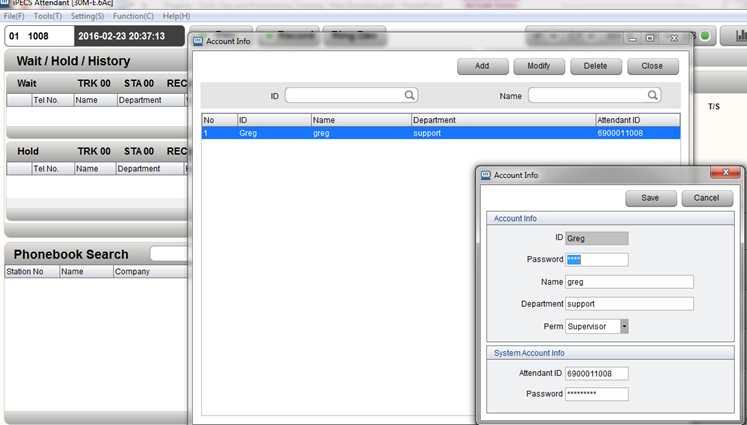
Logout of the default profile and login with the credentials that you have just created and you should now be logged on to your client.
“

Leave A Comment