
1. Version Information
2. Document Purpose & History
This document is intended to provide the reader with the necessary information to setup a Microsoft Teams integration to the iPECS Cloud platform.
iPECS Cloud – iPECS2Teams full integration setup guide
This guide covers the full setup of the integration of Microsoft Teams to the iPECS Cloud platform. Throughout this guide there are steps that need to be taken by different parties, please pay attention to which parties are required to perform each action.
Reseller: places an order on the iPECS Cloud Portal for a new iPECS2Teams customer and corresponding individual users.
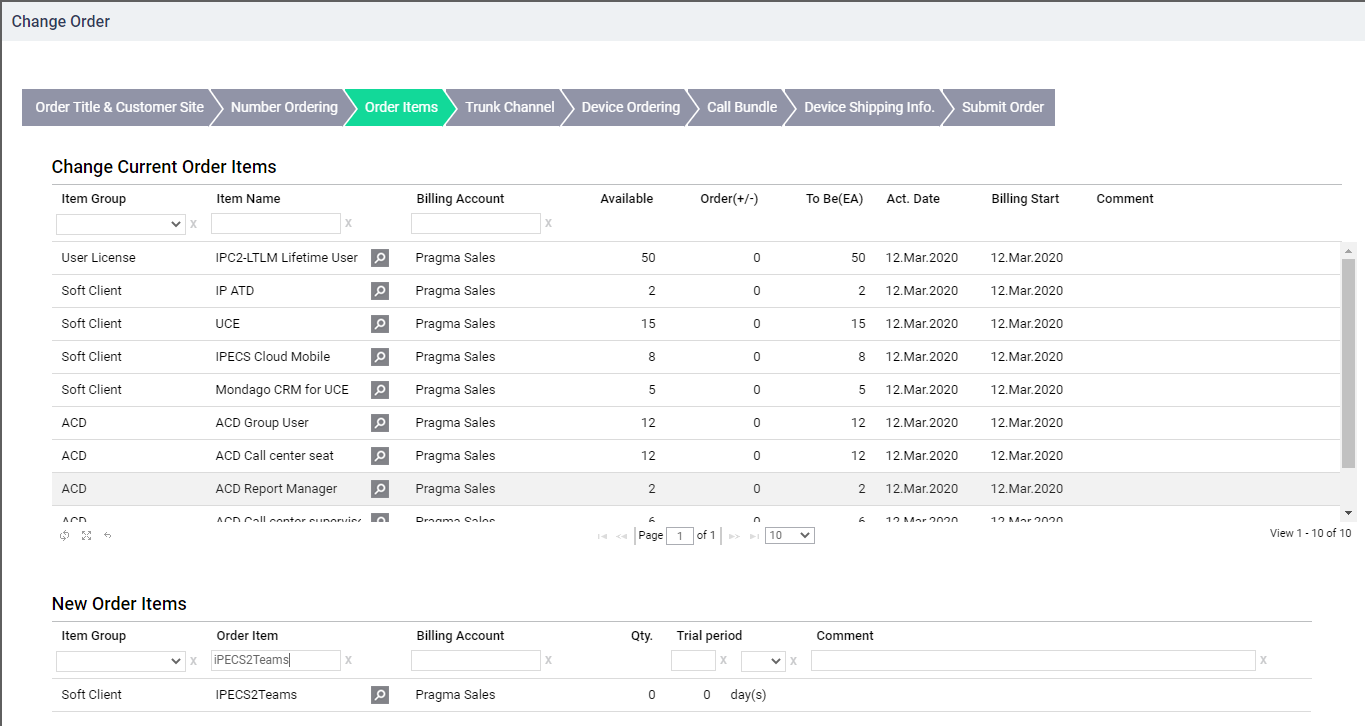
Reseller: Final confirm the order.
Reseller: Respond with the email address for the customer administrator. This email address will be used below.
Reseller: Create users in the iPECS Cloud Portal by following the steps in the two Knowledgebase articles below. Make a note of the Authentication ID and Password for use later in the process and notify the end customer that they should now order the office 365 licences:
- Teams User creation knowledge base article: Ticket 26155

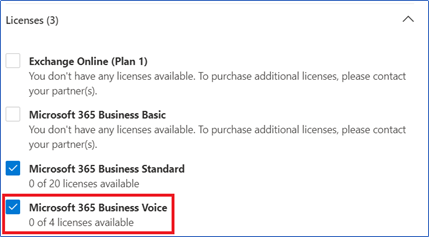
End Customer or End Customer’s Office365 domain admin: Must now order the Microsoft 365 Business Voice licence from their own Microsoft Office licence provider. An example is shown below of applying licences.
End Customer or End Customer’s Office365 domain admin: Must ensure the Microsoft 365 Business Voice license is applied to every user that requires the integration.
End Customer or End Customer’s Office365 domain admin : Additionally the end customer must ensure that every user that requires the Teams integration has the Microsoft 365 Domestic Calling Plan App disabled. This is found in the Apps section of the User under the Licenses within the Microsoft Administrator Portal.

Once Pragma have set-up the customer on the Call2Teams portal, the Account Owner will receive an email letting them know the customer is now set-up. The recipient will either be the Reseller or End-User customer who administers the End-User customer’s domain

Customer domain administrator: Click the ‘Accept Invitation’ button in the email to proceed to the Call2Teams portal. The end customer can log into the customer part of Call2Teams portal. This email is sent to the email address for the customer administrator referenced earlier in this guide.
The Reseller logs into the Call2Teams portal and selects Customer Portal for the relevant customer.

Choose the services tab at the top:
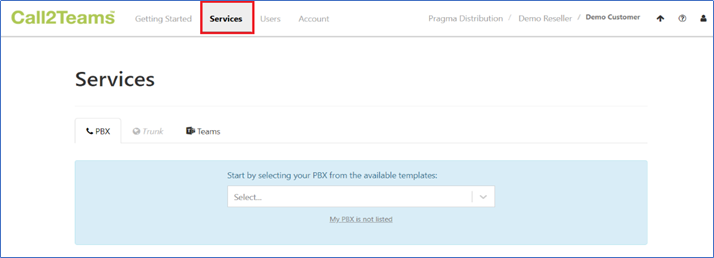
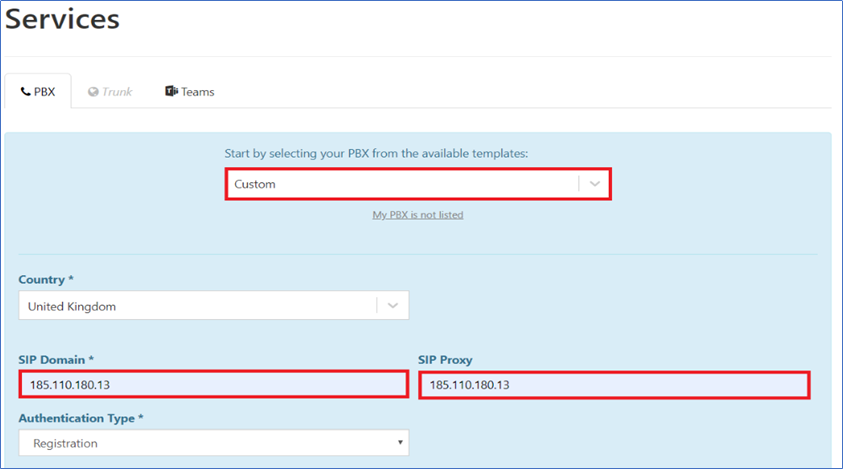
Choose the correct platform from the ‘Start by selecting your PBX from the available templates:
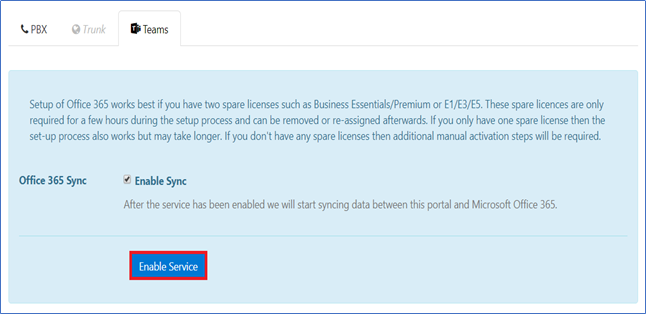
Customer domain administrator: Login to the Call2Teams portal via the link received, Go to the services tab, then the Teams menu, tick the ‘Enable Sync’ tick box then click the Enable Service button.
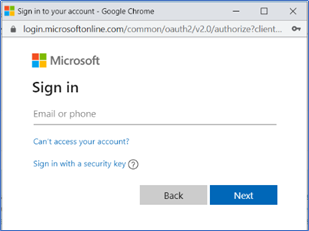
A pop-up appears. Enter your admin account details to login to your office 365 domain. You MUST login with an admin account level of access for the domain you would like to sync. Click Next.
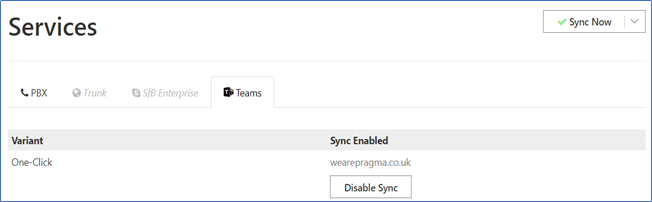
The pop-up box disappears after logging in. You can now see the Call2Teams Services screen again. If you have synchronised successfully, it will show a green tick in the top right.
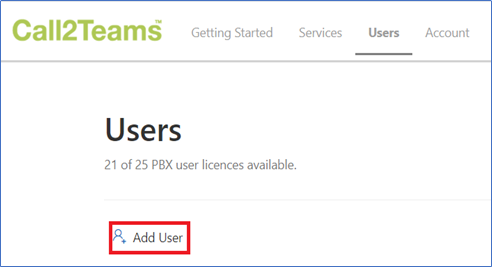
Domain Account Administrator: Login to Call2Teams and go to the User’s tab and click Add User.
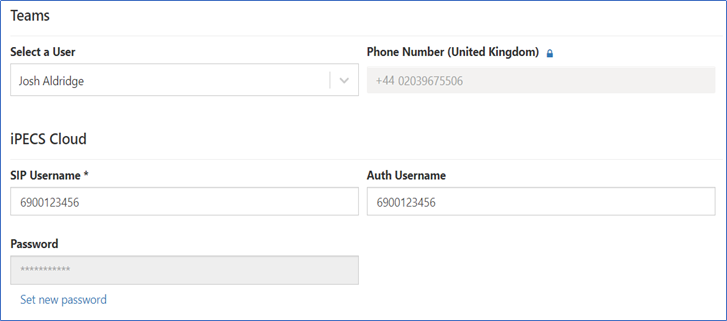
A new screen will appear. In the select a user dropdown, any user with the correct Microsoft 365 Business Voice Licence will show in the list.
Select the user and then enter the Authentication ID and Password that was set-up on the iPECS Cloud Portal user previously. Once these details have been entered, the cloud user will be linked with their profile on the Call2Teams platform.
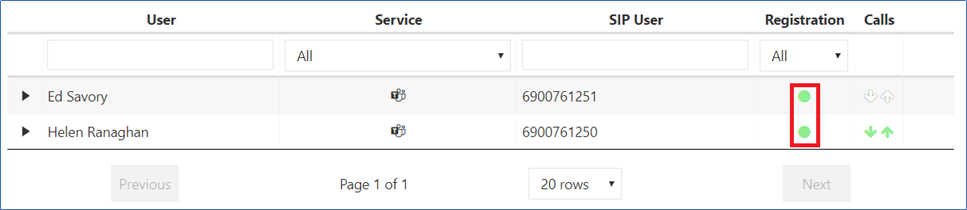
Once registered correctly, a green icon will show in the registration column next to all registered users.
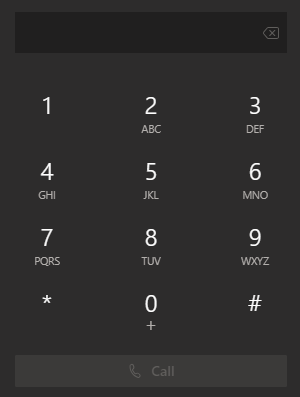
It may take a few minutes for this to push to the Microsoft Teams clients – it may also take a restart of the PC to start the service locally on the machine, but once this has been done a dial pad will show within the ‘Calls’ tab in the Microsoft Teams client;
This process has now completed succesfully and the client is ready for use.
“

Leave A Comment