
1. Version Information
2. Document Purpose & History
This document is intended to provide the reader with the setup and registration steps for connecting Ascom i63 remotely.
This KB is to be used in conjunction with KBs:
Ascom i63 – Cloud handset setup and registration
Ascom i63 – On-premise handset setup and registration
Ascom i63 – Connecting Ascom i63 remotely
For Cloud or remote on premise, you will need to change the “Far-End NAT Traversal to Yes”. This can only be accomplished via the programming base.
This setting enables the Ascom i63 to make and receive calls when connected remotely.
First you will need a desktop programming base, or admin base, which you can connect via USB to your desktop. If you don’t have one, please order one.
Then download and install both USB.exe and WinPDM.exe files. You can find the link to download the Ascom WinPDM 3.15.2.zip here.
Open the Ascom WinPDM.
Step 1 only needs to be done once per machine. If you already followed step 1 in your machine, please go to Step 2.
Step 1:
First go to File > File management. A new window will open.
In here we will add the latest i63 version file.
Note: you can download the latest version for Ascom i63 here.
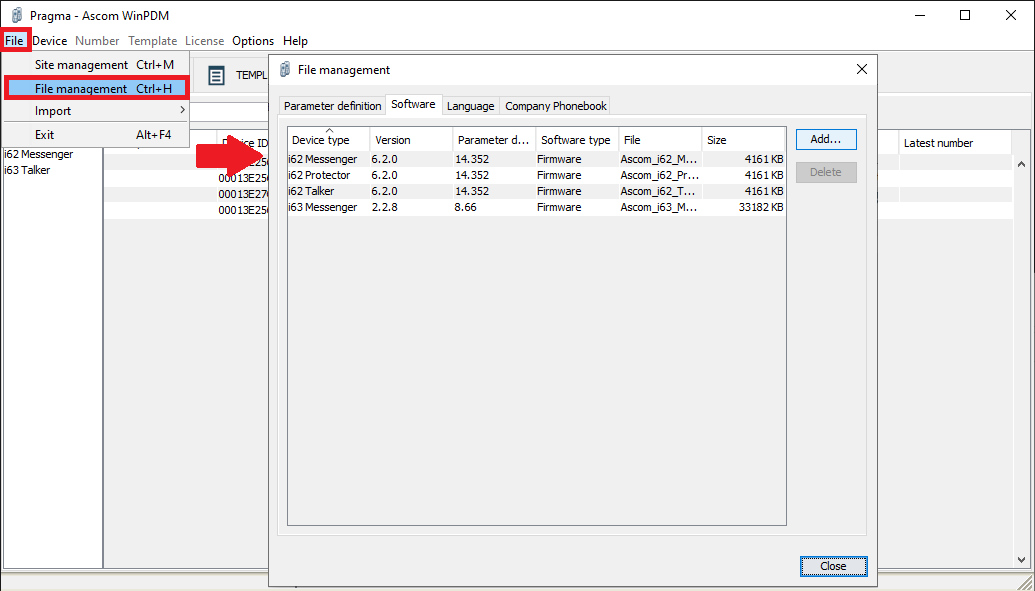
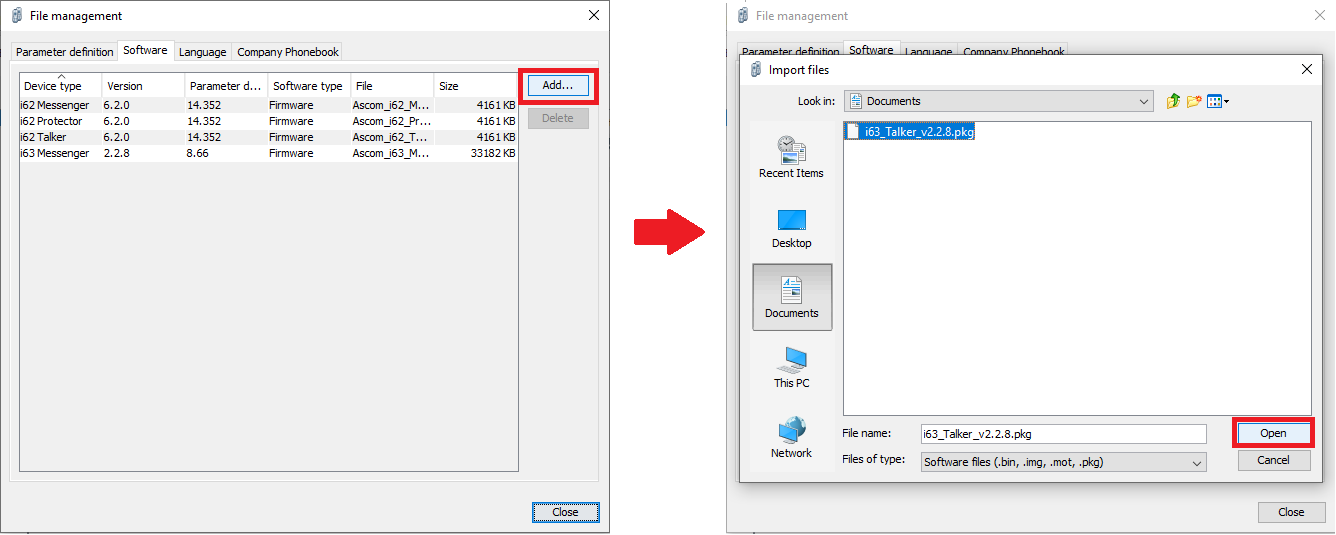
In file management, click on add. Then search and select the latest Ascom i63 version file and open it.
Step 2:
There are two ways to change the parameter we need to make it able to connect and to work remotely.
Option A) You can just edit the parameter “Far-End NAT Traversal” to Yes.
This would be the best option if you want to setup the Ascom i63 using the Ascom WinPDM.
Option B) You can create a number that you pre-uploaded a template (attached to this KB) that the only change is the parameter “Far-End NAT Traversal to Yes”.
This option will be explained later, you will create one number per machine and associate a number to the device.
This is the best option if you are going to be setting up the Ascom i63 manually on the device or if you just want to change this parameter and will configure the rest later on site, for example.
Please see the step by step:
Option A)
Connect the programming base to your PC via USB. Place the phone into the programming base with the Ascom WinPDM opened.
A Wizard window will appear.
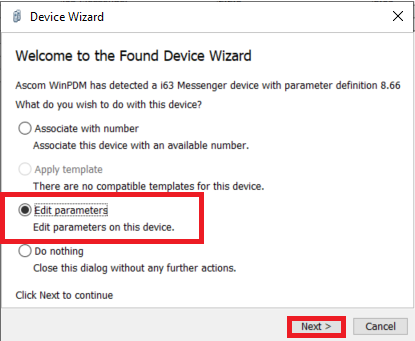
A new window will pop up and you will be able to edit parameters.
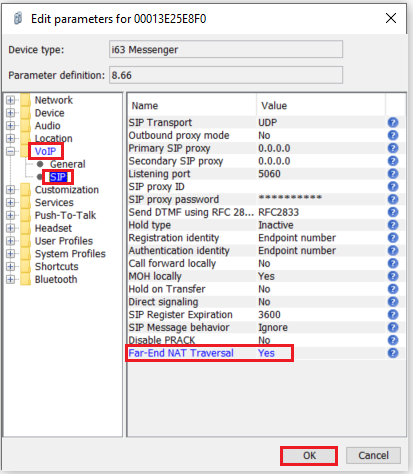
In “edit parameters” go to VoIP > SIP: Change “Far-End NAT Traversal” to Yes > Ok.
That is all you need to be able to connect and to work remotely.
If you want to setup the Ascom i63 completely using the Ascom WinPDM , please go to the KB: Ascom i63 – Cloud handset setup and registration
Option B)
Step B.1) Only needs to be done once per machine.
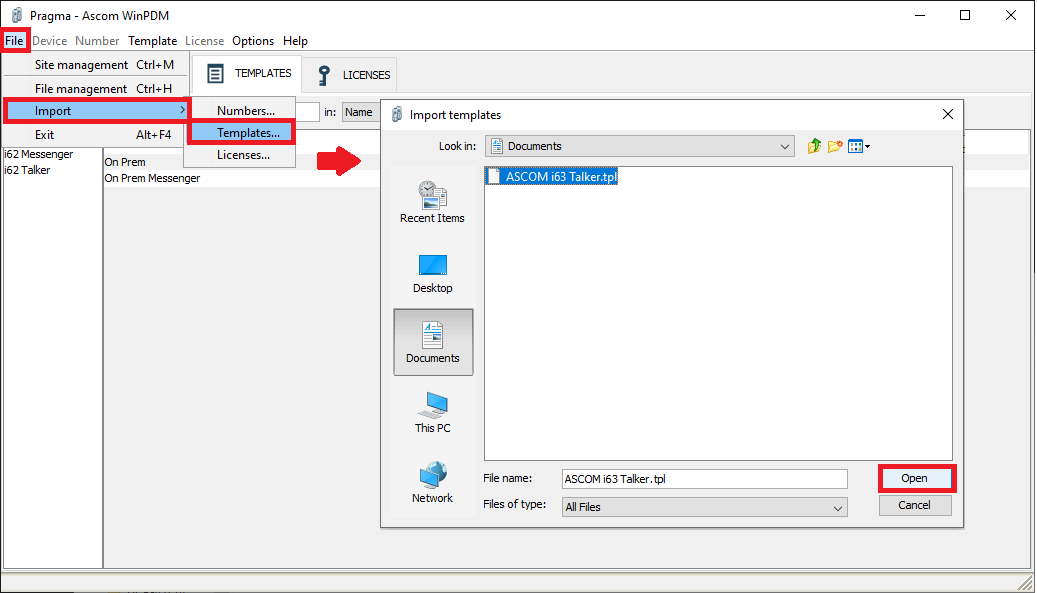
Go to File > Import > Templates. A new window will open.
Search and select the ASCOM i63 Talker.tpl template. The template is attached to this KB.
This template only contains the change “Far-End NAT Traversal” to Yes.
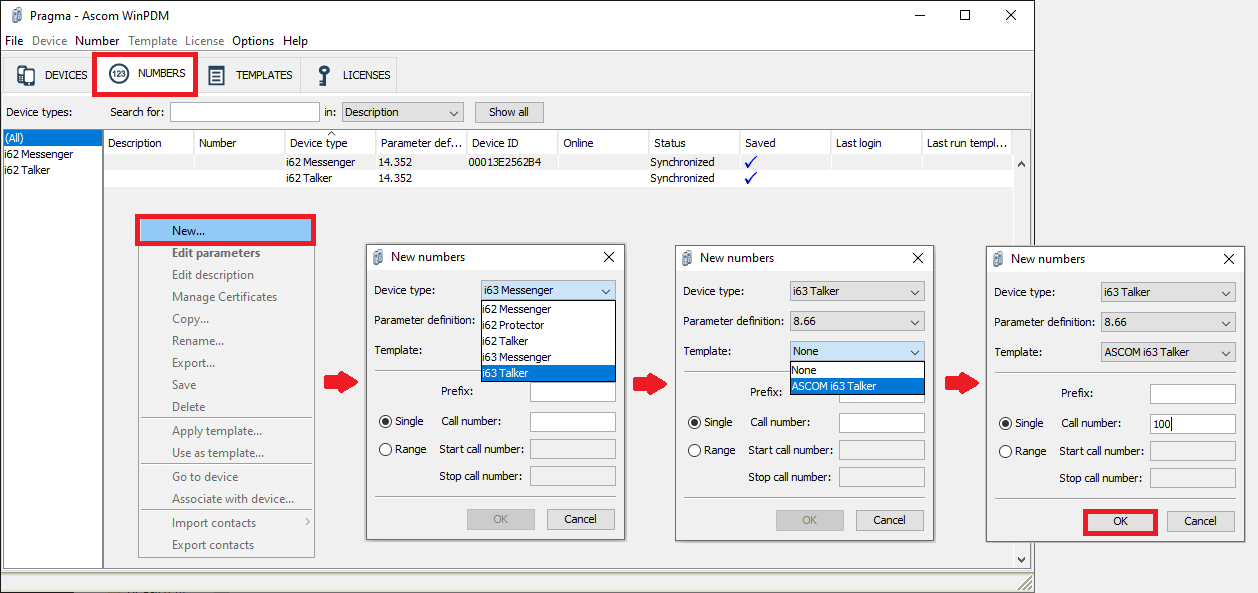
Then we will associate a number with the template we just imported.
Go to numbers > right click in the grey area > New. A new window will pop up.
In this window, set:
Device type: i63 Talker
Template: ASCOM i63 Talker
Call number: this is the endpoint number. As it will vary from device to device, set as 100. Later you can emend it in the admin menu. This can only be amended manually on the device. You cannot amend it using the Ascom WinPDM.
And Ok to save.
This process so far only needs to be done once per machine. Once you have the number created, you can connect the phones with the PC and use this number to be associated with devices.
Step B.2)
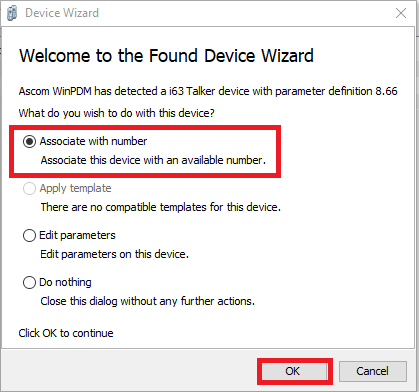
Connect the programming base to your PC via USB. Place the phone into the programming base with the Ascom WinPDM opened.
A Wizard window will appear.
Select “Associate with number” and click “ok”.
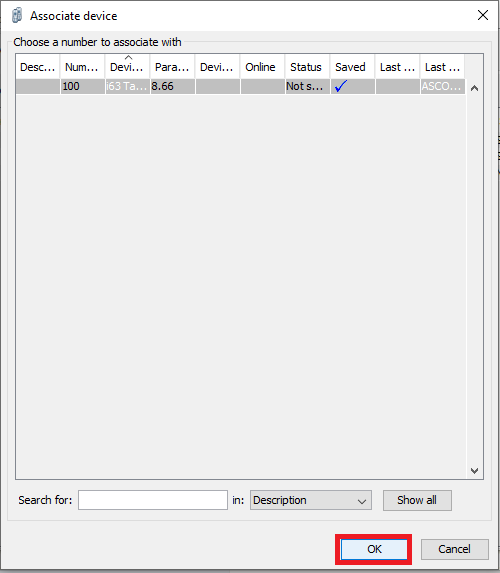
This window “Associate device” will appear.
The number created in step 1 will appear in the list. Select it and then click “ok”.
Your device will start synchronising and once it’s finished the phone will beep.
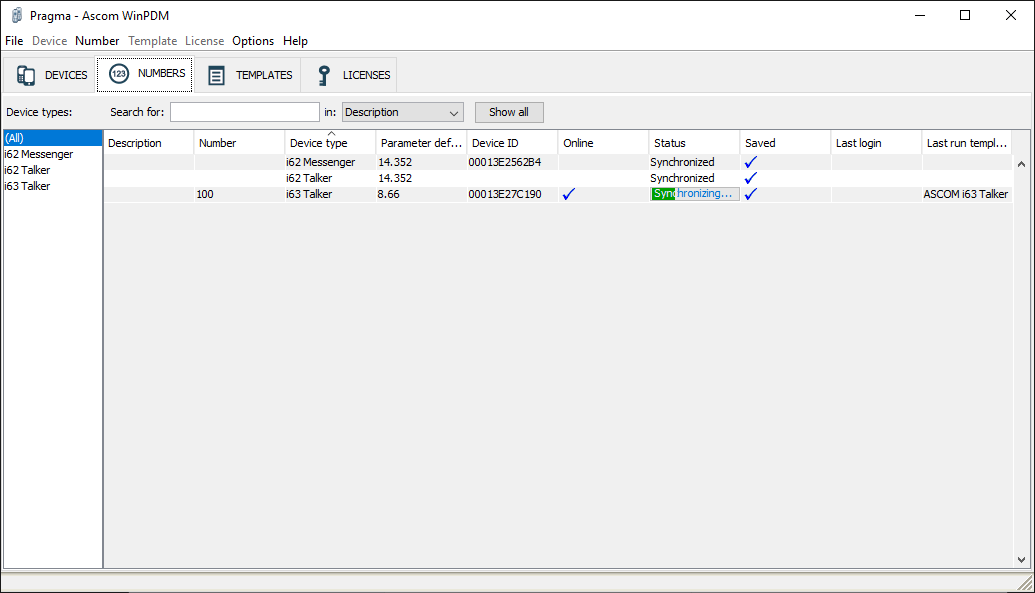
Remove the phone from the programming base and it will start reboot and to remotely update.
Once your Ascom i63 is back on you will be able to set it up.
Please refer to the KBs: Ascom i63 – Cloud handset setup and registration and Ascom i63 – On-premise handset setup and registration for more information on how to setup your Ascom i63.
“

Leave A Comment