
1. Version Information
This document is intended to provide the reader with information on how to setup VoiceFlex SIP lines on a UCP system.
VoiceFlex – SIP config UCP
All iPECS UCP systems come with inbuilt VOIU channels for SIP (comes with 6 channels). You can increase your channels with VOIP licences or VOIM modules.
** Please take note that if you aren’t using all channels, you need to put the spare channels into a spare line group e.g. (Group 201 in UCP), this is done in PGM 140. This will avoid those lines being selected and causing issues.
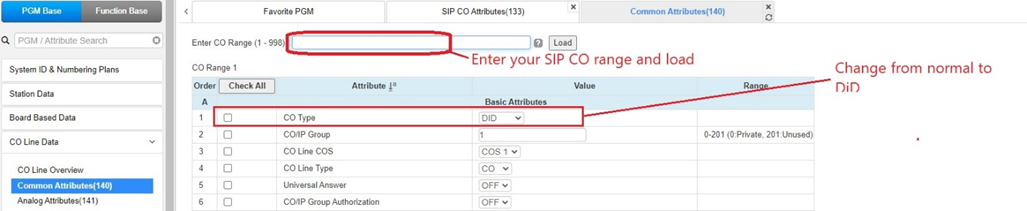
1.) Start by changing the line from normal too DiD in Pgm 140 as per the image.
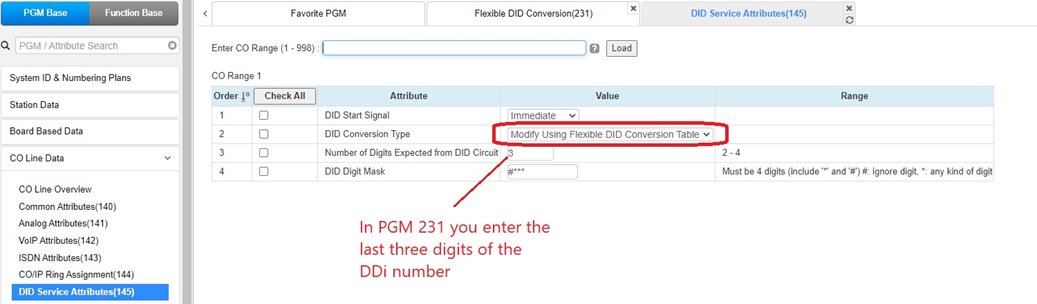
2.) Pgm 145 you will need to be setup with how your DDI number will be represented in Pgm 231.
You need to point your lines to use the Flexible DID Conversion table to route your DDi number.
Enter your VoiceFlex SIP CO range and click load.
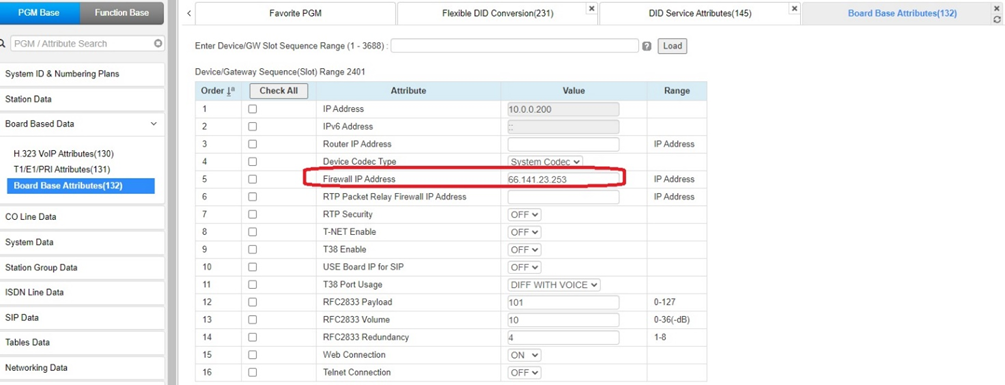
3.) If the site has a firewall that is being used, then please follow the below instructions in Pgm 132.
Enter the device slot sequence and click load (you will find the sequence ref in PGM 103) – Then go to Pgm 132 and enter the Firewall IP Address.
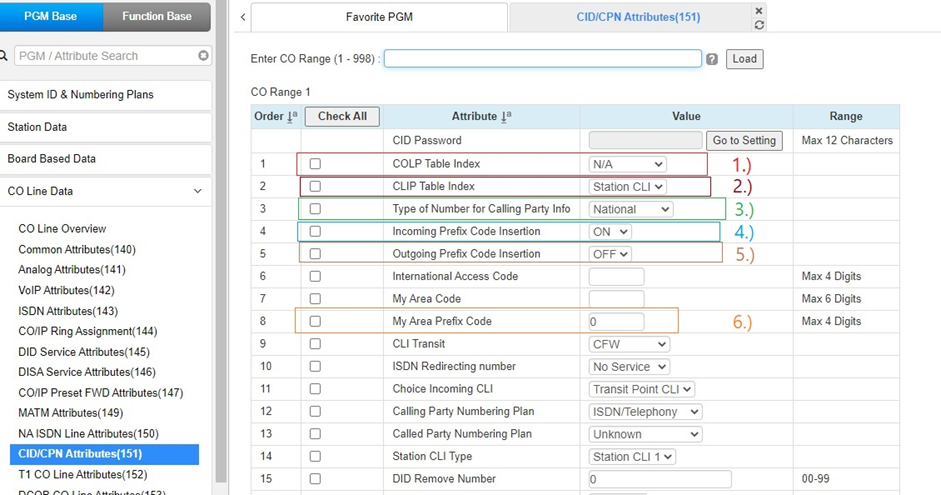
4.) In Pgm 151 enter your VoiceFlex SIP CO range and press Load.
You will need to Set:
- CLOP Table Index – N/A
- CLIP Table Index – STATION CLI
- Type of Number for Calling Party Info – NATIONAL
- Incoming Prefix Code Insertion – ON
- Outgoing Prefix Code Insertion – OFF
- My Area Prefix Code – 0
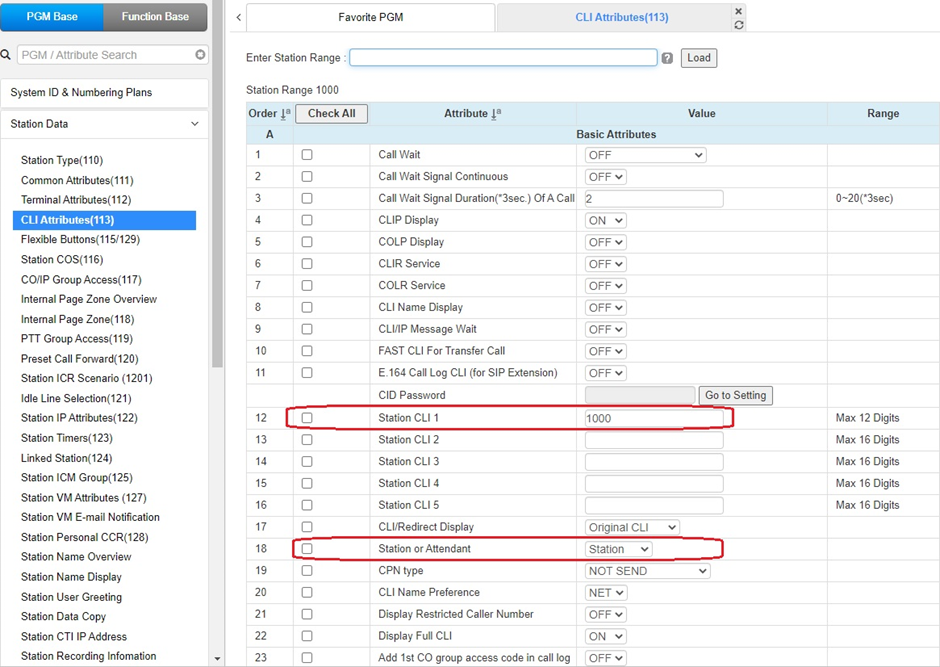
PGM 113
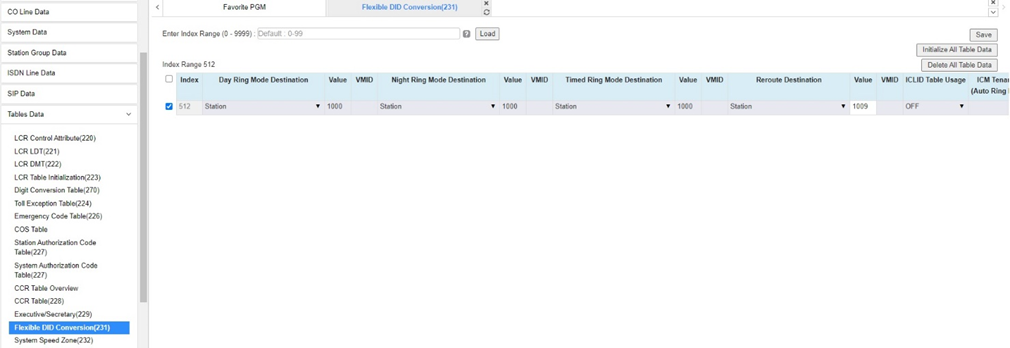
5.) In Pgm 231 Flexible DDI routing – Programme your DDI routing as normal example below:
6.) In Pgm 113 you enter your Station range and press Load.
Set:
Station or Attendant to – STATION or ATD (depending on what CLI you wish to send)
Station CLI 1 to – CLI NUMBER (without leading 0)
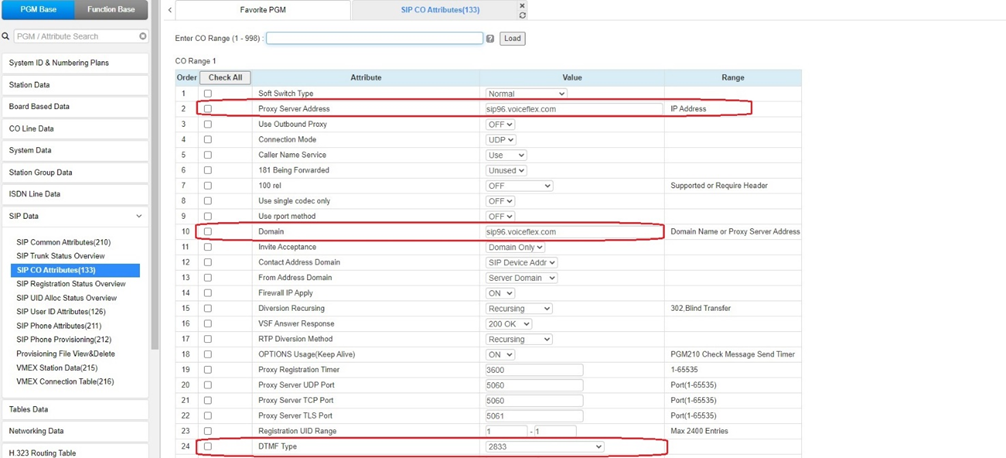
7.) In Pgm 133 this is where you will set your VoiceFlex – SIP provider information.
Enter the VoiceFlex CO Range and press Load
Set:
Proxy server address given to you by VoiceFlex – sip96.voiceflex.com
Domain to: sip96.voiceflex.com (given to you by VoiceFlex)
DTMF Type 2833
Invite Acceptance: DOMAIN ONLY
Pgm 133 – External CODEC Priority as below image:
Codec: 1st Priority = G711-a, 2nd Priority = G729, 3rd Priority = G711-u

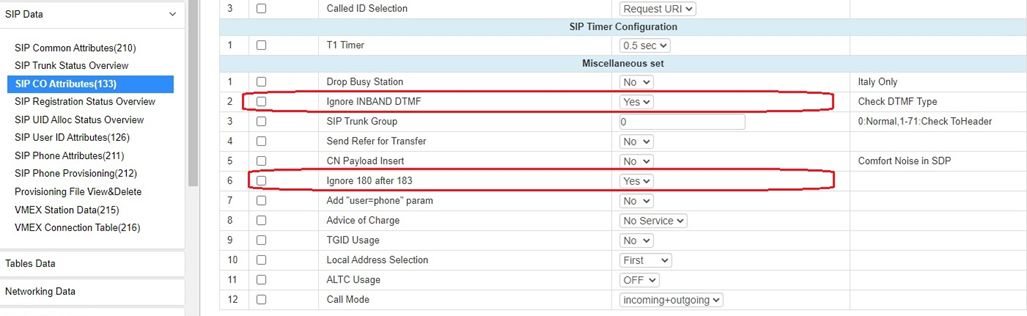
Pgm 133 – Miscellaneous section
Set: Ignore INBAND DTMF to Yes
Set: Ignore 180 after 153 to Yes.
Pgm 133 – ID Usage
Set:
P-Asserted-ID to USE
From ID to: Extension Outgoing-CLI
P-Asserted-ID to: Extension Outgoing-CLI
Remote-Party-ID to: Extension Outgoing-CLI

8.) VoiceFlex – Uses Registration method for your SIP trunks (Name and Password authorisation), you need to complete Pgm 210 programming.

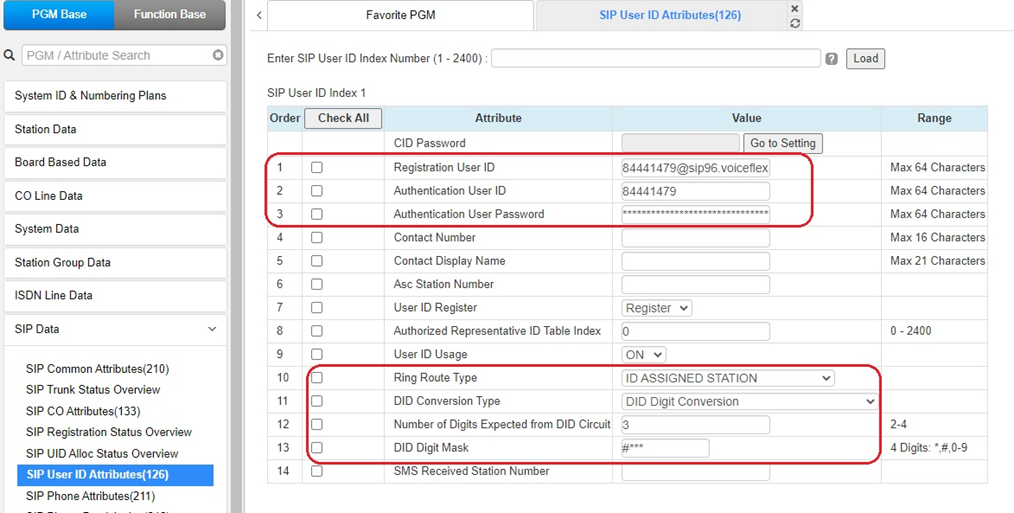
9.) In Pgm 126 you enter SIP User ID index Number and click Load
Example Set:
Registration User ID to: 84441479@sip96.voiceflex.com
Authentication User ID to: 84441479
Authentication User Password to: qLKen9bRWo3ExZC
11.) In Pgm 111 you enter Station Range and press Load.
Inserted from UID into SIP USER TABLE INDEX Pgm 111 found in Pgm 133 as below image at the bottom of the this page:
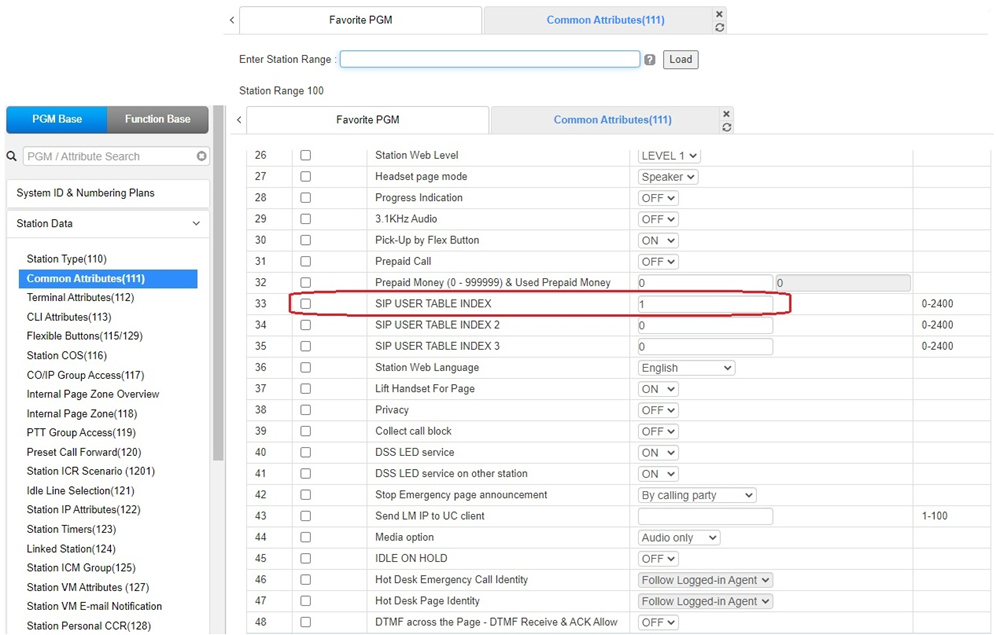
12.) In Pgm 133 Set SIP USER TABLE INDEX to 1

“

Leave A Comment