
1. Version Information
2. Document Purpose & History
This document is intended to provide the reader with the necessary steps on how to add and move MAC addresses between customers.
iPECS Cloud – Adding and moving MAC addresses between customers
Within the cloud portal you are able to add additional devices without needing to place an order for the device – This can be done within the ‘Un-shipped Device Allocate’ menu.
In the Reseller Portal, go to Customers > Modify Existing Customer > click in the customer > Un-shipped Device Allocate.
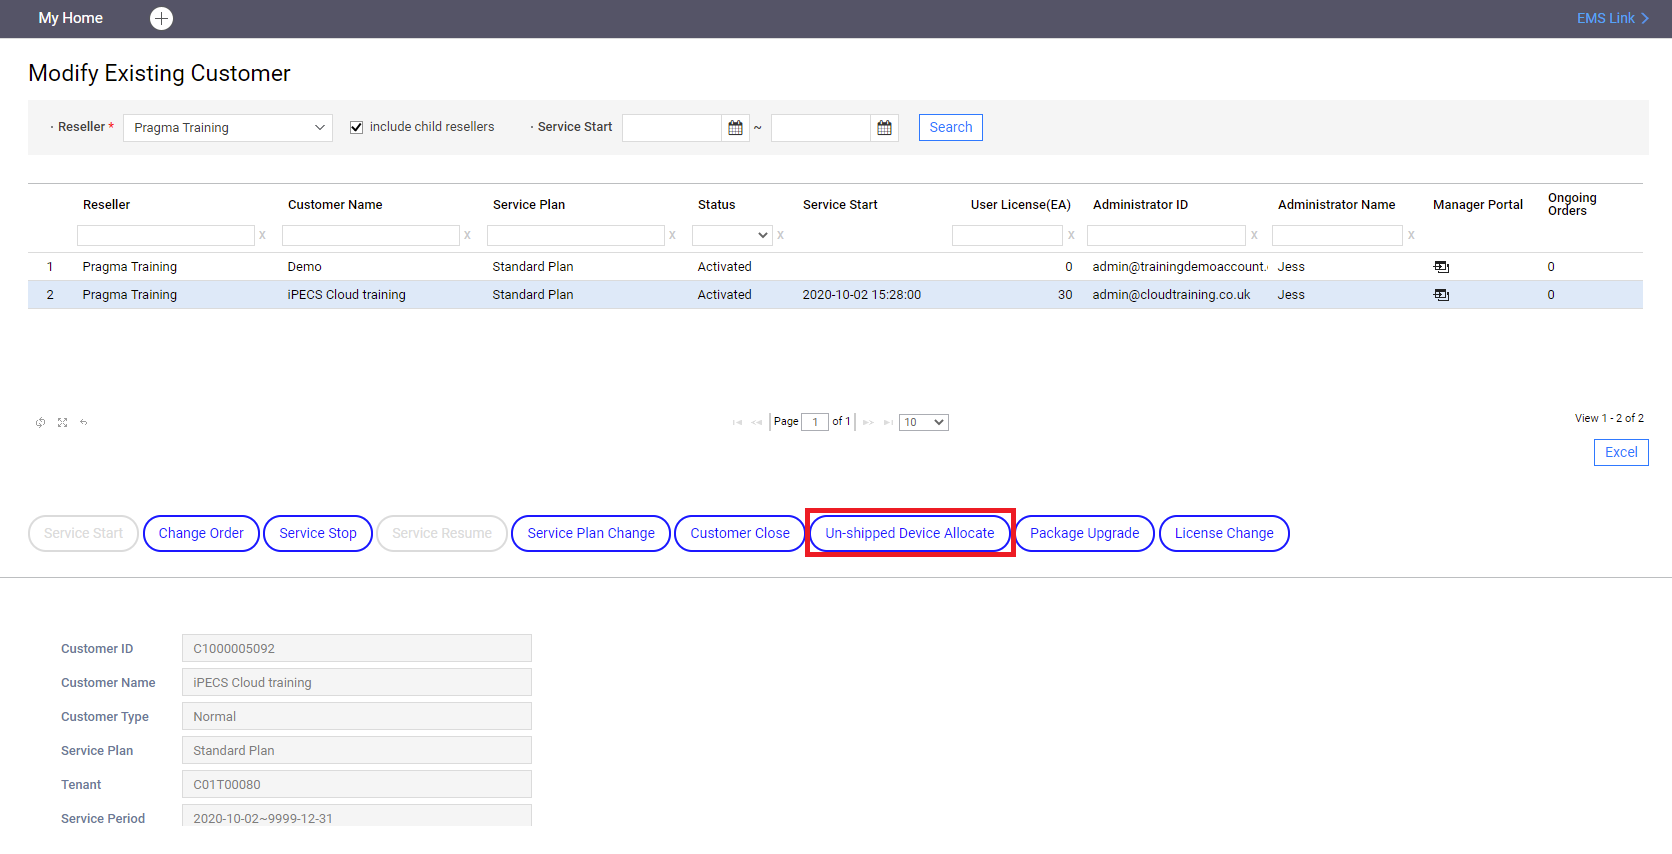
A window will pop.
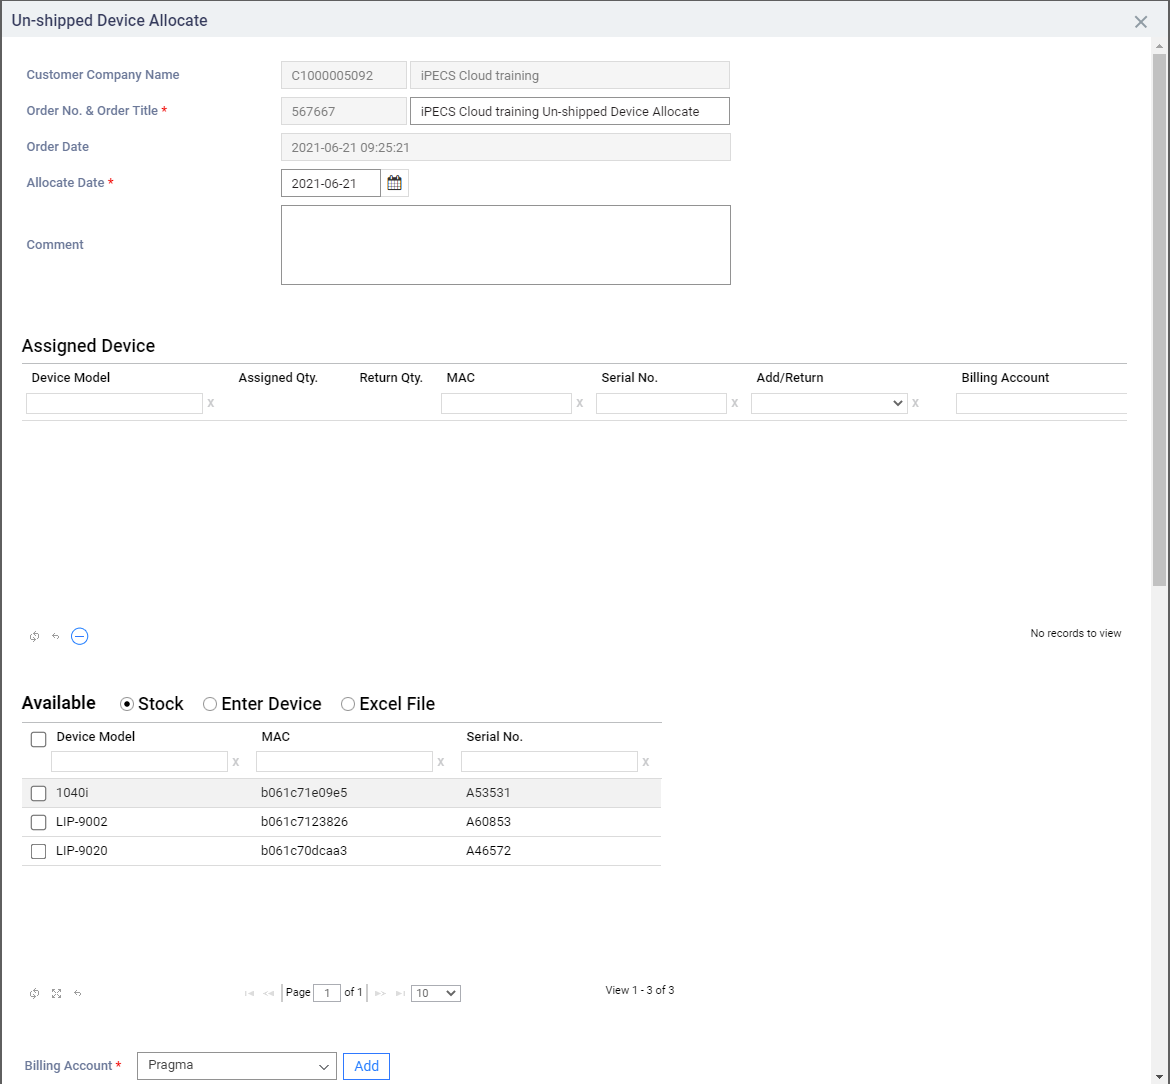
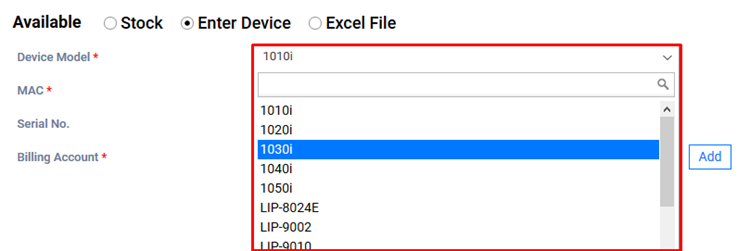
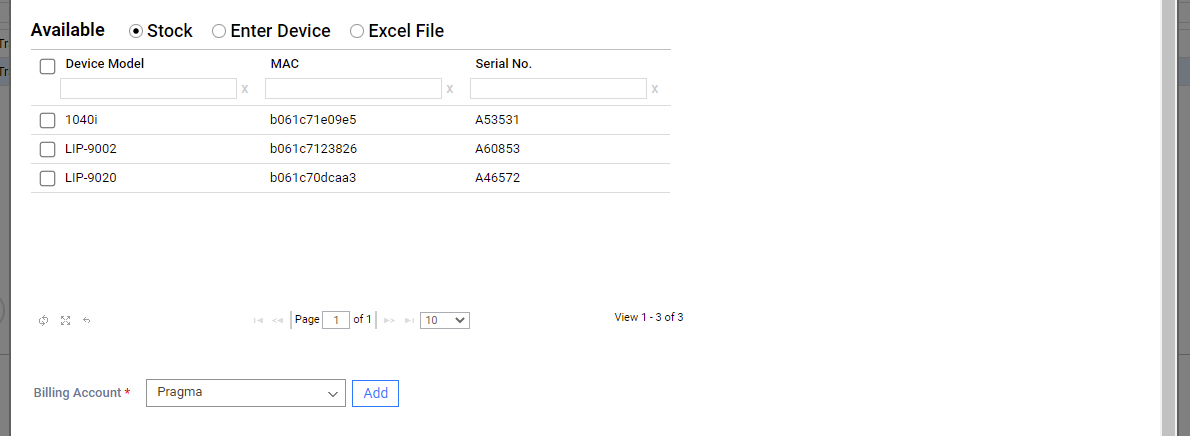
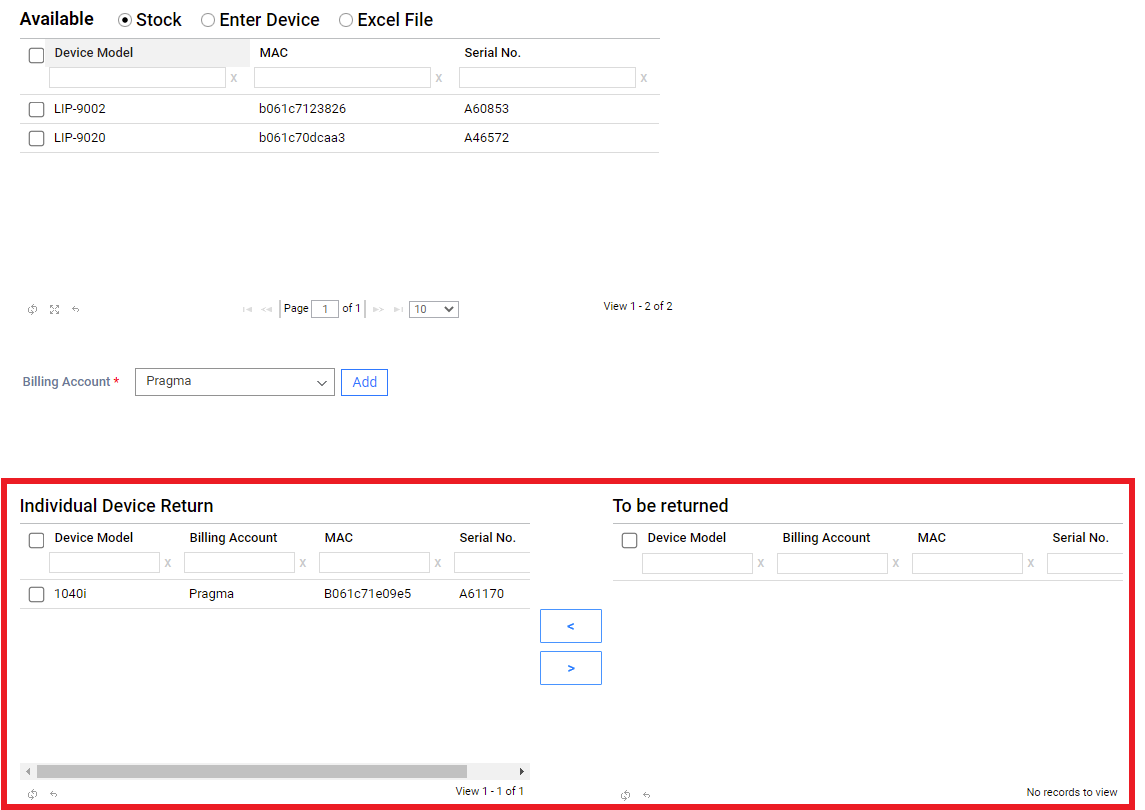
To add an ELG device, navigate to the Available section. Here you will be able to select from either to see the devices under Stock, to enter the MAC address for a new device under Enter Device, or to upload an Excel file with your new MAC addresses in, if you have more than one.
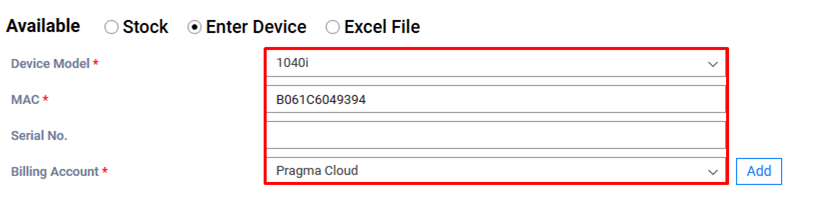
Enter Device gives you the ability to select the Device Model and then enter a Mac address.
You will also need to make sure that the billing account matches the customer that you are looking to add the phone on.
Note: This is just for brand new phones. If you get the message: “duplicate MAC address” it means that your phone/MAC address is already assigned somewhere.
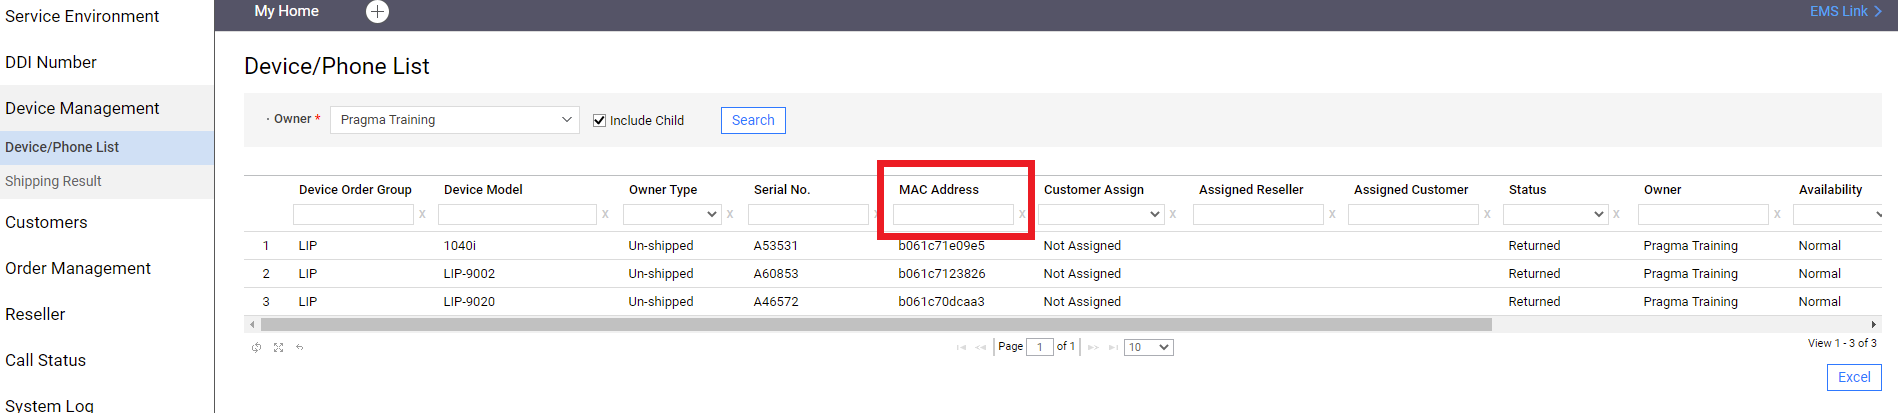
To find where, go to Reseller > Device Management > Device/Phone List.
Enter the MAC address under the MAC address field and press enter. You will see to which customer this MAC address is assigned to.
Back to the Un-shipped Device Allocate.
Under Stock is the list of any devices assigned to your reseller account that have not yet been linked with a customer.
If you want use a phone that the MAC address is showing under Stock, you need to assign it to a customer.
So go to the customer you wish to use this phone: go to Customers > Modify Existing Customer > click in the customer > Un-shipped Device Allocate
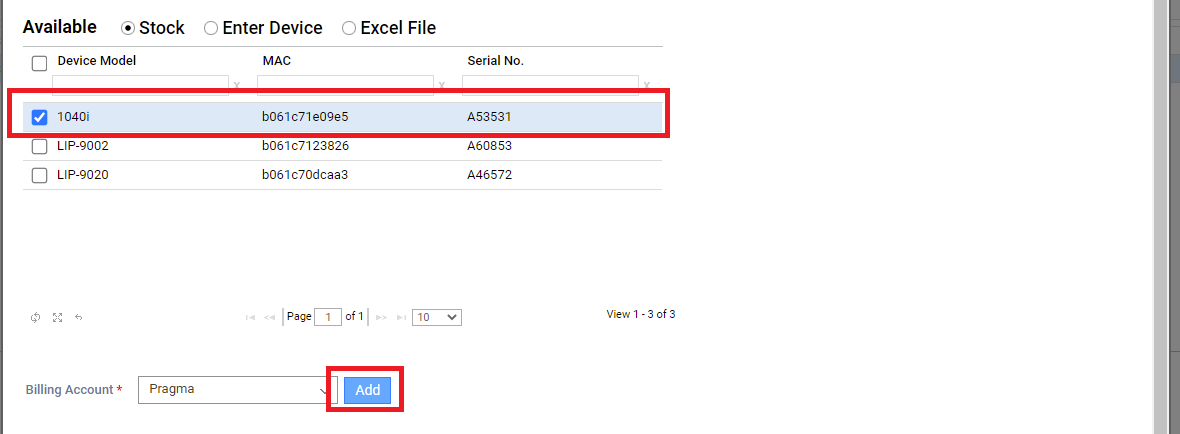
Find the device and select it. Under Billing account you can choose your billing account, then click Add.
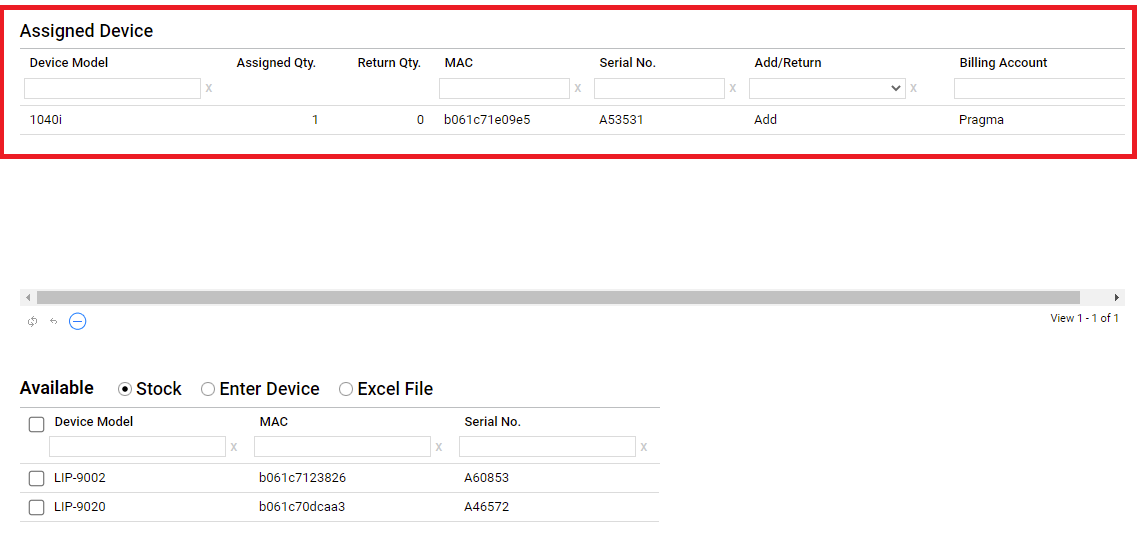
You will see that your device went up, to Assigned Devices. Note: your device is not assigned yet, there is one more step.
Next scroll down to the bottom of the page and click:

This device is now assigned to a customer and you will be able to add it to a user.
If you go back to Un-shipped Device Allocate, you will see that your device is now under Individual Device Return.
Under Individual Device Return are all the devices that are assigned to this particular customer and are free to be added to a user.
Under Individual Device Return will also be all devices that you un-assigned from a user, or the user got deleted in the Customer Manager portal.
If you are looking to use this device on another customer, first make sure you can see it under Individual Device Return. That means they are free to be returned to Stock or used on this particular customer.
To return it to Stock, select the device then click in the right arrow, to move it to: To be returned.
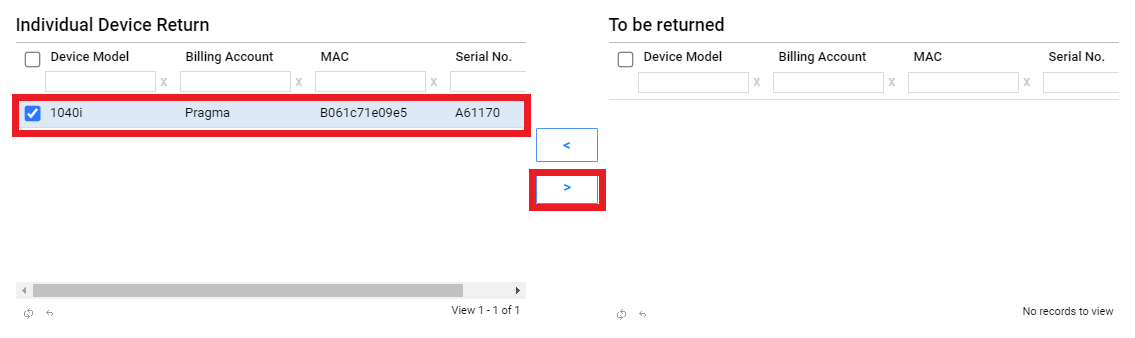
Note: your device is not returned yet, there is one more step.
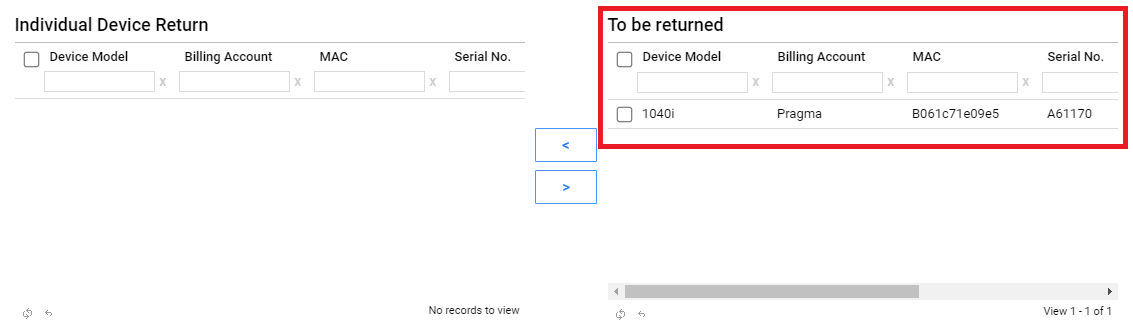
Next scroll down to the bottom of the page and click:
You can now go to another customer, click in Un-shipped Device Allocate and you will see it under the reseller Stock.
You can then added to your new customer, as shown above.
“

Leave A Comment